How to Make a Table Saw Sled at Home, Step by Step
A table saw crosscut sled is a flat plywood platform with two runners that ride in your miter slots and a tall fence set at exactly 90 degrees to the blade. To build one, cut a base and fence from flat plywood, fit the runners to your slots, cut the base partway through, then attach and square the fence with a test cut. A sled about 24 inches deep and 30 inches wide suits most home shops, but size it to your saw table and the parts you cut.
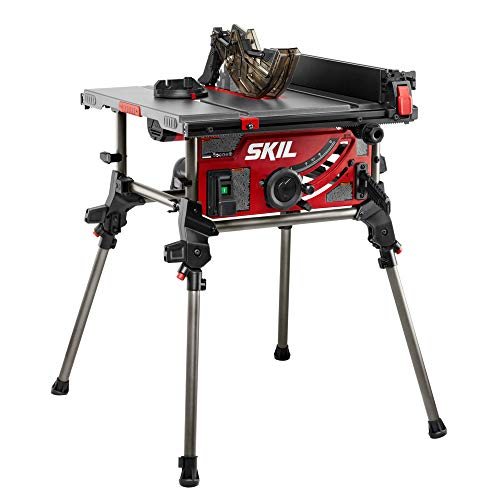 Skil TS6307-00#2 on our Best Score
 EVOLUTION R10TBLXBest overall
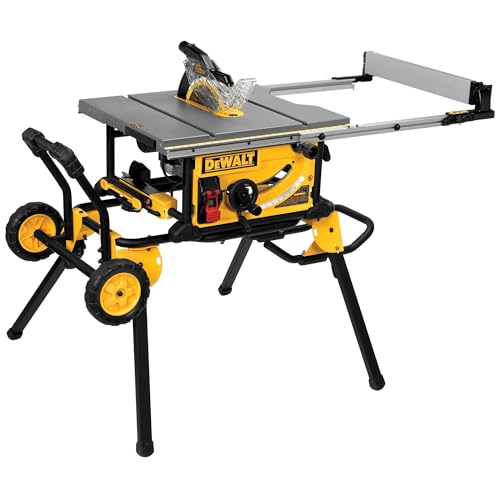 DEWALT DWE7491RSWide rip, telescoping fence
What a crosscut sled does and what you need
A sled carries the workpiece past the blade on a platform, so the wood never rubs against the rip fence. That makes crosscuts more repeatable than pushing a board with the miter gauge. It also gives your hands a safer path, because they stay behind the fence and away from the blade.
The materials are simple, and most of them are common shop leftovers. Pick flat stock, because a warped base ruins every cut that follows.
- One sheet of flat plywood or MDF for the base, about 3/4 inch thick (1/2 inch works for small sleds)
- Two hardwood or plywood strips for runners, sized to fit your miter slots
- A straight, tall fence board, such as a doubled strip of plywood or a hardwood board
- A back fence (also called a rear rail) that holds the sled together after the blade cuts through
- Wood glue, countersunk screws, and shorter screws for the runners
- A square, a tape measure, and a few thin shims or playing cards for spacing
- A scrap block for a blade guard at the back of the sled
How big should a table saw sled be?
There is no single correct size. The best size depends on your saw table and the widest board you plan to cut. The sled should be wide enough to support the work and short enough to store and handle without struggle.
Think about two measurements. The depth is how far the base extends front to back, and it sets the widest board you can cross cut. The width is the side to side length, which controls how stable the sled feels as it travels. A longer fence also helps support long boards, and you can add a stop block for repeat cuts.
Use the table below as a starting point, then adjust to fit your saw.
| Sled type | Typical base size | Best for |
|---|---|---|
| Small sled | About 12 by 18 inches | Small boxes, trim, picture frame parts |
| Medium sled | About 24 by 30 inches | General shop use, shelves, cabinet parts |
| Large sled | About 30 by 36 inches or more | Wide panels, if your saw table can support it |
Step by step: building the sled
Work slowly through the first few steps. Small errors in the runners or the fence show up as angled cuts later.
- Cut the base to size. Use a straight edge or the saw itself so the edges are square. Leave the back edge long enough for a rear rail.
- Fit the runners. Test the runner strips in your miter slots and sand or plane them until they slide smoothly with almost no side play. They should also sit slightly below the table surface so they do not drag on the base.
- Attach the runners. Place the saw table face up, set the runners in the slots, and put a thin shim under each so they sit proud of the table. Lay the base on top with the front edge overhanging the table, apply a little glue to the runners, then press the base down. Screw through the base into each runner using short screws that will not poke through.
- Check the sled slides freely. Flip it over, add two or three screws per runner, and slide it back and forth. It should move with no binding or wobble.
- Make the first cut. Keep the sled at the front of the saw, raise the blade about an inch above the base, and push the sled forward until the blade cuts about two thirds of the way through. Stop and switch the saw off before the blade reaches the back.
- Attach the fence. Clamp the front fence close to the cut line so it sits at 90 degrees to the blade, then glue and screw it in place from the underside. Start with just one screw at the far end so you can adjust it.
- Add the back rail. Fix the rear rail across the back so the sled stays in one piece after the blade has cut through. Place a block here too, so there is a visible barrier where the blade exits.
Squaring the fence
The fence is the part that decides how accurate the sled is. A square held against the blade can mislead you, because the blade has teeth with set. Use a test cut instead.
A well known method is the five cut test. Cut a square piece of scrap on all four sides in turn, rotating it each time, then measure the final thin strip at both ends. If the strip is wider at one end, your fence is off. Nudge the fence by that amount and repeat the test.
Once the cut is clean, add the remaining screws and recheck. Add a stop block clamped to the fence for repeat lengths. A sled stays accurate only while the fence stays tight, so check it now and then.
Safety notes
A sled lowers risk, but a spinning blade is still dangerous. Take a moment to set up the shop before each session.
Wear safety glasses and hearing protection. Keep long hair and loose sleeves tied back. Unplug the saw before you adjust the blade, replace it, or work near it with tools. Never place fingers behind the fence or in line with the blade, and never reach over the blade to grab a cutoff.
Make sure no screw sits where the blade will pass. Hold the work firmly against the fence, and use a clamp for small parts. Wait for the blade to stop fully before lifting the sled off the table. A blade guard block on the back rail adds a visible warning for your hands.
Choosing the saw and blade that suit your sled
The sled works on most table saws that have miter slots, from large cabinet saws to portable models. If you are still picking a saw, see our best table saw comparison. If you work on site or store the saw away between jobs, a best jobsite table saw is worth a look, but check that the table and miter slots are big enough for your sled.
A crosscut sled also puts the blade to work in a different way than ripping. A fine tooth blade tends to leave cleaner end grain, and you can compare options in our best table saw blades guide. For rip cuts in dense wood, a different tooth pattern helps, as covered in best table saw blade for ripping hardwood. Keep the blade sharp and clean, because a dull blade burns the cut and forces you to push harder.
Frequently asked questions
How long should a table saw sled be?
Side to side, 30 inches suits many home saws, and 18 inches works for small parts. Make it long enough to support the work and short enough that it stays stable and easy to store.
What wood should I use for the runners?
Dense hardwood or good plywood works well. The strips should fit the slot with minimal play, stay straight, and not swell or shrink much with the seasons.
Can I use the sled with a dado blade?
Only if your saw, arbor and sled setup allow it, and the base is cut through carefully for a wider blade. Check your saw manual first, and consider building a dedicated sled for it.
Why does my sled cut slightly out of square?
The fence angle is the usual cause, followed by loose runners or a warped base. Repeat the test cuts, snug the runners, and replace any base that is not flat.