How to Use a Table Saw for Beginners: Feed Direction and Technique
Feed the wood into the blade from the front of the saw, moving it toward the back, so the teeth push the board down onto the table. For a rip cut, hold the board flat on the table and snug against the fence, and push it through with steady pressure. On a standard table saw, put the good face up, because the blade exits the top surface and that is where tear-out shows.
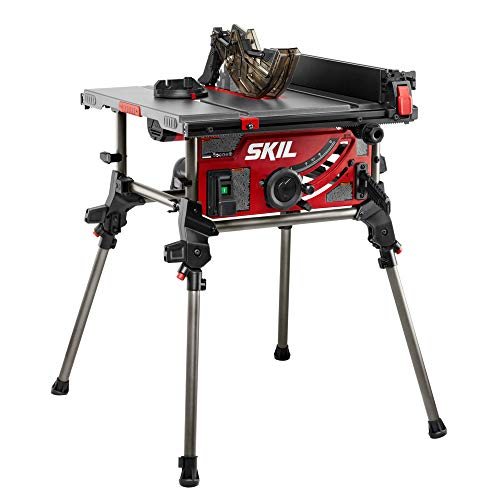 Skil TS6307-00#2 on our Best Score
 EVOLUTION R10TBLXBest overall
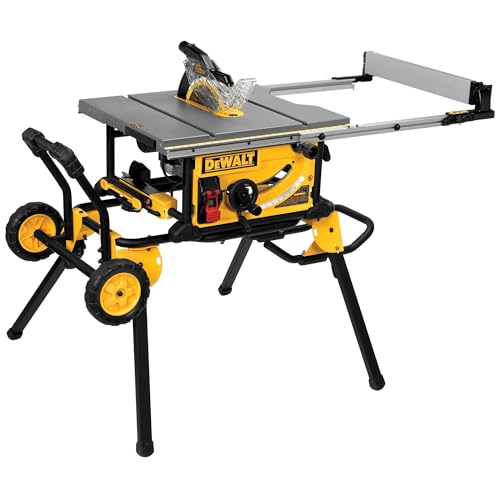 DEWALT DWE7491RSWide rip, telescoping fence
The short version of correct table saw technique
A table saw is safe when you control three things: where the wood is, where your hands are, and where you are standing. Almost every beginner accident comes from losing control of one of them.
The basic sequence is simple. Set the blade height, lock the fence, check that the guard or riving knife is in place, start the saw, let it reach full speed, and feed the board through in one smooth motion. Everything else in this guide is detail on those steps.
Which direction do you feed wood into a table saw?
You always feed from the front of the saw (the side where you stand) toward the back. The blade spins so that the teeth at the front of the cut move downward. That means the blade presses the board against the table as it cuts, which keeps the board stable.
This is called feeding against the blade rotation. If you fed from the back, the teeth would grab the board and pull it through on their own, and you would lose control. Never do that.
Kickback is the real danger here. The teeth at the back of the blade are moving upward, and they can catch a board and throw it toward you. Kickback usually happens when the wood twists, pinches the blade, or drifts away from the fence. That is why the next few habits matter so much.
Good side up or down?
On a standard table saw, the blade rises up through the table and the teeth exit through the top face of the board. The top face is where chipping and tear-out show up, so put your good face up.
Circular saws and track saws work the opposite way. Their teeth exit the bottom, so the good face goes down. If you move between tools, this is an easy rule to mix up.
A fine-tooth blade with more teeth leaves a cleaner edge, and a zero-clearance insert reduces tear-out on the underside. If cut quality is your main worry, our best table saw blades comparison shows how tooth count and blade type differ.
Step by step: making a basic rip cut
A rip cut runs along the grain, with the fence guiding the board. Here is the routine to follow every time.
- Unplug the saw or confirm it is off. Check that the riving knife or splitter is installed and aligned with the blade.
- Raise the blade so the top of the teeth sits just above the thickness of the board. A little over a quarter inch of blade above the wood is a common starting point.
- Set the fence to the width you want and lock it. Measure from the fence to the nearest tooth that leans toward the fence.
- Put on safety glasses and hearing protection. Add a dust mask for fine dust.
- Stand slightly to the left of the blade line, not directly behind the board. If kickback happens, the board travels straight back along that line.
- Start the saw and wait for full speed before the wood touches the blade.
- Keep the board flat on the table and pressed against the fence. Push with smooth, even pressure and do not stop mid-cut.
- Near the end of the cut, use a push stick to finish the pass. Keep pushing until the board is fully past the blade, then switch off the saw and let the blade stop before you reach near it.
Match the cut to the right guide
Beginners often use the wrong guide for the job. The fence is for rip cuts only. For cuts across the grain, a miter gauge or crosscut sled is the right guide.
Never use the fence and the miter gauge together on the same cut. The offcut can get trapped between the blade and the fence and be thrown back at you.
| Cut type | Guide to use | Key habit |
|---|---|---|
| Rip cut (along the grain) | Rip fence | Keep the board tight to the fence and use a push stick at the end |
| Crosscut (across the grain) | Miter gauge or sled | Do not use the fence as a stop next to the blade |
| Narrow rip | Fence with push stick or push block | Keep fingers well clear of the blade path |
| Wide sheet goods | Fence with outfeed support | Get a helper or a roller stand so the board does not tip |
Safety habits that prevent most injuries
Treat the blade as always live. Unplug the saw before changing blades or making adjustments near it. Wear eye protection every time, and hearing protection, because a table saw is loud enough to damage hearing over repeated sessions.
Avoid loose sleeves, gloves and dangling jewelry that can catch. Tie back long hair. Never reach over the blade to pull a board back, and never cut freehand without a fence or gauge.
If the blade stalls or the board binds, switch the saw off and wait for the blade to stop. Do not try to pull the board out while the blade is spinning.
Support long boards. Without outfeed support, a board can tip off the table at the end of the cut and twist into the blade. Make sure the table is clean, because sawdust under the board can change how it sits.
Choosing the right saw and blade for the work
Your technique matters more than the saw, but the saw should fit your space and the work you plan to do. A larger stationary saw offers more table area and support. A portable one is easier to move and store. Our best table saw comparison covers the main types, and the best jobsite table saw page is a good place to start if you need something you can carry.
The blade matters too. A general-purpose blade handles most cuts, but ripping dense hardwood is easier with a blade designed for it, because it clears chips well and puts less strain on the motor. See our best table saw blade for ripping hardwood page if that is your plan.
If most of your work is crosscutting boards to length, a miter saw may be easier and safer for a first project. Our best miter saw for beginners comparison explains the options.
Frequently asked questions
Should I stand directly behind the board?
No. Stand slightly to one side of the blade line. If the board kicks back, it travels straight back along the blade line, so your body should be out of that path.
How high should the blade be set?
Set it so the teeth rise just above the top of the board. A little over a quarter inch above the wood is a common starting point. Raising it much higher exposes more blade and increases risk.
Do I need a riving knife?
Yes, use one whenever the cut allows it. It sits behind the blade and keeps the kerf from closing and pinching the blade, which is a leading cause of kickback.
When should I use a push stick?
Use one any time your hand would end up close to the blade, and always for narrow rips and for the last part of a cut. Keep a few within reach before you start.
Can I stop in the middle of a cut?
Try not to. Stopping can burn the wood or let the board shift. If you must stop, switch off the saw, wait for the blade to stop, and then back the board out carefully.