How to Change a Die Grinder Bit Safely
Disconnect the power first (unplug an electric grinder or disconnect the air line), then hold the spindle with its lock or a wrench and loosen the collet nut. Seat the new bit's shank well into the collet, tighten firmly, and spin it by hand to check that it runs true. Never change a bit while the tool is connected or the old bit is still spinning down.
 BLENCEE Burr14-10Best overall
 Sworker 5TC635Best long-reach set
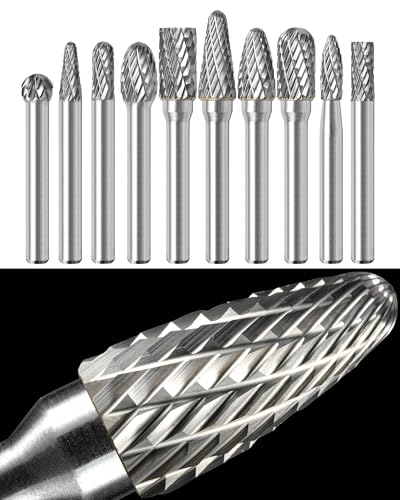 Sworker CBS-5Best mixed head sizes
Start with power and protection
Most injuries during a bit change happen because the grinder starts when it should not. An electric grinder can be bumped on by a trigger or lock-on switch, and an air grinder can fire the moment someone touches the throttle with air still connected.
So the first step is always the same: unplug the cord or disconnect the air hose at the tool. Then wait until the spindle has fully stopped. A bit that is still coasting can cut skin, and a freshly used burr can be hot enough to burn.
- Unplug the electric grinder, or disconnect the air line and set the tool down with the throttle clear.
- Let the spindle stop completely and let the old bit cool.
- Wear cut-resistant or sturdy work gloves when handling used burrs, because the teeth stay sharp.
- Wear safety glasses with side protection once you start testing the new bit, and add hearing protection for the test run.
- Clamp or rest the grinder on a stable surface so it cannot roll while you work.
Remove the old bit
Most die grinders use a collet and a collet nut. The collet is the split sleeve that squeezes the shank when the nut is tightened. To open it, you need to keep the spindle from turning while you turn the nut.
Many grinders have a spindle lock button or a flat on the spindle for a wrench. If yours has a lock, press and hold it, then turn the collet nut counterclockwise with the wrench that came with the tool. If it has two flats, use two wrenches: one on the spindle, one on the nut. Check your owner's manual, because the wrench size and method vary by model.
Once the nut breaks loose, unscrew it a few turns and the bit should slide out. Some collets grip a little after loosening, so a gentle tug with a gloved hand is usually enough. Do not pry with a screwdriver, since that can nick the collet.
Inspect the bit and the collet
Before the new bit goes in, take a minute to look at everything. A damaged part is a common cause of wobble and vibration, and a wobbling carbide burr can chip or shatter.
Look at the old bit's shank for bluing from heat, scoring, or a slight bend. Roll it on a flat surface to see if it rocks. Check the new bit's head for cracks or chipped teeth. If you are reusing a burr, discard it if the shank is bent or the head is damaged.
Then check the collet. Blow out dust and metal fines with a bit of compressed air (with eye protection on) or wipe it with a clean cloth. Packed debris stops the collet from gripping evenly. If the collet is worn, cracked, or marked inside, replace it rather than tightening harder.
Match the shank to the collet
The shank diameter must match the collet size. A bit that is too small will not clamp securely, and forcing a bit that is too large can damage the collet. Our best die grinder bits for metal page notes that most die grinders take 1/4 in shanks, while rotary tools like a Dremel often take 1/8 in.
The sets we compare there all use 1/4 in (6.35 mm) shanks. Several listings also point out that these bits do not fit 6 mm collets, which are close in size but not the same. If your grinder has a 6 mm collet, buy bits made for it instead of trying to make a 1/4 in shank fit.
| Shank or collet | Typical tool | What to know |
|---|---|---|
| 1/4 in (6.35 mm) | Most die grinders | Matches the burr sets on our metal bits page |
| 1/8 in | Rotary tools such as a Dremel | Too small for a standard die grinder collet |
| 6 mm | Some grinders and rotary tools | Close to 1/4 in but not interchangeable; listed as not compatible with 1/4 in burr sets |
Install the new bit
Slide the shank into the collet until it is well seated, but do not push it all the way until the head touches the collet nut. Leaving a small gap keeps the head from rubbing the nut and gives the collet room to grip. Many manuals suggest inserting most of the shank length, so follow the guidance for your tool.
Keep the burr's exposed length as short as the job allows. A long stick-out bends more easily and vibrates more. This matters even more with long-reach burrs, such as the 158 mm overall burrs in the Sworker 5-piece set, which are made for porting and hard-to-reach spots.
Follow these steps to finish:
- Insert the shank straight into the collet, with no side pressure.
- Hand-tighten the collet nut until it stops.
- Lock the spindle and snug the nut with the wrench. Firm is enough; do not use a cheater bar or extra leverage.
- Spin the bit by hand and check that it turns smoothly with no visible wobble.
- Reconnect power only after the wrench is out of your hand and off the tool.
Test run and use the bit correctly
Point the grinder away from your body and anyone nearby, and keep your hands clear of the head. Reconnect power and run it briefly in open space. Listen for rattling and feel for vibration. If anything seems off, disconnect power and re-seat the bit.
Check the bit's speed rating against your grinder. One kit on our page, the 14-piece BOOLY set, is listed with a maximum of 45,000 rpm. If your bit has a rating, never run it faster than that. For air grinders, a regulator at the tool helps hold speed within the limit; see our best air die grinder comparison for options.
Some long burrs carry a specific warning from the maker. The Sworker long set says the burr should stay in contact with the workpiece while the tool is starting, running, and stopping, or the shank can bend and raise the risk of injury. Follow that guidance with any long carbide burr, and clamp your workpiece so it cannot spin or slip.
Common mistakes to avoid
A few habits cause most of the trouble with bit changes. Avoiding them keeps both you and the tool in better shape.
If you are shopping for a grinder with an easy-to-use spindle lock and a comfortable collet system, our best die grinder page lines up the options side by side.
- Changing a bit with the tool still connected to power or air.
- Tightening the collet nut with no bit installed, which can damage the collet.
- Using a bit with a bent shank or a chipped head.
- Bottoming the shank so the head touches the nut.
- Skipping eye and hearing protection for the test run.
- Forcing a mismatched shank into the collet.
Frequently asked questions
How tight should the collet nut be?
Snug and firm with the supplied wrench. The bit should not slip when you try to turn it by hand, but there is no need for extra leverage, which can damage the collet and nut.
Do I need to remove the air hose to change a bit on an air die grinder?
Yes. Disconnect the air line at the tool so it cannot start by accident, and then change the bit with the spindle lock or wrenches.
Can I use a bit with a bent shank if it still seems to spin okay?
No. A bent shank can cause vibration, chatter, and breakage at speed. Replace it.
How often should I check or replace the collet?
Check it every time you change a bit. Replace it if it is worn, cracked, or no longer grips the shank firmly, since a loose bit is a safety risk.