Why Does My Miter Saw Cut Crooked or Uneven?
Most crooked or uneven miter saw cuts come from a dull or bent blade, a fence or miter angle that is out of square, or loose parts in the arm and rails. Technique matters too, since pushing too fast or letting the board shift will wander any cut. Check the blade first, then square the saw, then look at how you hold and feed the wood.
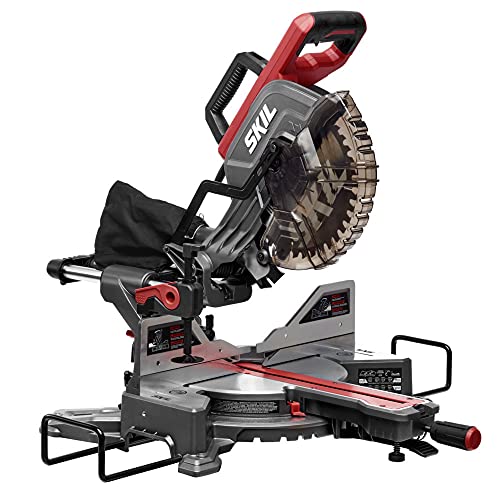 Skil MS6305-00Best overall
 DEWALT DEWALTWidest crosscut in the lineup
 DEWALT DWS780-QSDust collection with dual bevel
Start with the blade
The blade is the most common culprit and the easiest to check. A dull blade tends to burn the wood, grab, and wander, which leaves a rough or slanted edge. A blade that is bent or has caked-on pitch can wobble as it spins, and that wobble shows up as a wavy or uneven cut face.
Unplug the saw before you touch the blade. Wear gloves when you handle it, because the teeth are sharp even when they are dull. Look for missing or chipped teeth, resin buildup, and any visible warp when you hold a straightedge against the plate. If the blade is bent, replace it. Cleaning pitch off with a blade cleaner can restore a sticky blade, but it will not fix a warp.
Also confirm the blade is mounted correctly. It should be seated on the arbor, face the right direction, and be tightened firmly with the arbor nut as your manual describes.
Check that the saw is square
If the cut is straight but not square to the board, the saw is probably out of adjustment. Over time, vibration and transport can knock the fence, miter scale and bevel setting out of true. The saw may read 0 degrees on its scale while actually cutting a hair off.
Test it with a reliable square. With the saw unplugged, lower the blade and hold the square between the blade plate and the fence. Then check the blade against the table for bevel. Make a test cut on a piece of scrap with a straight factory edge, flip one half over, and push the cut ends together. Any gap shows you the error doubled, which makes small problems easy to see.
- Square the blade to the fence at the 0 degree miter setting.
- Square the blade to the table at the 0 degree bevel setting.
- Adjust the pointer and scale so they read true after you correct the saw.
- Re-check the detents, since a worn detent can let the table settle slightly off the mark.
- Follow your owner's manual for the exact adjustment screws, because each saw is different.
Look for looseness in the arm, pivot and rails
Play in moving parts is a classic reason for cuts that drift or leave a rippled surface. On a sliding saw, the bearings in the rails can loosen, so the head shifts sideways as you pull it through the wood. The pivot bolts on the arm and the miter table lock can loosen as well.
With the saw unplugged and the head locked down, grab the head and try to rock it side to side. Any movement that feels sloppy points to an adjustment. Your manual will show how to tighten the rail bearings or pivot, and the steps differ by model.
Make sure the miter lock and bevel lock handles are fully tightened before every cut. A table that creeps even slightly during the cut will change your angle.
Fix your technique and setup
Even a well-tuned saw can cut badly if the stock moves or the head is forced. Press the board firmly against the fence and keep it flat on the table. A board that is bowed or twisted will rock, so support it so it cannot tip. Long boards need support at the same height as the table, such as a roller stand or a block, so the free end does not pull the wood out of position.
Let the blade reach full speed before it touches the wood. Then lower the head in a smooth, steady motion and let the blade do the work. Forcing it deflects the blade and leaves a slanted or burned edge. After the cut, keep the head down until the blade stops.
Keep your hands well clear of the blade path, clamp the work when you can, and wear eye and hearing protection. Sawdust buildup on the table or fence can also hold a board slightly off square, so wipe it clear before each session.
Quick troubleshooting table
Use this table to match what you see on the cut with the most likely cause.
| What you see | Likely cause | What to do |
|---|---|---|
| Wavy or rippled cut face | Bent blade or loose rail bearings | Replace the blade or tighten the bearings |
| Burn marks and rough edge | Dull or dirty blade, feed too slow | Clean or replace the blade, feed steadily |
| Cut is not square to the face | Fence or bevel out of adjustment | Square the saw and reset the scale |
| Angles do not match the scale | Miter pointer or detent off | Recalibrate and check detents |
| Gap in a mitered corner | Small angle error added twice | Test on scrap and fine tune |
| Board shifts during the cut | Poor support or loose hold | Press to fence, clamp and support the stock |
When the saw itself is the limit
If you have tuned the saw and the cuts are still off, the saw may be worn or lower in build quality than your projects need. Fences that flex, thin tables, and loose pivots are harder to hold true than a sturdier design. Stepping up can make sense if you do a lot of precise trim or furniture work.
Our best miter saw page compares published specifications across the field. If you are new to the tool and want something easier to set up and keep true, see our best miter saw for beginners guide. For fine joinery, take a look at the best miter saw for woodworking comparison, and if you cut wide boards, the best 12 sliding compound miter saw page covers sliding models.
Frequently asked questions
Can a dull blade really make a cut crooked?
Yes. A dull blade needs more force to push through the wood, so it can deflect and leave a slanted or burned edge. Replacing or cleaning the blade is a fast first fix.
How often should I check my miter saw for square?
Check it when you first set it up, after you move or transport it, and before any project that needs tight joints. A quick scrap test takes only a few minutes.
Does dust buildup affect accuracy?
It can. Chips packed against the fence or on the table can hold a board off square. Brushing or vacuuming the work area before cutting helps, and our best miter saw for dust collection page covers models built to cut down on the mess.
Should I unplug the saw to adjust it?
Always. Unplug the saw before you change the blade, check square, or tighten any part, so it cannot start by accident.