How to Use a Moisture Meter on Wood, Walls, and Soil
Set the meter to the right material, confirm it reads correctly, then take several readings and compare any damp-looking spot with a dry area of the same material. Pin meters suit wood and framing, pinless meters suit finished walls and tile, and soil needs a dedicated soil probe because building-material meters are not designed for it.
 General Tools MMD950Best overall
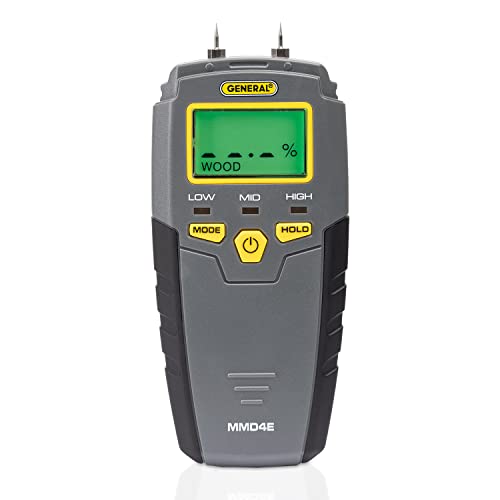 General Tools MMD4ELightest in the lineup
 Tramex CMEX5Concrete slab and mapping
Start with the right meter and a quick check
A moisture meter only tells you something useful if the sensing method matches the job. Pin meters push two metal probes into the material and read it directly. Pinless meters rest flat on the surface and scan through it, so they leave no marks. If you are still deciding which type to buy, our best moisture meter comparison lays the main options side by side.
Before every session, do three small things:
- Install a fresh battery. Weak batteries can make readings drift.
- Run the calibration check if your meter has one. The General Tools MMD4E, for example, includes a protective cap that doubles as a calibration checker.
- Pick the material setting or scale that fits what you are measuring, such as wood or building material.
How to use a moisture meter on wood
Wood is where pin meters shine, because the probes read the board itself. Press the pins into the surface so they sit across the grain or along it, and keep the same direction every time so your readings can be compared. Many makers suggest reading along the grain for the most consistent results, so check your manual.
Wood readings are given as a percentage, and the scale varies by meter. The MMD950 lists a wood range up to 99.9%, the MMD4E covers 5 to 50%, and the Tramex pinless models read wood from 5 to 30%. Species and density change the result, which is why some meters include adjustment tables for wood type.
For a clear picture, follow these steps:
- Take a reading in the middle of the board, away from the ends, where wood dries faster.
- Take two or three more readings along its length.
- Check a board you know has been stored indoors and use it as your dry baseline.
- Record the numbers so you can see whether a wet area is drying or getting worse.
How to use a moisture meter on a wall
For painted drywall, plaster, and tile, a pinless meter is the gentler choice. Hold the sensor flat against the wall, press lightly, and slide it slowly. The scan depth tells you how far below the surface the meter can see. The MMD950 lists 4 in, while the Tramex CME5 and ME5 list 1.25 in, with shallow and deep settings of 0.4 in and 1.25 in so you can compare surface and core moisture.
Start with a dry section of wall, well away from windows, bathrooms, and pipes, and note that number. Then work toward the suspect area in a grid, such as every few inches across and down. A reading that climbs steadily as you approach a stain usually points to the source.
Pin meters also work on drywall if you do not mind two tiny holes. On a pin meter such as the MMD4E, the building-material range is 1.5 to 33%. Readings on walls are often best treated as relative: you are looking for areas that are clearly higher than the dry reference, not chasing an exact figure.
Pin or pinless: which to use where
The table below summarizes how the two methods fit common jobs, based on how each sensor works and the published specs on our comparison page.
| Material | Better method | What to watch |
|---|---|---|
| Lumber and framing | Pin | Hold the pins in the same grain direction each time |
| Finished wood floors | Pinless | Avoids holes in the surface |
| Painted drywall | Pinless first, pins to confirm | Compare against a dry section of the same wall |
| Behind tile | Pinless | Scan depth sets how far the meter can see |
| Concrete slab | Pin with RH probe, or dual-depth pinless | Slab testing has its own method and standards |
Using a meter on soil and houseplants
Here is the honest limit: the meters on our page are built for wood and building materials, not for soil. Their scales are tuned to those materials, so a number from soil would be misleading. For plants, use a probe made for soil.
A soil probe is usually a metal rod you push into the pot or bed. It gives a simple dry, moist, or wet reading. Use it like this:
- Push the probe in near the root zone, not right against the stem.
- Take readings at two depths, since the top inch often dries first.
- Wipe the probe clean between pots so soil from one plant does not skew the next reading.
- Pair the number with the plant's needs. A cactus and a fern want very different readings.
Common mistakes that skew readings
Most bad readings come from small habits rather than a faulty meter. Metal under the surface, such as nails, pipes, or foil-backed insulation, can push a reading up. Paint, wallpaper, and coatings can also affect pinless scans. Temperature extremes matter too, so let the meter sit in the room for a few minutes before you start.
Another trap is treating one number as the answer. Take several readings, compare them to a known dry spot, and look at the pattern. If a wall reads high in one place and normal everywhere else, that tells you more than any single figure. Some meters also include a humidity sensor, which adds context about the air in the room, though it does not measure the material itself.
If the numbers matter for a purchase, a repair, or a flooring install, confirm them against the material maker's limits and consider asking a professional. Tramex, for instance, publishes detailed scales for concrete work, and accuracy figures are only listed for the two General Tools meters on our page.
Safety notes
A moisture meter is a low-risk tool, but the places you use it are not always safe. Turn off power at the breaker before pushing pins into walls, ceilings, or anything that might hide wiring or live circuits. Pin tips are sharp, so keep fingers behind them and use the protective cap when you store the meter.
If you find water near outlets, fixtures, or a ceiling that is sagging, stay clear and shut off power to that area before going further. Wear gloves and a dust mask when you open damp walls, since mold may be present. Use a stable ladder when scanning ceilings, and do not lean out to reach a spot.
Finally, if readings stay high after the source of water is fixed, the area may need drying and a closer look before it is closed up again.
Frequently asked questions
How many readings should I take in one spot?
Take at least three, a few inches apart, and compare them with a dry reference. If they vary widely, move the meter and repeat.
Do pin meters damage walls?
They leave two small holes about the width of the pins. Choose a pinless meter for painted or finished surfaces you want to keep unmarked.
Can I use a wood moisture meter on drywall?
Often yes, but treat the number as relative. Look for areas that read higher than a dry section of the same wall, and use a meter with a building-material scale if you can.
How do I know a reading is trustworthy?
Run the calibration check if your meter has one, use a fresh battery, and confirm the same result at several points before acting on it.