How to Use a Hand Plane for Beginners: Setup, Technique and Fixes
To use a hand plane, set the blade so it barely pokes past the sole, plane in the direction the grain rises toward the surface, and push with steady, even pressure along the whole board. Start with a light cut, test it on scrap wood, and adjust in tiny steps until you get long, thin shavings. A sharp blade matters more than any other setting.
 Jorgensen 70700Best overall
 Jorgensen PJ-70710Adjustable mouth block plane
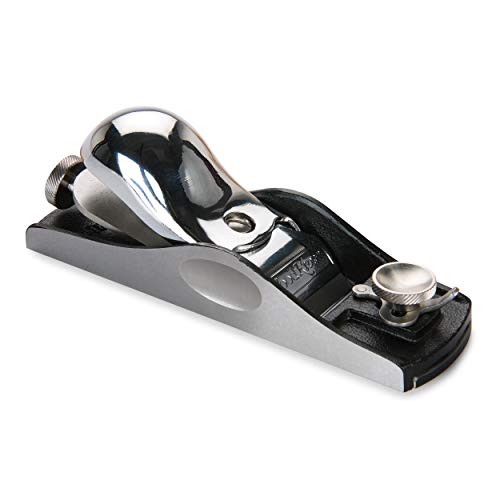 WOODRIVER 151125WWOODRIVER 151125W
Start with the right plane for the job
Hand planes come in a few basic types, and each suits a different task. A block plane is small enough for one hand and handles edges, chamfers and end grain. A bench plane such as a No. 4 is longer and smooths whole boards. A Japanese kanna works the same way in principle but cuts on the pull stroke.
If you are not sure which to buy, our best hand plane comparison lines up length, weight, blade width and adjustment features side by side. The table below shows a few examples from that page so you can see how the types differ.
| Plane | Type | Length | Weight | Good first job |
|---|---|---|---|---|
| Jorgensen No.101 Mini Block Plane | Mini block plane | 3.54 in | 0.55 lb | Small trimming and deburring |
| Jorgensen No.60-1/2 Low Angle Block Plane | Low angle block plane | 6.25 in | 1.48 lb | Edges and end grain, with an adjustable mouth |
| Amazon Basics No. 4 Adjustable Bench Plane | No. 4 bench plane | 9.8 in | 2.66 lb | Smoothing faces and edges of boards |
| KAKURI Japanese Kanna Plane 50mm | Japanese kanna | 9.5 in | 1.46 lb | Pull-stroke smoothing |
Safety and workspace basics
A plane blade is a chisel edge set in a body, so treat it with the same care as any sharp tool. Most injuries come from hands that wander in front of the blade or from a board that slips.
Before you cut, run through these points:
- Clamp the workpiece firmly to a bench or use a bench stop. Never hold it with one hand while you plane with the other.
- Keep both hands behind the cutting edge at all times, and keep your fingers off the sole's mouth.
- Wear safety glasses. Chips can fly, especially when you plane knots or end grain.
- Set the plane on its side when you put it down so the blade does not rest on the bench or point up.
- Work with good light so you can read the grain and see the shavings.
Set up the blade before the first stroke
Most frustration for beginners comes from setup, not technique. Take a few minutes to get the blade right and the rest gets easier.
First, make sure the blade is sharp. A dull blade tears wood and needs more force, which makes the plane harder to control. Sharpen it on a whetstone or other sharpening system if the edge looks nicked or shiny, or if the plane chatters.
Next, retract the blade until it is fully hidden, then bring it out slowly. On planes with a depth knob or geared adjuster, such as the Amazon Basics No. 4 models, you turn the knob a little at a time. On planes with an adjustable mouth, like the Jorgensen low angle block plane, you can also close the mouth for fine shavings or open it for thicker ones.
Look down the sole from the front. You want an even sliver of blade across the full width, not more on one side. Use the lateral adjustment lever, if your plane has one, to level it. Japanese planes have no screws. You set the blade by tapping it with a hammer, which takes more practice, so a western-style plane is usually the easier place to start.
How to plane a board, step by step
Once the plane is set, follow this routine on a piece of scrap first.
- Read the grain. Look at the edge of the board and see which way the grain lines run up to the surface. Plane in the direction that lifts the grain toward you, like petting a cat from head to tail.
- Set a very light cut. If you have to force the plane, back the blade off.
- Place the front of the sole flat on the board, with firm downward pressure on the front knob.
- Push forward in one smooth motion. Shift your pressure to the back handle as the plane moves across the board, so the toe and heel stay flat on the surface at both ends.
- Lift the plane at the end of the stroke and return for the next pass. Do not drag the blade backward over the wood.
- Overlap your passes and check the surface often. Stop when the shavings come off in a continuous ribbon along the full length.
Use your body, not just your arms
Stand with your feet apart and your body in line with the stroke. Let your hips and legs drive the plane instead of pushing with just your arms. This keeps the stroke straight and steady.
If you try a Japanese kanna, the motion reverses. You pull the plane toward you with both hands and let your body weight move backward. It feels odd at first, but the same rules apply: light cut, long strokes, sharp blade.
Planing edges and end grain
For an edge, clamp the board with the edge facing up and keep the plane square to the face. Check your work with a straightedge or a small square. A longer plane, such as a No. 4, helps flatten an edge because the sole bridges small dips. A shorter plane follows the surface and can round things over.
End grain needs special care. Fibers at the far edge can split away as the blade exits. To avoid this, clamp a scrap piece tight against the far edge so the blade has something to cut into, or plane from both edges toward the middle. Take thin shavings. A low angle block plane with an adjustable mouth is a good match for this job because the small mouth opening supports the fibers.
Common problems and quick fixes
When a cut goes wrong, the cause is usually one of a handful of things. Check the list below before you blame the tool.
- Tear-out (rough, lifted patches): You are likely planing against the grain. Turn the board around or change direction, and take a thinner cut.
- Plane skips or leaves no shaving: The blade is set too shallow or is dull. Advance it a little, or sharpen it.
- Plane stalls or digs in: The cut is too deep. Back the blade off, and with an adjustable mouth, open it slightly to let shavings clear.
- Chatter or ridges: The blade may be loose, dull or set too deep. Tighten the lever cap and reduce the depth.
- Uneven track on one side: The blade is not level. Use the lateral adjustment or reset the blade.
Care and storage
After use, retract the blade a little so the edge does not rest against the bench. Wipe the sole and body to keep rust off, especially on cast iron or ductile iron bodies. Store the plane on its side or on a shelf with the blade protected.
As you get more comfortable, compare the features on our hand plane comparison page to decide whether a second plane, such as a smoother for faces after a block plane for edges, would suit your projects.
Frequently asked questions
Can I use a hand plane on plywood?
You can trim plywood edges with a sharp plane, but the glue layers dull the blade faster than solid wood. Take light cuts and plane from the edges toward the middle to avoid chipping the face veneer.
How much wood can I remove with one pass?
Think in thin shavings. A light cut gives you more control and a better surface. If you need to remove a lot, make many light passes rather than one deep one.
Do I need to sharpen a new plane?
It depends on the maker, so check the listing and manual. Some blades arrive sharp, others need honing and flattening before they cut well. If the first shavings tear or the plane skips, sharpen it.
Why does my plane cut well in one direction but tear in the other?
Wood grain does not run straight, so one direction lifts the fibers cleanly while the opposite direction catches them. Switch directions to match the grain, and use a finer cut on tricky areas.