How to Sharpen a Knife on a Wet Stone
To sharpen a knife on a wet stone, soak or splash the stone, set the blade against it at a steady angle (about 15 to 20 degrees for most kitchen knives), and push the edge across the stone in even strokes until a thin burr forms. Then repeat on the other side, move to a finer grit, and finish with light strokes. Keep the stone wet, keep the angle the same, and go slowly.
 WORK SHARP WSGFS221Best overall
 Chef's Choice 0101500Electric 15° edge converter
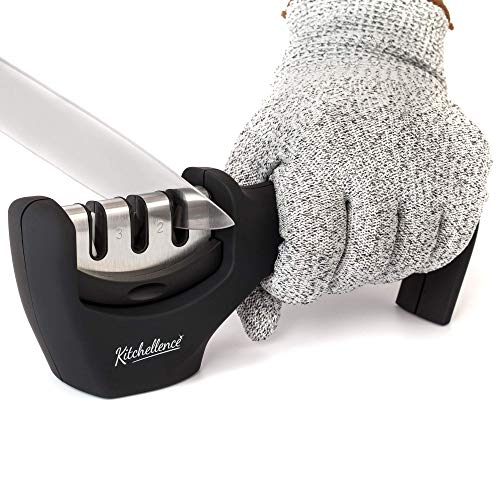 KITCHELLENCE KS37 PSafest for beginners
What you need before you start
A wet stone, also called a whetstone, is a flat block of abrasive. Water keeps the surface clear of metal particles, so the stone keeps cutting instead of clogging. Some stones need a soak before use. Others only need water splashed on top. Check the maker's instructions, because oil stones use oil, not water.
Most people do well with a combination stone that has a coarser side and a finer side. If you only have one stone, a medium grit around 1000 is a common all-purpose choice. A finer stone is useful if you want a polished edge.
- A wet stone, ideally with a coarse side and a fine side
- A stone holder, or a damp towel under the stone so it cannot slide
- A small bowl or spray bottle of water
- A dry towel for wiping the blade
- A cut-resistant glove for your non-sharpening hand
- A sheet of paper or a ripe tomato for testing the edge
Set up the stone and find your angle
Place the stone on a damp towel or in a holder on a flat counter. Position it so the long side runs away from you. A stone that shifts mid-stroke is the most common cause of uneven edges and slipped hands.
The angle is how steeply the blade meets the stone. Thinner angles cut more easily but dull faster. Steeper angles are tougher. Our guide to the best knife sharpener options explains the same trade-off: lower angles such as 15° suit thin kitchen knives, while 25° or 30° suits tougher blades like hunting knives and cleavers.
A simple way to find roughly 15 to 20 degrees is to lay the blade flat on the stone, then raise the spine until the gap under it is about the thickness of two stacked coins. That is a rough guide, not a measurement. What matters is that you hold the same angle on every stroke.
Step-by-step sharpening
Work on the coarser side first if your knife is dull. If the knife is only a little dull, you can start on a medium or fine side. Wet the stone so there is a thin, even layer of water on top.
- Place the heel of the blade on the far end of the stone, edge facing away from you, at your chosen angle.
- Hold the handle with your dominant hand. Rest two or three fingertips of the other hand flat on the blade, away from the edge, to apply light, even pressure.
- Push the blade forward and across the stone as if you were slicing a thin layer off the top, so the whole edge travels from heel to tip.
- Use light pressure. The stone does the cutting, and pressing hard can round the edge.
- Repeat on one side for 10 to 15 strokes, then check for a burr.
- Feel for the burr by running your thumb gently across the edge, from the spine toward the edge, never along it. A thin ridge of metal on the opposite side means you have reached the edge on this side.
- Flip the knife and repeat on the other side until you raise a burr there too.
- Add water whenever the surface looks dry or gray with metal slurry.
Move to a finer grit and finish the edge
Grit numbers describe how coarse the stone is. Lower numbers remove metal faster and repair damage. Higher numbers smooth the edge and leave a finer finish. Our sharpener comparison page says the same thing about grit in general: lower numbers remove metal quickly, higher numbers polish.
Once you have a burr on a coarse or medium stone, switch to the finer side. Use the same angle and fewer, lighter strokes. Alternate sides, and reduce the number of strokes each time, such as 5, then 3, then 1. This helps remove the burr and refines the edge.
| Grit range | What it does | When to use it |
|---|---|---|
| Coarse (under 400) | Removes metal fast and repairs chips | Badly dull or damaged edges |
| Medium (about 800 to 1500) | Sets a sharp, usable edge | Regular sharpening of kitchen knives |
| Fine (3000 and above) | Polishes and refines the edge | Finishing after a medium stone |
Remove the burr and test the edge
After the finest stone, wipe the blade clean and dry. Draw the knife lightly along a leather strop or a piece of cardboard, edge trailing, to knock off any leftover burr.
Test the edge safely. A sharp knife should slice through a sheet of paper held by one corner, or bite into a tomato skin without pressure. If it tears or slides, return to the medium stone and check that you are holding the angle and raising a burr on both sides.
Rinse and dry the knife and stone. Let a soaked stone air dry fully before storing it.
Safety and common mistakes
Sharpening is safer than most people expect, but a wet blade and a wet stone can slip. Keep your fingers behind the edge and out of its path. Wear a cut-resistant glove on your supporting hand, especially while you are learning. Never try to catch a falling knife.
Some of the most common problems come from small habits:
- Changing the angle between strokes, which rounds the edge
- Pressing too hard, which can damage the edge and wear the stone unevenly
- Letting the stone dry out, which makes it clog
- Skipping the burr check, so one side is never fully sharpened
- Using a stone that has a dished or uneven surface
When a guided sharpener makes more sense
A wet stone gives you the most control, but it takes practice to hold a steady angle. If that sounds frustrating, a guided sharpener holds the angle for you. For example, the Work Sharp Precision Adjust Elite on our knife sharpener comparison adjusts from 15° to 30° and lists a 320-grit coarse diamond plate and a 600-grit fine diamond plate.
Pull-through models are quicker still, but they give you less control over the angle. Pick a stone if you enjoy the process and want to learn a skill. Pick a guided or pull-through model if you want consistent results with less technique.
Frequently asked questions
Do I have to soak my whetstone?
Not always. Some water stones need a soak of several minutes until bubbles stop rising. Others only need water on the surface. Follow the maker's instructions.
How often should I sharpen a knife on a stone?
It depends on how much you use the knife. Sharpen when it starts to slip on tomato skin or crush instead of slice. Light honing between sessions can delay the need.
Can I sharpen a serrated knife on a flat stone?
Not well. Serrated blades need a rod or tool that fits each tooth. A flat stone can only touch the flat side, so use a tool made for serrations instead.
How do I flatten a worn whetstone?
Stones wear into a dished shape over time. A flattening plate or a coarse flattening stone lets you rub the surface level again. Flatten the stone whenever it no longer sits flat against a straight edge.