How to Install Finger Pulls on Kitchen Cabinets
Install finger pulls by choosing a consistent position, making a simple template, marking and pre-drilling the pilot holes, then fastening the pull with a hand screwdriver until it sits flush. Most of the work is careful measuring, so take your time on layout and the install itself takes only a few minutes per door. Check your pull's instructions first, because edge-mounted styles differ in how they attach.
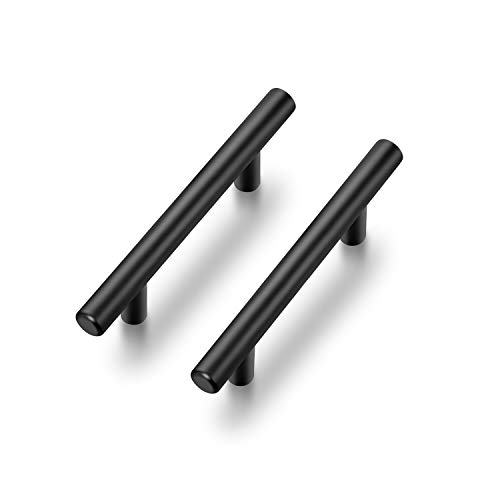 Ravinte Best overall
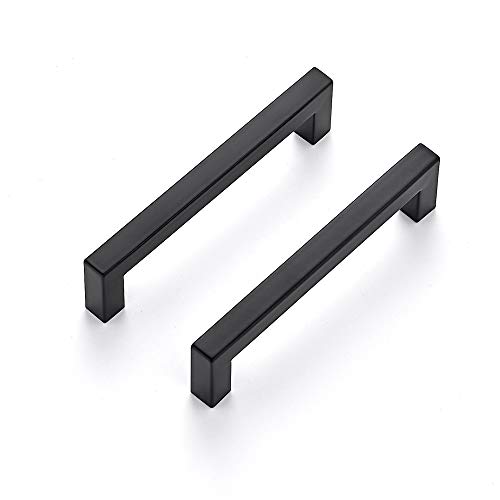 Ravinte JFX5HS30Deepest projection listed
 JOY DECOR JDKXYN1BSSingle-hole white knobs
What finger pulls are and how they differ from bar pulls
Finger pulls, sometimes called edge pulls or tab pulls, are low-profile pieces that mount on the top edge of a drawer front or the bottom or side edge of a door. You hook your fingertips behind the lip to open the cabinet. Many styles screw into the back face of the door or into the edge, and some also use adhesive or a routed channel.
Standard bar pulls work differently. They mount on two holes on the face of the door, which is why the center-to-center number matters so much. On our best cabinet pulls page, the bar pulls use 3 in or 5 in spacing, and a pull with the wrong spacing will not mount without new holes. Finger pulls usually skip that step, because you set the position yourself.
If you are replacing existing bar pulls with finger pulls, plan to fill the old holes. If you are swapping the other way, keep the old holes in mind when you choose a new style.
Tools and materials
You do not need much. Gather everything before you start so you are not hunting for a tool with a door half done.
- Finger pulls with the screws that came in the box
- Tape measure and a pencil
- Painter's tape or a sheet of thin cardboard for a template
- Combination square or small level
- Drill and a bit slightly smaller than the screw shank, plus a depth stop or tape flag
- Hand screwdriver (Phillips or the type your screws need)
- Safety glasses
- Wood filler and a putty knife, if you are covering old holes
- Clean rag and a mild cleaner
Plan placement before you drill
Consistent placement is what makes finger pulls look clean. Decide on one rule and apply it to every door and drawer. For example, you might center each pull on a drawer front, and set door pulls the same distance in from the corner on every door of the same size.
Check the maker's instructions for the exact edge, offset and screw position. If the instructions give no guidance, hold the pull against the door and look at how far your fingers need to reach behind it. Test it with a real grip, not just by eye.
Make a template so you only measure once. Cut a strip of cardboard to the length of the pull, mark the screw holes on it, and mark the corner or center line you will align. Tape it to each door in turn. You then punch or mark through the template instead of re-measuring every time.
Step-by-step installation
Work on one door or drawer first, and check how it looks and feels before repeating the process on the rest.
- Remove the door from its hinges if the pull mounts on the back face or the edge is hard to reach. Lay it flat on a padded surface.
- Clean the area with a mild cleaner and let it dry, especially if the pull has any adhesive.
- Tape the template in place and mark the screw positions with a pencil or an awl.
- Set the drill depth. Wrap tape around the bit so the hole stops well short of the front face of the door.
- Wear safety glasses and drill pilot holes straight and slow. A square held beside the bit helps you keep the angle true.
- Hold the pull in position and start each screw by hand.
- Tighten with a hand screwdriver, not the drill. A hand tool gives you more control and avoids over-tightening, which can crack the door or pull the pull out of line.
- Rehang the door, close it, and check the gap. Adjust if the pull rubs a neighboring door or drawer.
Fixing common problems
Most issues come from small misalignments or screws that are the wrong length. Screw length depends on door thickness, so check that the screw bites in but does not poke through the front. Some bar pull listings include two screw lengths, such as 1 in and 1.57 in in one pack, and it is smart to confirm the length the same way before you commit.
Use this table to troubleshoot.
| Problem | Likely cause | What to do |
|---|---|---|
| Pull does not sit flush | Pilot holes not square, or door edge not flat | Loosen, check the angle, and redrill or shim lightly |
| Screw tip shows on the front | Screw too long for the door | Swap to a shorter screw or add a washer behind the pull |
| Wood splits near the hole | Pilot hole too small or screw over-tightened | Fill and re-drill with a slightly larger pilot, then tighten by hand |
| Pulls look uneven across a run | Placement rule changed between doors | Use the template again and compare from the same reference edge |
| Pull loosens over time | Screw stripped the hole | Add a bit of wood glue or a toothpick in the hole, then reinstall |
Finish and paint considerations
Finish matters because finger pulls sit where your hand touches daily. Kitchens also add moisture, so wipe the area dry after cleaning. On our best hardware for white kitchen cabinets page, you can compare finishes that work against light doors.
If you plan to repaint, do that first. Fully cured paint holds up better against the drill and the screw head than fresh paint, and you avoid getting paint in the screw seats. Our guide to the best paint for kitchen cabinets covers options. Always follow the paint label for cure times before you mount hardware.
Safety notes
Wear safety glasses whenever you drill. Wood chips and metal shavings can fly, and dust from old paint can irritate your eyes and lungs. A dust mask is a good idea if you are sanding or drilling through old finishes.
If you use a corded drill, keep the cord clear of the work area. Use hearing protection if you run a router for a routed channel. Many finger pulls have thin metal edges, so handle them with care and wipe away burrs. If you stand on a stool to reach upper cabinets, make sure it is stable and never overreach.
Frequently asked questions
Do finger pulls need a specific hole spacing?
Usually not. Unlike bar pulls, which use a center-to-center measurement, finger pulls are positioned by you along an edge. Always follow the instructions that came with your model.
Can I install finger pulls without taking the doors off?
Sometimes, if the pull mounts on the front or bottom edge and you can reach it. Back-mounted styles are easier on a door laid flat, so removing it often gives a cleaner result.
What do I do with the old holes from my previous hardware?
Fill them with wood filler, sand smooth, and touch up the paint. Do this before you mount the new pulls so the finish can dry.
Should I use a drill or a screwdriver to drive the screws?
Use a drill for the pilot holes and a hand screwdriver for the screws. A hand tool lowers the risk of over-tightening and cracking the door.