How to Install Cabinet Pulls on Cabinets and Drawers
Measure the center-to-center spacing, mark your hole positions with a template or a careful measured layout, drill pilot holes at the marks, then fasten each pull with screws of the right length. A mounting template or hardware jig keeps every hole in the same spot, which matters most when you have many doors and drawers. If you are replacing old pulls on existing holes, you can skip the drilling and just swap them in.
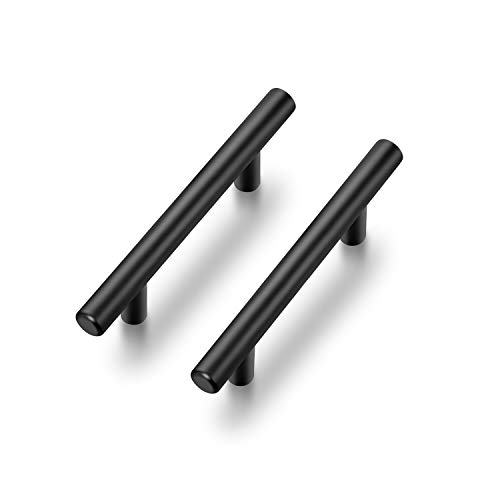 Ravinte Best overall
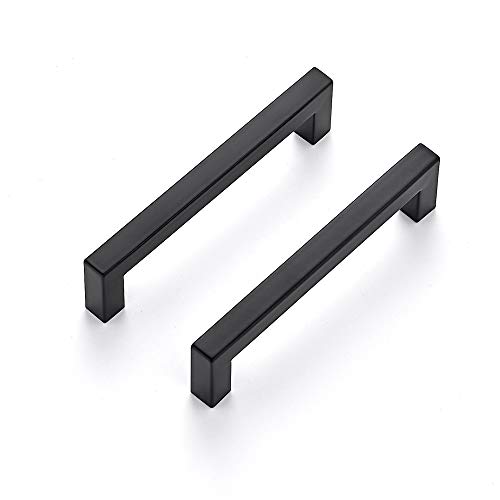 Ravinte JFX5HS30Deepest projection listed
 JOY DECOR JDKXYN1BSSingle-hole white knobs
What you need before you start
Most of this job is layout, not drilling. A few basic tools and a little planning will keep your holes straight and your pulls evenly placed.
Gather these items before you open the first box:
- Tape measure or ruler
- Pencil and painter's tape
- Level or square
- Power drill and a drill bit sized for your screws (a bit slightly larger than the screw shaft for a clean fit through the door)
- Screwdriver for the final tightening
- Cabinet hardware mounting kit or template, if you have one
- Scrap wood to back the door or drawer front while drilling
- Safety glasses
Match the hole spacing and screw length
Pulls mount on two holes, so the center-to-center spacing has to match exactly. Measure from the center of one screw hole to the center of the other, not edge to edge. If you are replacing old hardware, measure the existing holes. If you are drilling new ones, pick a pull first and drill to its spacing. Our best cabinet pulls page lists spacing for each model so you can compare before you buy.
Screw length matters as much as spacing. The screw has to pass through the door or drawer front and thread into the pull with a solid grip, without poking out the front. Many sets include more than one screw length. Check the listing for what comes in the box, and buy separate screws if your door is thicker than the included ones allow.
Here is how the spacing and screw details look for four pulls from our page:
| Pull | Center-to-center | Screws in the set |
|---|---|---|
| Ravinte Matte Black T-Bar | 3 in | Not stated in our data |
| Ravinte Matte Black Square Bar | 5 in | Mounting screws included |
| homdiy Brushed Nickel | 3 in | 1 in and 1.57 in screws |
| Ravinte Champagne Bronze T-Bar | 5 in | 1 in and 1.75 in screws |
Install pulls with a template or mounting kit
A template or cabinet hardware mounting kit is the easiest route. It is a small jig, often adjustable, with guide holes for your spacing and an edge that rests against the door or drawer. You set it once, and it repeats the same position every time.
Follow these steps:
- Choose the position for your first pull and note the distance from the door edge and corner.
- Set the template to your spacing, such as 3 in or 5 in, and lock it in place.
- Hold the template against the door or drawer front, with its edge flush against the corner or edge.
- Mark the hole centers through the guides with a pencil or sharp awl, or drill straight through the guide holes if your kit supports that.
- Place scrap wood behind the panel and drill each hole, keeping the drill square to the surface.
- Insert a screw from the back, thread the pull on by hand, then tighten with a screwdriver until snug.
Install pulls without a template
No template? You can still get clean results with a ruler and some tape. Make one test door first, so you know where you want the pull before you drill anything.
Run a strip of painter's tape across the door where the pull will sit. Measure and mark the two hole centers on the tape, using a level or square to keep the line straight. Because the marks are on tape, a slip will not leave a pencil line on your finish.
For repeat jobs, make your own jig. Mark the hole positions on a piece of cardboard or thin scrap wood, poke small holes through the marks, and use it on every door. Check each piece against the first one before drilling. Take extra care when the spacing is long, such as 5 in, because a small tilt shows more across a longer pull.
Where to place pulls on doors and drawers
Placement is a style choice, but a few common habits make cabinets feel natural to use.
On upper doors, pulls usually go near the bottom corner on the side opposite the hinges, often mounted vertically. On lower doors, they go near the top corner. A common vertical layout puts the closest hole about 2 to 3 inches from the door edge, but adjust to suit your door size and your hand.
On drawers, center a single pull side to side and up and down on the drawer front. For wide drawers, you can use two pulls spaced evenly, each one about a third of the way in from each end. Keep the same placement across a whole run of drawers so they line up.
Think about size too. Projection is how far the pull sits off the door, and overall length decides how much of the front it covers. Among the models on our best cabinet pulls page that list projection, values run from 1 in to 1.4 in. A longer, deeper pull gives your fingers more room, while a slimmer one looks lighter.
Drawers, knobs and tricky cases
A knob uses one hole, so layout is simpler. Just mark the center point and drill once. If you are swapping pulls for knobs, or the other way around, you will need to drill new holes or fill the old ones, since the two types are not interchangeable.
If a hole is too large, use a washer or a slightly larger screw head to cover the gap. If your drilled hole is slightly off, fill it with wood filler, sand it, touch up the finish and redo the layout. For a pull that wobbles, check that both screws are fully seated and that the spacing is exactly right. A pull that fights the screws usually means the holes are a hair off.
Do not over-tighten, especially on hollow pulls or thinner doors, because you can strip the thread or crack the panel.
Safety tips
Wear safety glasses when you drill. Wood chips and metal shavings can fly, and an eye injury is easy to avoid. If you drill many holes in a row, ear protection helps too.
Keep your free hand clear of the bit, and clamp or brace the door or drawer front if it moves. If you use a cordless drill, remove the battery when changing bits. If you must use a stepladder to reach upper cabinets, keep both feet on the steps and avoid overreaching. Before drilling into a wall-side cabinet, make sure you are not close to wiring or pipes behind it.
Frequently asked questions
Do I need a template to install cabinet pulls?
No. A template speeds things up and keeps every hole the same, but a ruler, level and painter's tape will do the job on a small project.
Can I install a pull with a different spacing than my old one?
Not without drilling new holes. The pull's spacing has to match the holes in the door or drawer, so fill the old holes or hide them with the new hardware if you change sizes.
How tight should the screws be?
Snug, but not forced. Stop when the pull sits flat and does not wobble, since too much torque can strip threads or mark the finish.
Should I install pulls before or after painting?
After. Paint the doors and drawer fronts, let them cure, then mount the hardware so you do not get paint on the finish or in the screw threads.