How to Change the Blade on a Sliding Compound Miter Saw
Unplug the saw or remove the battery, lock the arbor, loosen the center bolt with the supplied wrench, swap the blade so the teeth point the right way, and tighten the bolt again. Most saws follow the same steps, including Ryobi models, but bolt direction and guard design vary, so keep your manual nearby.
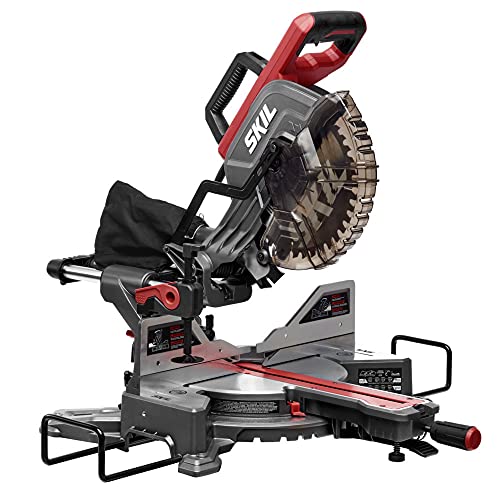 Skil MS6305-00Best overall
 DEWALT DEWALTWide cuts without a cord
 DEWALT DCS361BLightest top-five saw
What you need before you start
Changing a blade takes about ten minutes once you know the layout. The saw usually ships with the tools you need, so look in the storage clip on the base or fence before you reach for a toolbox.
Gather these items first:
- The new blade, matched to your saw's listed blade diameter and arbor hole size
- The wrench or hex key that came with the saw
- A pair of work gloves for handling the blade teeth
- A small brush or vacuum to clear sawdust from the blade area
- Your owner's manual, for model-specific details
Safety first
Cut power before anything else. For a corded saw, pull the plug from the outlet. For a cordless saw, take the battery off the tool and set it well away from the work area. Pressing the trigger is not enough, because a stored charge or a stray touch can still start the motor.
Wear gloves when you handle the old and new blades, since the teeth stay sharp even on a worn blade. Safety glasses are also a good idea, because dust and old pitch can fall out when the guard moves. Work on a stable surface with the saw head locked in the raised position.
Never defeat or remove the blade guard permanently. Only move it as far as needed to reach the bolt.
Step-by-step blade change
The exact parts differ between brands, but the sequence below covers nearly every sliding compound miter saw.
- Unplug the saw or remove the battery.
- Raise the head fully and lock it up. Slide the saw head toward the back of the rails so it sits in a stable position.
- Open the lower guard. Many saws have a small cover plate held by a screw. Loosen that screw and rotate the plate so the arbor bolt is exposed.
- Press the arbor lock button or pin. Rotate the blade gently by hand until the lock engages and the blade stops turning.
- Loosen the center bolt with the wrench while holding the lock. On many saws the bolt is reverse threaded, so you turn it clockwise to loosen. Check your manual to confirm.
- Remove the bolt, the outer washer or flange, and then the old blade. Note the order of each part and which way it faces.
- Wipe sawdust from the flanges and the arbor. A clean surface lets the new blade sit flat.
- Fit the new blade with the teeth pointing down at the front of the blade, in the direction of rotation. Look for the arrow printed on the blade and the matching arrow on the guard.
- Replace the washer and bolt, hold the arbor lock, and tighten the bolt firmly with the wrench. Do not use extensions or a hammer.
- Return the guard cover, release the lock, and rotate the blade by hand to check that it spins freely without rubbing. Reconnect power only when everything is closed up.
Choosing the right replacement blade
The replacement must match the diameter your saw is built for. A larger blade will not fit under the guard, and a smaller one reduces cutting depth. Blade size is part of the saw's name on many listings, so it is easy to check. If you are still choosing a blade type, our best circular saw blade page compares options side by side.
Here is how a few saws from our comparison data line up on blade size:
| Saw | Blade size in listing | Note from the listing |
|---|---|---|
| Skil MS6305-00 | 10 in | Dual bevel sliding saw |
| DEWALT 20V MAX XR | 12 in | Cordless, remove the battery first |
| DEWALT DCS361B | 7-1/4 in | Cordless, tool only |
| WOODSTARTER CJS65 | 8 in | Cordless with 18V battery |
| Hoteche P805217A | 8-1/4 in | 24-tooth blade, two hex wrenches included |
| DOVAMAN DMS01A | 10 in | Includes two 40-tooth and one 48-tooth blades |
Changing the blade on a Ryobi sliding compound miter saw
The process matches the steps above. Ryobi saws generally use an arbor lock, a guard cover and a center bolt, but the details differ by model, so open your manual to the blade change page before you begin.
Two things are worth checking on a Ryobi. First, find the arbor lock button and confirm it engages before you apply force to the bolt. Second, note how the guard cover opens, since some models need a screw loosened and others use a lever. If you cannot find your manual, the model number on the saw's label lets you look up a copy on the maker's site.
Ryobi makes both corded and battery saws. If yours is a battery model, take the battery off before you start, just as you would unplug a corded one.
Fixing common problems
A stuck bolt is the most common issue. Check the thread direction first, because pushing the wrong way tightens it. Hold the arbor lock steady and use a firm, even pull on the wrench handle. If the bolt still will not move, apply a small amount of penetrating oil, wait a few minutes, and try again.
If the new blade wobbles, remove it and clean the flanges again. A speck of dust or a bent washer can tilt the blade. If the blade rubs the guard, check that it is the right diameter and that the washer is seated the right way around.
If you are new to saws and unsure which model suits you, our best miter saw for beginners page is a good place to compare. For wider boards and compound cuts, see the best sliding compound miter saw page.
Final checks before cutting
Once the blade is installed, lower the head by hand with the power still off. The blade should pass cleanly through the slot in the table without touching anything. Slide the head along its full travel to confirm nothing catches.
Then reconnect power, stand to one side of the blade path, and make a test cut on scrap wood. Wear hearing protection and eye protection for that and every cut. Let the blade reach full speed before it touches the wood, and wait for it to stop fully before you lift the head.
Frequently asked questions
How often should I change a miter saw blade?
Change it when cuts burn the wood, tear out more than usual, or take noticeable extra force. A dull blade is also a safety risk, so replace it rather than push harder.
Can I put a different tooth count on my saw?
Yes, as long as the diameter and arbor size match. Lower tooth counts cut faster and rougher, while higher counts leave a smoother finish, which suits trim and moldings.
Why does the blade have an arrow on it?
The arrow shows the direction of rotation. The teeth at the front of the blade should point down toward the table, so the arrow should match the one on the guard.
Do I need to adjust the saw after a blade change?
A quick check is wise. Make a test cut, then confirm your 90 degree and 45 degree cuts are square. If they are off, follow your manual's alignment steps.