How to Build a Miter Saw Stand at Home
A simple miter saw stand is a sturdy 2x4 frame with a plywood top, built so the saw table sits level with side supports that hold long boards. Plan on a weekend, a few basic tools and careful measuring. Size the stand to your own saw and your own height before you cut anything.
 EVOLUTION 005-0002Best overall
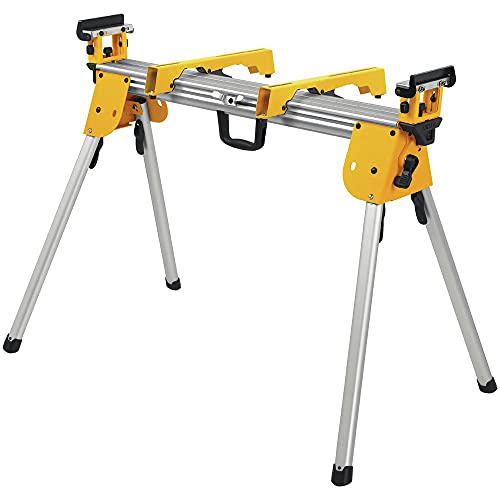 DEWALT DWX724500 lb aluminum stand
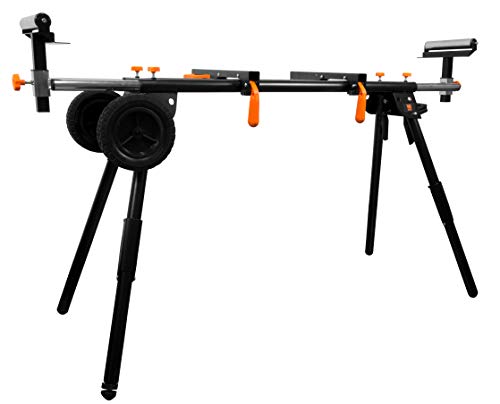 WEN MSA330Longest board support
Pick the Stand Style That Fits Your Space
Most home builders choose one of three designs. The right one depends on how much floor space you have and whether you need to move the saw around.
A fixed bench is the simplest and the most stable. A rolling stand adds wheels or casters so you can park it against a wall. A full cabinet station adds storage and a dust-friendly enclosure, but it takes much longer to build.
If you would rather buy than build, our best miter saw stand page compares ready-made options by their published specifications, which is a useful way to see what features are worth copying.
| Style | Best for | Build effort | Portability |
|---|---|---|---|
| Fixed bench | Garage or shop with a permanent spot | Low | None |
| Rolling stand | Small shops that share space | Medium | High |
| Cabinet station | Serious woodworking with storage needs | High | Low to medium |
Measure Your Saw First
Every saw is a different size, so start with your owner's manual or the published specifications. Write down the base width and depth, the mounting hole locations and the overall height of the saw.
Sliding saws need extra room behind them. The rails travel backward during a cut, so the stand must sit far enough from a wall to let the saw move freely.
The key goal is a saw table that is level with the support wings on both sides. If you are still choosing a saw, our best 12 sliding compound miter saw page lists the base sizes and capacities you will want to plan around.
Gather Materials and Tools
This design uses common lumber and hardware from any home center. Choose straight, dry 2x4s without large knots or twists, because a warped frame will never sit flat.
Here is what you will need:
- 2x4 lumber for the legs, rails and braces
- 3/4 inch plywood for the top and the side wings
- Wood glue and 2 1/2 inch construction or self-tapping screws
- Pocket hole jig and screws (optional, but they give clean joints)
- Carriage bolts or lag screws to mount the saw
- Locking swivel casters rated well above the combined weight of the saw and stand (for a rolling version)
- Circular saw or miter saw, drill, tape measure, speed square and clamps
- Safety glasses, hearing protection and a dust mask
Build the Stand Step by Step
Work on a flat floor so you can check that each assembly sits true. Square every frame before you drive the final screws.
Follow these steps:
- Cut all the 2x4 parts to length from your plan, labeling each piece with a pencil.
- Build two end frames, each made of two legs joined by a top and bottom rail. Use glue and screws, and check for square with a speed square or by measuring the diagonals.
- Stand the frames upright and join them with long front and back rails to form the center section.
- Add lower stretchers or a plywood shelf. These brace the frame against racking and give you a place for blades and clamps.
- Cut and attach the plywood top for the saw so it is flush with the frame.
- Build the left and right wings from 2x4 and plywood. Keep their top surfaces at exactly the same height as the saw table.
- Mount the saw to the top with bolts through its base holes, then set the wings and shim them until a long board lies flat across all three surfaces.
- Add a fence extension and a stop block to the wings for repeat cuts.
Safety and Stability Tips
A saw that tips or shifts mid-cut is dangerous. Test the finished stand by pushing on it from several directions before you use it.
Always unplug the saw before you change the blade, tighten bolts or adjust the mounting. Wear eye and hearing protection every time the saw runs, and keep your hands well clear of the blade path.
If you build a rolling stand, lock the casters before cutting. Never cut with the stand free to roll. Clamp long boards at the wings so they cannot lift or swing.
Heavy saws are awkward to lift. Get a helper to set the saw on the stand instead of lifting it alone.
Add Dust Control and Finishing Touches
Miter saws throw a lot of sawdust, so plan for it early. A simple back panel or a hood behind the saw catches much of the debris, and a shop vacuum port helps further.
Dust collection quality depends partly on the saw itself. Our best miter saw for dust collection comparison shows which models have the better published dust features.
Finish the wood with a coat of sealer or paint so spilled glue and damp air do not swell the plywood. Sand every edge smooth to avoid splinters, and add a power strip to the frame so cords stay off the floor.
New to the tool? Our best miter saw for beginners page can help you choose one that is easy to set up on your new stand.
Frequently asked questions
How high should a miter saw stand be?
Most people set the saw table close to their standing elbow height, which keeps the wrists comfortable and the cuts easy to see. Adjust it to suit your own height.
Can I build a stand that folds up?
Yes. Hinged legs with a locking brace let the stand fold flat for storage. Use strong hardware and make sure the legs lock firmly before you start any cut.
What wood works best for the frame?
Standard 2x4 construction lumber is the usual choice because it is strong, easy to find and simple to cut. Pick straight pieces with few knots.
Do I need to bolt the saw down?
Yes, in most cases. Bolting the saw to the top prevents it from shifting during a cut. Clamping is an option for a temporary setup, but check that the clamps will not interfere with the saw's travel.