How to Test Capacitance With a Multimeter
Turn the power off, fully discharge the capacitor, set your multimeter to its capacitance mode (marked with a capacitor symbol or "nF" and "µF"), and touch the probes to the two leads. The meter shows the value in nanofarads, microfarads or millifarads, which you compare with the rating printed on the part. Your meter must have a capacitance function, and its range has to cover the size of capacitor you are checking.
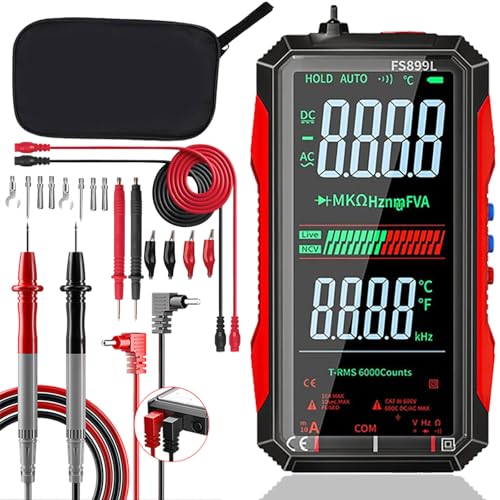 ZMIWNIED F899LBest overall
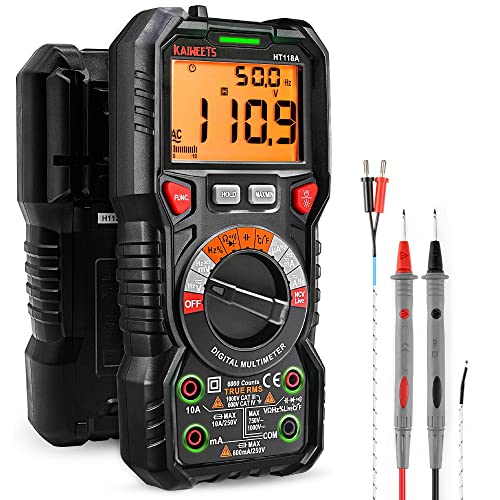 KAIWEETS HT118ARated for 1000V DC
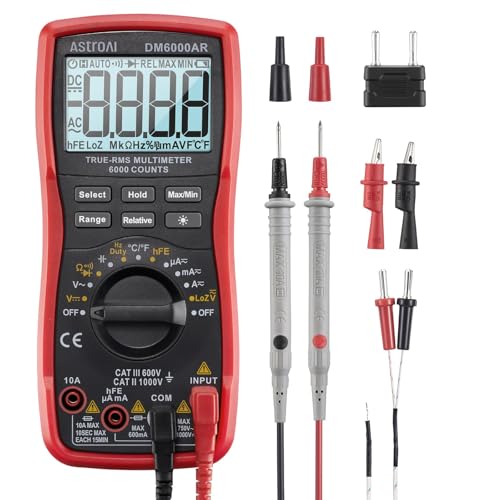 AstroAI DM6000ARPlain capacitance meter
What the capacitance mode actually does
A multimeter in capacitance mode charges the capacitor with a small, known current, measures how the voltage rises, and calculates the capacitance from that. You do not need to do any math. The screen simply shows the result.
This also explains two things you will notice. Larger capacitors take longer to settle on a reading, and the meter needs the part to be completely empty of charge before it starts. A capacitor that still holds voltage can give a wrong reading or damage the meter.
Check that your meter can do it
Not every multimeter has a capacitance mode. Look for a capacitor symbol on the dial or a function button that cycles through resistance, continuity, diode and capacitance. Then check the listed range, because it decides which parts you can measure.
For example, the ZMIWNIED FS899L listings state a capacitance range of 10nF to 60mF. The 10nF floor means very small capacitors, such as those measured in picofarads, fall below what that meter is built to read. The 60mF ceiling covers large parts. Some other meters on our spec sheet, like the KAIWEETS HT118A and the AstroAI DM6000AR, list capacitance testing but do not give a range in our data, so check the manual before relying on them for a specific part. Our multimeter comparison for capacitor testing flags exactly where that range data is missing.
Step-by-step: testing a capacitor
Work on a bench or a powered-down device, and give yourself good light. Wear safety glasses, since a failed electrolytic capacitor can vent or burst.
- Disconnect the device from power and wait. Unplug it, or switch off and lock out the breaker for fixed equipment.
- Discharge the capacitor. Use a resistor made for the job with insulated leads, or a discharge tool. Do not short the leads with a bare screwdriver, since that can spark and damage the part.
- Confirm it is empty. Switch the meter to a DC voltage range and check across the capacitor leads. You want a reading at or near zero.
- Remove the capacitor from the circuit, or at least unsolder or disconnect one lead. Other components in the circuit can change the reading.
- Turn the dial to the capacitance mode. Some meters share this position with other functions, so press the function button until the "nF" or "µF" unit appears.
- Touch the probes to the leads. Hold them firmly and wait for the number to settle. Large values can take several seconds.
- Compare the reading with the value printed on the capacitor body.
Reading the number and units
Meters show capacitance in different units depending on size, and the display may jump between them as it auto-ranges. The units step up by factors of 1,000, so a quick table helps.
If your meter has auto-ranging, as the FS899L listings do, it picks the scale for you. That is handy when the label on a capacitor is worn off and you do not know the value.
| Unit | Symbol | Equals | Typical use |
|---|---|---|---|
| Nanofarad | nF | 1,000 nF = 1 µF | Small ceramic and film parts |
| Microfarad | µF | 1,000 µF = 1 mF | Electrolytic and motor run capacitors |
| Millifarad | mF | 1 mF = 1,000 µF | Very large banks and power supply parts |
What a good or bad reading looks like
Capacitors are not exact. Each one has a tolerance, which is the allowed difference from the printed value, and it is often wide on electrolytic types. The label or datasheet lists it. A reading inside that tolerance is a pass.
A reading that is well below the rating usually means the capacitor has aged or dried out. A reading of zero, or an overload indicator such as "OL", can point to an open or shorted part, or to a value outside the meter's range. If the number drifts and never settles, recheck your probe contact and make sure the part is fully out of the circuit.
Safety notes that matter
Capacitors can hold a dangerous charge long after power is removed. This is especially true of motor run capacitors in HVAC units and the large capacitors in power supplies, which can hurt you even when the equipment looks switched off.
Keep these habits every time:
- Always discharge before touching leads or probes.
- Never rely on the meter alone to prove a part is safe. Verify with a voltage check first.
- Pick a meter with a stated category rating, such as the CAT III 1000V rating listed for the FS899L and KAIWEETS HT118A, if you also work on live circuits.
- Observe polarity on electrolytic capacitors. The marked stripe is usually the negative lead.
- Never test a capacitor on a live circuit in capacitance mode. The mode is for de-energized parts only.
Choosing a meter if you test capacitors often
For occasional checks, any meter that lists capacitance and a range matching your parts will do. Display counts affect how finely small differences show up. Most meters on our list offer 6000 counts, so you can see small changes in a reading.
Extras that help in practice include data hold for tight spaces, a backlit screen, and insulated alligator clips for hands-free connections. If you are weighing several options side by side, our capacitor testing multimeter rankings put the specs in one place so you can match the range and safety rating to the work you actually do.
Frequently asked questions
Can I test a capacitor while it is still on the circuit board?
It is better not to. Other parts on the board can change what the meter reads. Remove the capacitor, or lift at least one lead, for an accurate result.
Why is my reading slow to settle on a large capacitor?
The meter has to charge the part to measure it, and bigger values take longer. Wait a few seconds, keep the probes steady, and make sure the capacitor was fully discharged first.
What does it mean if the meter shows OL?
OL means overload. The capacitor may be shorted, open, or larger than the selected or available range. Check the meter's stated range and try another part to confirm the meter works.
Can I tell a capacitor is bad without a capacitance mode?
A meter without that mode cannot give you a value. Visible bulging, leaking or a burnt smell are signs of failure, but only a capacitance reading tells you whether the value is still within tolerance.