How to Test a Capacitor With a Multimeter
To test a capacitor, switch off and unplug the equipment, discharge the capacitor, and remove it from the circuit. Then set your multimeter to capacitance mode, touch the probes to the two leads, and compare the reading with the value printed on the part. A reading close to the label, within its tolerance, means the capacitor is working. A reading far below it, or near zero, means it has failed.
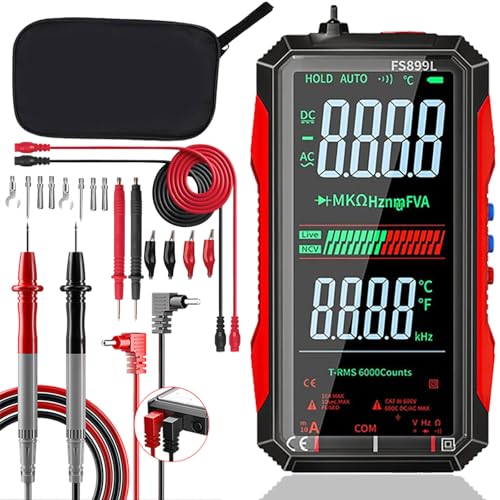 ZMIWNIED F899LBest overall
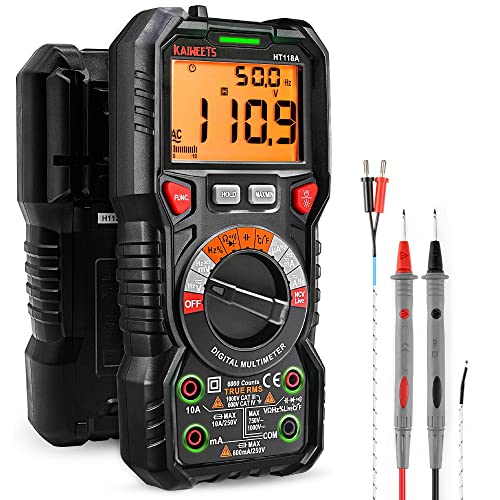 KAIWEETS HT118ARated for 1000V DC
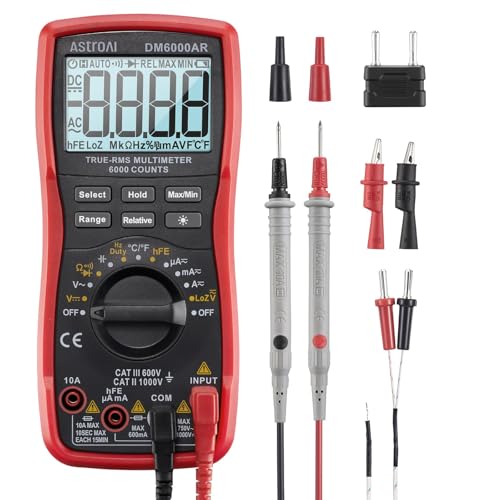 AstroAI DM6000ARPlain capacitance meter
What you need before you start
Capacitance testing is simple, but it takes a little preparation. A capacitor stores energy and can keep a charge long after the power goes off, so the setup matters as much as the measurement.
Gather these items first:
- A multimeter with a capacitance function (look for the –|(– symbol on the dial, often shared with diode or resistance modes)
- Insulated test leads in good condition, or small alligator clips for hands-free contact
- A resistor for discharging, or an insulated discharge tool made for the job
- Safety glasses and insulated gloves if you work on larger capacitors
- The capacitor's label, so you know its rated capacitance (µF) and voltage
Discharge the capacitor first
Safety note: a charged capacitor can give a painful or dangerous shock, and it can also damage your meter. Always unplug the device and wait before you touch anything. Do not assume that a switched-off appliance is safe inside. Large capacitors in motor circuits, power supplies and HVAC equipment can hold a charge for a long time.
To discharge it, hold a resistor with insulated pliers or use a proper discharge tool across the two terminals for a few seconds. Many people use a resistor of a few thousand ohms with a suitable power rating. Shorting the terminals with a bare screwdriver is a common habit, but it can cause sparks and damage the capacitor, so avoid it.
After discharging, set your meter to DC voltage and measure across the terminals. If it reads zero, you can go on. If not, discharge it again. Never rely on the meter alone for safety, and keep one hand away from the terminals while you work.
Step-by-step: measure capacitance
Once the part is discharged and out of the circuit, the test itself takes a minute or two. Testing a capacitor while it is still soldered in can give false readings, because other components in the circuit also affect the measurement.
- Note the rated capacitance and tolerance printed on the capacitor body. Electrolytic types also show a voltage rating and a stripe marking the negative lead.
- Turn the dial to the capacitance setting. On many meters you press a function button to switch from diode mode to capacitance.
- Plug the black lead into COM and the red lead into the VΩ input, as you would for voltage.
- If the meter is not auto-ranging, choose a range above the expected value. An auto-ranging meter picks the scale for you.
- Touch the red probe to the positive lead and the black probe to the negative lead. Polarity matters for electrolytic capacitors. Film and ceramic types have no polarity.
- Wait for the reading to settle. Large capacitors can take several seconds, because the meter charges the part with a small known current and measures the result.
- Compare the displayed value with the label.
How to read the result
Capacitors are not exact. The label gives a tolerance, and electrolytic types often allow a wide margin. Check the part's own markings or datasheet before you decide it is bad.
Use this table as a quick guide:
| Reading | Likely meaning | What to do |
|---|---|---|
| Within the labeled tolerance | Capacitor is working | Put it back, or look for the fault elsewhere |
| Well below the labeled value | Capacitor has lost capacity | Replace it with the same rating |
| Zero or an open-circuit display | Open or failed capacitor | Replace it |
| Reading far above the label, or unstable | Possible leakage or a damaged part | Replace it and check the circuit |
| Meter overloads at once | Possible short inside the capacitor | Replace it |
No capacitance mode? Try a resistance check
Some basic meters skip capacitance mode. You can still get a rough idea with the resistance setting on a discharged capacitor. Connect the probes with the right polarity and watch the display. On a healthy capacitor, the resistance reading starts low and climbs as the meter charges the part, eventually showing an open circuit.
If the reading stays near zero, the capacitor is probably shorted. If it shows an open circuit immediately and never moves, the capacitor may be open. This check only shows a pass or fail pattern. It cannot tell you the actual capacitance, so a capacitor that has drifted out of tolerance can still look fine.
Small capacitors, such as those below a fraction of a microfarad, may not show any movement on this check. For those, a meter with a real capacitance range is the better choice.
Choosing a meter for capacitor work
If you test capacitors often, the specifications matter. A wide capacitance range lets you check both tiny parts and large ones. For example, the ZMIWNIED FS899L listings state a 10nF-60mF range. Higher display counts give finer resolution, and the meters on our spec sheet mostly list 6000 counts. Auto-ranging saves time when you do not know the value.
Also look at the safety rating. Capacitors sit in live equipment, so a stated category rating such as CAT III 1000V and fuse protection on the current inputs are worth checking. Some listings leave out the capacitance range, so confirm it with the seller before you buy. You can see the figures side by side in our best multimeter for capacitor testing comparison.
If you work on motors or HVAC units, True RMS helps with AC readings, and a backlit screen makes tight spaces easier. We compare published specifications only, so use the multimeter comparison page as a starting point and read each listing's details.
Common mistakes to avoid
A few habits cause most bad readings and most close calls. Skipping the discharge step is the most serious one. Another is testing a capacitor that is still connected, which lets other parts skew the number.
Hand contact can also change the result on small capacitors, so hold the probes by their insulated handles and avoid touching the leads and the metal tips together with your fingers. Finally, do not use the meter on a capacitor whose voltage rating is unknown and still charged. Treat every unknown part as live until you have discharged it and confirmed zero volts.
Frequently asked questions
Can I test a capacitor without removing it from the circuit?
It is not recommended. Other components in parallel can change the reading, so the result may be wrong. At minimum, disconnect one lead of the capacitor before measuring.
Does polarity matter when I test a capacitor?
Yes for electrolytic capacitors. Connect the red probe to the positive lead and the black probe to the negative lead, which is usually marked by a stripe. Film and ceramic capacitors have no polarity.
Why does my meter reading keep changing?
Large capacitors take time to charge during the measurement, so the display may climb for several seconds. Hold the probes steady and wait until the number stops changing. Poor contact can also cause drifting values.
How close should the reading be to the label?
It should fall within the tolerance printed on the capacitor or listed in its datasheet. Tolerance differs by capacitor type, so check the markings rather than guessing.