Why Does Paint on Kitchen Cabinets Peel or Chip?
Paint on kitchen cabinets usually peels or chips because it never bonded to the surface. Leftover grease, skipped sanding, the wrong paint and too little cure time are the most common causes. Fixing the prep and giving the paint days to harden prevents most failures.
 Rust-Oleum Home 372011Fastest drying
 INSL-X CC560109A-01Best for a full kitchen
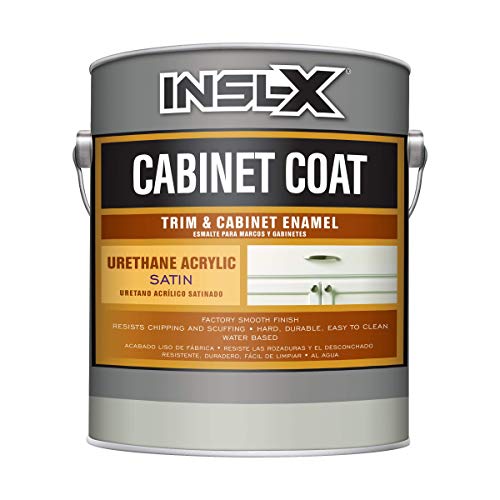 INSL-X CC550109A-01Best satin finish
The short version: it is almost always bonding
Paint does not stick to cabinets the way it sticks to a wall. Cabinet doors are often factory-sealed, glossy and coated with years of cooking residue. If the new paint sits on top of that layer instead of gripping the surface, it can lift in sheets or flake at the edges.
Cabinets also take more abuse than walls. Hands, steam, grease and knocks from pots all work on the finish every day. So a coat that would be fine in a bedroom can fail in a kitchen within weeks.
The good news is that the causes are predictable. The sections below go through them in the order they usually happen, from prep to paint choice to the days right after painting.
Prep mistakes that cause peeling
Prep is where most peeling starts. Kitchen cabinets collect a film of cooking grease that you often cannot see. Paint will not grip it, even if the surface looks clean.
Smooth, glossy surfaces are the second problem. Paint needs a slightly rough surface to hold on to, so a light scuff-sanding matters even on paints that say they bond without primer.
- Skipping the degreaser. Wipe every door, frame and the areas around the handles with a degreasing cleaner, then rinse and let dry.
- Skipping the scuff-sand. A light pass with fine sandpaper dulls the old finish so the new coat can grip.
- Leaving dust behind. Wipe sanding dust off completely, or it becomes a weak layer under the paint.
- Painting over damp or oily wood. Let cleaned surfaces dry fully before you open the can.
- Ignoring the primer question. Some cabinet paints are made to bond without primer, but a bare or stained surface may still need one. Follow the label for your cabinet material.
Paint and application mistakes
Ordinary wall paint is a common culprit. It stays softer for longer and wears off at edges and corners. A cabinet paint is made to level out smoothly and cure hard. Urethane-modified acrylic cabinet paints are a popular DIY choice because they flow like oil-based paint but clean up with water. Our best paint for kitchen cabinets page compares several of them on one spec sheet.
How you apply it matters too. A thick coat can stay soft underneath and wrinkle or sag. Two thin coats grip and dry better than one heavy one. Painting in the wrong temperature is another trap. For example, the INSL-X Cabinet Coat listings say to apply it when the air, product and surface temperatures are above 50 °F and below 90 °F. Always check the temperature range on your own can.
Recoating too early also causes trouble. The Rust-Oleum Cabinet Transformations listing gives a 2 hour recoat time. Other paints differ, so follow the time on your product rather than guessing.
Why chips show up in the first weeks
A painted door can feel dry long before it is hard. Dry to touch and fully cured are different things. The Rust-Oleum listing, for instance, says the paint dries to touch in 30 minutes and is ready for normal use after 24 hours. Paint can keep hardening after that, so go easy on the doors for several days.
Early chips usually come from putting doors back and loading shelves too soon. Stacking wet-looking doors, hanging them on hinges or sliding them against each other can all leave marks. Edges and corners get hit first, so that is where chips start.
Sticky hinges and handles add wear. Where your hands grab the door every day, the paint takes the most rubbing. If you are replacing handles at the same time, see our best hardware for white kitchen cabinets guide, and fill or cover old holes before the final coat.
Why the paint looks different than expected
Painted cabinets can look different from the color chip, the can or a neighbor's kitchen. Sheen is a big part of this. Semi-gloss is the easiest to clean, while satin hides flaws and brush marks better. A glossier finish also shows every dent and roller mark.
Lighting changes color as well. Under-cabinet lights, warm bulbs and daylight can make the same white look cooler or warmer. Dark old finishes can show through if you skip coats, and wood tannins can add a yellow tint.
Uneven texture usually comes from application. Paint that is brushed too much, dragged as it dries or applied too thickly will not level well. Using a quality cabinet paint and thin, even coats helps brush marks fade.
Cause, symptom and fix at a glance
Use this table to match what you see on your cabinets to the likely cause.
| What you see | Likely cause | What to do |
|---|---|---|
| Paint peels in sheets | Grease or no scuff-sanding | Strip loose paint, degrease, sand, repaint |
| Chips at edges and corners | Too little cure time or soft paint | Wait longer before use, switch to a cabinet paint |
| Peeling near the stove or sink | Heat, steam and moisture | Use a moisture-resistant paint and ventilate |
| Wrinkles or sags | Coat too thick or recoated too soon | Sand smooth and apply thin coats |
| Brush marks stay visible | Overbrushing or paint that does not level | Sand lightly and recoat with a self-leveling paint |
| Color looks off | Sheen, lighting or old finish showing | Test a sample on a door before committing |
How to fix peeling paint and stop it coming back
If paint is already peeling, do not paint over it. Scrape off all the loose paint, sand the edges so they feather smoothly and clean the area. Then spot-prime if needed and repaint the whole door or panel so the repair does not show.
Safety matters during this work. Sanding old paint creates fine dust, so wear eye protection and a dust mask, and ventilate the room. Degreasers and paints can irritate skin and lungs, so wear gloves and follow the label. Cabinets painted before the late 1970s may contain lead paint, so test before sanding if your home is old.
For a fresh start, follow this order:
- Remove doors, drawers and hardware, and label them.
- Degrease and rinse every surface.
- Scuff-sand, then wipe away all dust.
- Prime if your paint or surface calls for it.
- Apply thin coats, with the recoat time on the can between them.
- Let the paint cure for several days before heavy use.
Frequently asked questions
Can I paint over peeling cabinet paint?
Not without repairing it first. New paint will only hold as well as the layer beneath it, so scrape loose areas, sand the edges smooth, clean the surface and then repaint.
Is semi-gloss or satin better for cabinets?
Semi-gloss wipes clean more easily. Satin hides brush marks and surface flaws better. Pick based on whether cleaning or a forgiving look matters more in your kitchen.
How long should I wait before using painted cabinets?
Follow the label for your paint. Some say they are ready for normal use after 24 hours, but the finish keeps hardening, so treat the doors gently for several days.
Do I always need primer on kitchen cabinets?
No. Some cabinet paints are made to bond without primer, but you still need to degrease and scuff-sand. Bare wood, stains or hard-to-coat surfaces may still benefit from primer.