Why Does My Heat Shrink Tubing Kit Not Work?
Most heat shrink problems come from three things: the wrong tube size or ratio for the wire, uneven or insufficient heat, and tubing that has no adhesive lining when you need a waterproof seal. Check the size and type first, then fix your heating technique. If the tubing is the wrong kind for the job, a better matched kit solves it.
 XHF resuoguan-heiBest overall
 HUAKAYO RSG4:1 ratio, long tubing runs
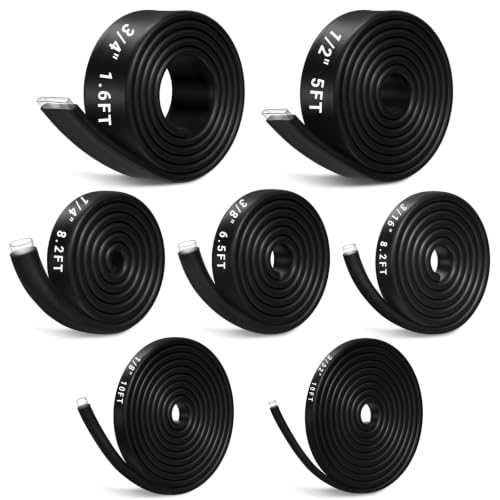 EVOULTES EVHS055Named polyolefin outer layer
Start with the tube and the wire
Before you blame the heat gun, look at what you are shrinking. Heat shrink only shrinks so far. A 2:1 tube shrinks to one half of its starting diameter, a 3:1 tube to one third, and a 4:1 tube to one fourth. If the wire or connector is wider than half the tube's starting size on a 2:1 tube, it will never grip, no matter how long you heat it.
The opposite mistake also happens. A tube that is far too large for the wire may shrink fully and still sit loose, because it reaches its smallest size before it touches the wire. Pick the smallest tube that slides over the widest part of your joint, such as a crimped terminal or solder blob.
Kits also have size limits. Some small-size sets top out at 0.391 in, which suits electronics but not heavy automotive or boat cables. If your thickest wire is bigger than the largest tube in your kit, the kit will not work for that job.
| Shrink ratio | Shrinks to | Good fit when |
|---|---|---|
| 2:1 | One half of original size | Wire and tube are close in size, light insulation jobs |
| 3:1 | One third of original size | Connectors that are bulkier than the wire |
| 4:1 | One fourth of original size | One tube must cover a wide range of wire and connector sizes |
Heat is the most common culprit
When tubing does not get enough steady heat, it never fully conforms to the wire. The walls stay thick and soft, and air can stay trapped inside. Tubing that shrinks in patches or looks wrinkled usually got heat in one spot only.
Lighters and candles can work in a pinch, and some listings mention them, but they put out uneven heat and soot. A heat gun or a hot air tool gives you far better control. Keep it moving around the tube and work from the middle toward the ends so air is pushed out rather than trapped.
Not every tube shrinks at the same temperature. It depends on the material and the wall thickness. One kit on our spec sheet states a shrink range of 80 to 125 °C, which is the kind of detail worth looking for. If your kit lists a range, make sure your heat source can reach it across the whole tube.
- Hold the heat source a few inches from the tube and keep it moving.
- Rotate the wire so all sides heat evenly.
- Start at the center and work outward.
- Stop when the tube is snug and, for lined tubing, a little adhesive shows at the ends.
Why your tubing leaks
Plain heat shrink insulates, but it does not seal against moisture on its own. If your joint leaks, the first question is whether your tubing has an adhesive lining. Tubing without lining, such as plain 2:1 sets, leaves a tiny gap along the wire jacket where water can creep in.
For a waterproof joint, choose tubing that is both adhesive lined and dual wall. The inner layer melts when heated and bonds to the wire and jacket, while the outer layer protects against abrasion. Our best heat shrink tubing kit comparison marks which kits list adhesive lining and dual wall construction, so you can filter out sets that cannot seal.
Even lined tubing can leak if you rush it. The adhesive needs time to flow, and it needs a tube that has shrunk fully. Leave extra length so the tube extends well past each end of the splice, and look for a thin bead of glue at both ends before you stop heating.
Why your tubing keeps breaking or splitting
Splits and cracks usually come from one of three causes: too much heat, too little room, or sharp edges. Overheating can melt, char or embrittle the tubing. Keeping the heat source moving and stopping as soon as the tube is snug avoids most of this.
Tubing that is too small for the joint will stretch and split as it tries to shrink around something it cannot fit. Using a tube with a higher ratio or a bigger starting diameter gives it room to shrink without strain.
Sharp crimp barrels, rough solder spikes and wire strands that poke out can also cut through thin walls. File or trim them first. If the joint will flex a lot, such as on a vehicle or boat, dual wall tubing gives better abrasion resistance and strain relief.
Why it gets hot, and how to stay safe
Heat shrink tubing itself does not generate heat. If the tube or wire is hot, the heat is coming from your tool or from the circuit. Tubing holds heat after you stop, so a freshly shrunk joint can burn your fingers for a short time.
Wire can also get hot if the connection under the tube is poor or the wire is too thin for the load. Heat shrink covers a bad crimp but does not fix it. If a joint feels warm in use, remove the tubing and redo the connection.
- Disconnect power and batteries before you work on any wiring.
- Wear safety glasses, since hot adhesive can drip or spit.
- Keep heat guns and flames away from fuel lines, fumes and flammable materials.
- Work in a ventilated space, because melting plastic and adhesive give off fumes.
- Let the joint cool before you handle it, and set hot tools on a heat-safe surface.
A quick troubleshooting checklist and when to change kits
Work through these steps in order when a joint fails:
- Confirm the tube's starting size fits over the widest part of the joint.
- Check the ratio: will it shrink small enough to grip the wire?
- Make sure the tube length covers the splice with room to spare. A 3.45 in tube, for example, will not cover a longer splice in one piece.
- Heat evenly and keep the tool moving.
- For waterproofing, confirm the tubing is adhesive lined and dual wall.
Choosing a kit that fits the job
If you keep running into the same problem, the kit may simply not suit your work. For example, the XHF kit on our page offers 225 pieces in 8 sizes from 0.09375 to 0.75 in, adhesive lined and dual wall, at 3:1. The HUAKAYO 4:1 kit covers seven sizes with the same range and adds a higher ratio for tighter grip. A 2:1 set such as the Ginsco kit has 580 pieces in 11 sizes with a storage case, but no adhesive lining is listed, so it is better for insulation and color coding than for sealing.
You can compare ratios, lining, tube length and size ranges side by side in our heat shrink tubing kit comparison before you buy again.
Frequently asked questions
Can I use a hair dryer to shrink heat shrink tubing?
Usually not well. Most hair dryers do not get hot enough for the tubing to shrink fully or melt the adhesive lining. A heat gun or a hot air tool made for electronics is a better choice.
Do I need to shrink the tube from one end to the other?
Start in the middle and work outward. This pushes air and melted adhesive toward the ends and avoids trapped bubbles.
Can I reuse heat shrink tubing?
No. Once shrunk, it will not expand again. Cut it off carefully without nicking the wire and use a fresh piece.
Is it safe to heat tubing on a live wire?
No. Disconnect power first. Heat can soften wire insulation, and working on live circuits risks shock and short circuits.