Why Your Detail Sander Isn't Working Properly (and How to Fix It)
Most detail sander problems come from a worn or loose pad, the wrong or clogged sandpaper, too much pressure, or a power problem. Work through those four areas in order and you will usually find the cause in a few minutes. If the tool still skips or stalls after that, it may be time to replace the pad or the sander.
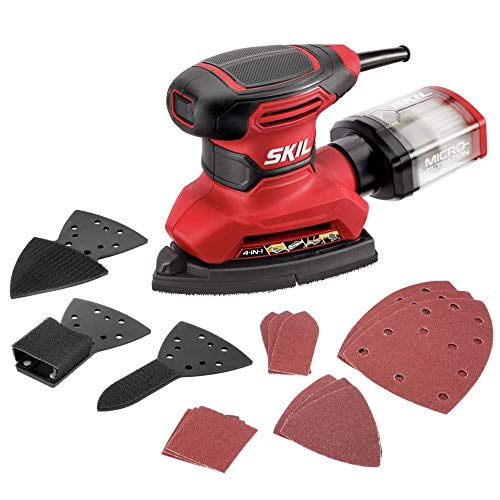 Skil SR232301Best overall
 HYCHIKA BETTER TOOLS FOR BETTER LIFE MS200WCompact with dust bag
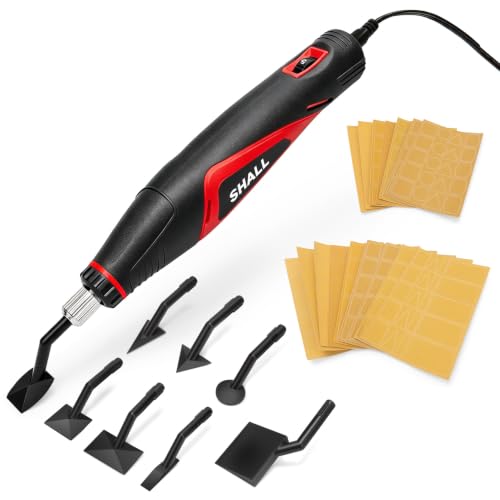 SHALL SH111052Lightest in the lineup
Start with the quick checks
Before you take anything apart, unplug the sander or remove the battery. A detail sander vibrates fast in a small area, and an accidental start while you handle the pad can pinch fingers or throw dust in your face.
Then look at the basics. Most complaints about a sander that "doesn't work" turn out to be simple wear or setup issues, not a dead motor.
- Is the power cord, plug, or battery connected and fully seated?
- Is the switch fully on, and does the tool start without a load?
- Is the sandpaper the right shape for the pad and attached flat?
- Is the pad intact, with no cracks, missing chunks, or rounded corners?
- Is the dust port or dust bag full?
Why the sander skips or jumps on the surface
Skipping is the most common complaint. It usually means the pad is not sitting flat against the work, or the sander is being asked to do something it handles poorly.
A worn or hardened pad is a frequent cause. Foam or rubber pads lose their grip and shape over time, and a pad with an uneven face will bounce instead of gliding. If the face looks glazed, cracked, or warped, replace it.
Pressure matters too. Pressing hard slows the motion and makes the pad catch and hop. Let the sander's own vibration do the cutting and guide it with light, even contact.
Technique can also cause skipping. Tilting the tool so only a corner touches the surface concentrates force on a tiny spot. Keep the pad flat, and use the tip only when you truly need to reach a tight corner.
Why the pads or paper keep coming off
If you are asking why detail sander pads won't stay put, the cause is usually the hook-and-loop backing or the adhesive. Dust and sanding residue clog the tiny hooks, and the paper stops gripping. Heat from long sessions can also weaken the hold.
Brush the pad face with a stiff brush to clear debris. If the hooks are flattened or the surface looks smooth and shiny, the pad has worn out and needs replacing.
Paper that is cut or sized incorrectly will also peel at the edges. Use sheets made for your sander's pad shape, and line them up so nothing hangs over the edge.
Why it sands slowly or leaves poor results
A sander that runs but does not cut well is often working with the wrong abrasive. Worn paper is the first thing to rule out. Sandpaper dulls quickly on a small pad, so swap it as soon as it feels slick or leaves the surface shiny without smoothing it.
Grit choice matters as well. Too fine a grit on rough or painted wood will barely scratch it. Too coarse a grit leaves swirl marks that show through finish. Start coarse enough to remove the old finish or flaws, then step up to finer grits one at a time.
| Symptom | Likely cause | What to try |
|---|---|---|
| Pad bounces or skips | Worn pad, too much pressure, tilted tool | Replace pad, ease off, keep pad flat |
| Paper falls off | Clogged or worn hook-and-loop | Brush clean or replace pad |
| Sands slowly | Dull paper or wrong grit | Fresh paper, adjust grit |
| Motor slows or stalls | Heavy pressure, blocked vents, weak power | Lighten up, clear vents, check supply |
| Deep swirl marks | Grit too coarse, skipped grit steps | Move up through finer grits |
| Excess vibration | Loose pad, damaged pad | Re-seat or replace the pad |
Power, dust, and motor trouble
If the motor slows, hums, or cuts out, check the power first. A damaged cord, a loose plug, a worn-out battery, or a long thin extension cord can all starve the tool. Try a different outlet or a charged battery before you blame the sander.
Dust is the next suspect. Packed dust bags and blocked vents cause overheating, and many tools shut off or lose speed when they run hot. Empty the dust container often and clear the vents with a soft brush or low-pressure air.
Wear a dust mask or respirator, eye protection, and hearing protection when you sand. Fine dust, especially from old paint, can be hazardous, so work with good ventilation or a dust extractor.
Never open the housing of a plugged-in tool, and do not use a sander with a frayed cord or a cracked case. Those repairs belong with a qualified service center.
When to repair and when to replace
Pads and paper are cheap to replace, so start there. If a fresh pad and new paper do not fix the problem, and the motor still runs rough, stalls, or smells hot, the internal parts may be worn out.
If you are shopping for a new tool, our best detail sander comparison lines up the published specifications side by side, so you can match features to the jobs you do most.
When you compare models, pay attention to pad shape, how easy replacement pads are to find, and how well the dust collection works. Those three points decide whether a sander stays easy to live with. You can read more in our detail sander comparison before you decide.
Frequently asked questions
How often should I change the sandpaper?
Change it when it feels smooth, stops removing material, or the surface starts to look burnished. On a small pad this can happen quickly, especially on paint or hardwood.
Can I fix a worn hook-and-loop pad?
Cleaning it with a stiff brush can help if debris is the issue. If the hooks are flattened or the pad is cracked, replacement is the reliable fix.
Why does my sander vibrate more than it used to?
A loose, damaged, or unevenly worn pad is the usual cause. Unplug the tool, check that the pad is secure and undamaged, and replace it if needed.
Is it normal for the sander to get warm?
Some warmth is normal during longer sessions. If it becomes too hot to hold, stop, let it cool, and check for clogged vents or a full dust container.