Why Does Bathroom Wall Paint Peel and How to Fix It?
Bathroom paint peels because steam and moisture get under the film, usually where the wall was dirty, glossy, damp, or painted with a product that was not made for wet rooms. To fix it, find the moisture source, scrape and sand back to sound paint, clean and dry the wall, prime, and repaint with a mildew-resistant satin or semi-gloss. Better ventilation keeps the repair from failing again.
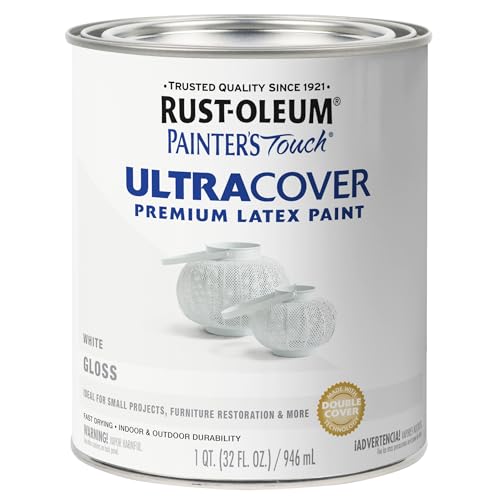 Rust-Oleum 1992502Fast-drying gloss for trim
 INSL-X CC550109A-44Satin sheen, water resistant
 Rust-Oleum 369384Satin door and trim
The usual reasons bathroom paint peels
Paint holds on by sticking to the wall. Anything that weakens that grip lets water vapor work underneath, and then the film lifts in flakes or sheets. A bathroom puts a lot of stress on that bond every day, so small mistakes show up fast.
Most peeling traces back to one or more of these causes:
- Steam with no place to go, because the fan is weak, noisy and rarely used, or vents into the attic instead of outdoors.
- A dirty surface. Soap film, body oils, hairspray residue, and old mildew stop new paint from bonding.
- Painting over glossy or hard old paint without sanding or priming first.
- Painting over a damp wall, such as after a leak, a recent shower, or a freshly patched area that has not dried.
- The wrong paint. Flat wall paint absorbs moisture and does not wipe clean, and cabinet or trim paints are not made for large wall areas.
- Skipping primer on bare drywall, patched spots, or stained areas.
- Putting on coats that are too thick, or recoating before the first coat has dried.
Why bathroom walls sweat
Walls sweat when warm, humid air meets a surface that is cooler than the dew point of that air. Water condenses on the wall just as it does on a cold glass. Paint does not cause this. It is a sign the room holds too much moisture or the wall is cold, often an exterior wall or one with little insulation.
Why does this matter for paint? A wall that is wet for long stretches keeps pushing moisture into the paint film and the drywall behind it. Over time the bond fails, and mildew gets a food source. If you see beads of water or streaks after every shower, treat that as part of the repair plan. A better fan and longer run times will do more for the paint than any single product.
Match the symptom to the likely cause
Before you scrape anything, look closely at how the paint is failing. The pattern often points to the cause.
| What you see | Likely cause | What to do |
|---|---|---|
| Small bubbles that come back after you press them | Moisture behind the paint, or a poor bond | Check for leaks and damp drywall, then dry the wall fully |
| Peeling in sheets near the shower or ceiling | Steam and weak ventilation | Improve the fan, scrape, prime, repaint |
| Flaking down to bare drywall | Paint applied with no primer or on dust | Scrape, seal with primer, repaint |
| Top coat lifting off an older glossy layer | No sanding or bonding primer | Sand the old layer and use a bonding primer |
| Black or green spots plus peeling | Mildew or mold growing on the wall | Clean safely, find the moisture source, then prime |
| Peeling in one spot with a brown stain | Leak from a pipe, roof, or fixture | Fix the leak first, then repair the wall |
How to fix peeling paint step by step
Do the repair only after the moisture source is under control. Painting over an active leak or a wall that still sweats will fail again.
Work through these steps in order:
- Fix leaks and run the fan or open a window so the wall can dry. Give damp areas several days to dry out, and check that the drywall feels firm, not soft.
- Scrape off all loose paint with a flexible putty knife. Keep going until the remaining edge holds firm when you push on it.
- Sand the edges so the old paint blends smoothly into bare wall. Wear safety glasses and a dust mask or respirator.
- Wash the whole wall with a household cleaner or mild detergent solution, rinse with clean water, and let it dry completely.
- Fill gouges with joint compound or patching compound, let it dry, and sand it smooth.
- Prime bare and patched areas with a stain-blocking or bonding primer. Spot priming is fine for small areas, but a full coat helps if the wall has stains or several sheens.
- Apply two thin coats of paint, letting each dry for the time on the can. Thin coats grip better than one heavy coat.
- Keep the fan running after showers and avoid heavy steam while the paint cures.
Safety notes before you scrape or sand
If your home was built before 1978, old paint may contain lead. Test it before you sand or scrape, and follow lead-safe work practices or hire a certified pro if the test is positive. Do not dry sand suspected lead paint.
Turn off power at the breaker before working around light fixtures, fan housings, and outlets. Water and electricity do not mix, so keep tools and wet rags away from live wiring. Use a stable stepladder for ceilings and tall walls, and never stand on the top step. Ventilate the room while you work, because primers and some paints give off fumes.
What to do about mold before painting
Paint will not cure a mold problem. If you cover mildew without cleaning it, it usually grows through the new coat. Wear gloves, eye protection, and a respirator rated for particles before you touch it.
For a small patch of surface mildew, scrub with detergent and water, rinse, and let the wall dry. Some people use a diluted bleach solution on hard surfaces. Never mix bleach with ammonia or other cleaners, because the fumes are dangerous. If the drywall is soft, crumbling, or the growth is widespread or keeps returning, the wall likely has a hidden moisture problem. Call a qualified contractor, and expect that some drywall may need replacing rather than painting.
Choose paint that can handle a wet room
Once the wall is sound, pick a paint built for walls in damp rooms. Satin and semi-gloss wipe clean and resist moisture better than flat. For a wider look at the options, see our best paint for bathroom walls comparison, which puts several products on one spec sheet.
Read the intended use closely. Many products in that comparison are cabinet or trim paints, and only one, Zinsser Perma-White, is a wall paint listed for bathrooms. It is a semi-gloss, water-based acrylic that is listed as mold and mildew-proof and self priming. The listing gives a dry-to-touch time of 30 minutes, a 2 hour recoat time, and coverage of 300 to 400 sq ft per 4 qt can. Even with a self-priming paint, you still need to scrape off loose paint and clean the wall first.
If you are only refinishing a vanity or trim, a cabinet paint may suit that job better than a wall. Just do not expect it to cover a whole room. The INSL-X quarts, for example, list 87 to 112 sq ft each. Our bathroom paint comparison shows coverage and drying times so you can plan how many cans you need.
Keep the problem from coming back
Good paint helps, but moisture control decides how long it lasts. Run the exhaust fan during every shower and for a while afterward, and make sure it vents outdoors. Wipe down wet walls and shower surfaces, and fix drips and caulk gaps quickly.
Give new paint time before heavy use. Check the can for cure times, and keep steam low for the first days if you can. A little patience here prevents a second round of scraping.
Frequently asked questions
Can I just paint over peeling bathroom paint?
No. New paint will peel with the old layer. Scrape off everything loose, sand the edges, clean, and prime before you repaint.
How long should I wait before showering after painting?
Follow the cure times on your can. Dry to touch is not the same as fully cured, so keep showers short and the fan running for the first days.
Does a primer really matter in a bathroom?
Yes on bare drywall, patched spots, stains, and glossy old paint. A self-priming paint can cover some cases, but only on a clean, sound surface.
Should I use flat paint on bathroom walls?
Flat absorbs moisture and is hard to wipe clean. Satin or semi-gloss is the better fit for a damp room.
When is peeling a sign of a bigger problem?
If paint keeps peeling in the same spot, the wall feels soft, or you see stains or musty smells, look for a leak or hidden moisture before repainting.