What to Put on Wood After Stripping Paint
After stripping, clean off the stripper residue, let the wood dry fully, and sand it smooth. Then apply the finish that matches your goal: stain and a clear topcoat for visible grain, a clear finish alone for a natural look, or primer and paint for a solid color. Always follow your stripper's cleanup directions first, because leftover residue can ruin any finish that goes on top.
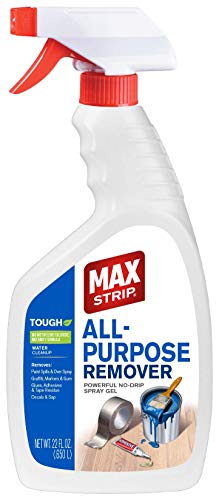 Max Strip ESA-522Drips, not refinishing
 Max Strip ESA-579Shellac and varnish removal
 Dumond 3332x2Largest container in the lineup
Start with cleanup, not finish
Whatever you put on the wood next will only look as good as the surface under it. Stripper leaves behind softened coating, residue and sometimes moisture. If you skip cleanup, the new finish can peel, blotch or stay tacky.
Cleanup depends on the product. Water-based strippers, such as the Dumond Smart Strip products on our best paint stripper for wood page, are generally rinsed or wiped off with water. Solvent and citrus gels often call for a different wipe-down, and some makers name mineral spirits or a similar solvent. Read your container label and follow it. If the label gives no cleanup step, ask the maker or test a small hidden area before you commit.
Scrape off the loosened coating first, then wipe the surface with clean rags. Use a stiff nylon brush or fine steel wool (on bare wood only, and keep it away from water-based finishes that could stain from metal fibers) to get paint out of grooves and carvings.
Let the wood dry completely
Stripped wood can hold moisture, especially after a water-based stripper or a rinse. Finishing over damp wood traps that moisture and can cause cloudy topcoats, raised grain and poor adhesion.
Give the piece time in a dry, ventilated room. How long depends on the weather, the wood and how wet it got, so judge by feel and look. The wood should look an even, natural color with no dark damp patches. If you are unsure, wait another day. Rushing this step is one of the most common reasons a refinish fails.
Sand the surface smooth
Sanding removes the last traces of old finish, evens out the grain and opens the wood so it can accept stain or sealer. Work with the grain, never across it.
A typical approach is to start with a medium grit if the wood still feels rough or has stubborn residue, then move to a finer grit for a smooth feel. Wipe off dust between grits. Hand sanding is safest on thin veneer, carvings and delicate edges, since it is easy to sand through veneer with a power tool.
Choose a finish for the look you want
Once the wood is clean, dry and smooth, decide on the final look. The table below compares the common routes in general terms.
Hardwoods like oak and maple take a clear finish well. Softer woods and some species such as pine and cherry can blotch with stain, so a pre-stain conditioner is often worth using.
| Goal | What to apply | Notes |
|---|---|---|
| Show the natural grain | Clear finish only, such as an oil, shellac, varnish or polyurethane | Keeps the wood's own color. Oil finishes are easy to touch up. Film finishes protect more. |
| Change or deepen the color | Stain, then a clear topcoat | Test the stain on a hidden spot. Seal with a topcoat so the color lasts. |
| Solid color | Primer, then paint | Primer helps paint stick and can block tannin bleed on some woods. |
| Heavy wear (tabletops, doors) | Durable film finish such as polyurethane or varnish | Apply thin coats and sand lightly between them. |
| Low-sheen, hand-rubbed feel | Wax or oil over bare wood | Gentle protection. Reapply over time. |
How to apply the finish step by step
The exact steps vary by product, but this order works for most projects.
- Vacuum the dust, then wipe with a tack cloth or a lightly damp rag. Let it dry.
- If using stain on a blotch-prone wood, apply a pre-stain conditioner first.
- Apply stain with a rag or brush, wait the time on the label, and wipe off the excess.
- Apply the clear finish or primer in thin, even coats. Thick coats run and dry slowly.
- Let each coat dry as directed, then lightly sand with a fine grit and wipe clean.
- Apply a final coat and leave the piece undisturbed until it cures. Cured is different from dry to the touch, so go easy on it for a while.
Match the finish to what was on the wood before
If you stripped shellac, lacquer or polyurethane, those coatings are gone, so you are free to choose any compatible new finish. Our page notes that products differ in which coatings they name, such as shellac and polyurethane on the Max Strip citrus gel and lacquer on the Sunnyside product. If a stripper did not name your old finish, some may remain, and a test patch will show it.
Leftover old finish is a common cause of patchy stain. If the stain looks uneven in a test area, go back, strip or sand that spot again, and retest. For a deeper comparison of which stripper suits which finish, see our paint stripper comparison.
Safety notes
Stripping and refinishing involve chemicals and dust, so protect yourself at each step.
- Wear chemical-resistant gloves and eye protection when handling stripper and finishes.
- Ventilate the room well. Even low-odor products and finishes give off fumes.
- Wear a dust mask or respirator rated for fine dust when sanding, and use hearing protection with power sanders.
- If the piece or the house was painted long ago, the old paint may contain lead. Use a lead test kit before sanding, and do not dry sand suspect paint.
- Rags soaked in oil-based stains and finishes can heat up and ignite on their own. Lay them flat outdoors to dry or store them in a water-filled, sealed metal can.
- Keep finishes away from flames, pilot lights and sparks. Many are flammable.
Frequently asked questions
Do I need to sand wood after stripping paint?
Yes, in most cases. Stripping leaves the surface rough and may leave faint residue. A light sanding gives you a smooth, even base for stain, clear finish or primer.
Can I paint right over stripped wood without primer?
You can, but primer usually helps paint bond and look even. It also helps on bare wood that might bleed tannins or soak up paint unevenly.
Why is my stain blotchy after stripping?
Blotching usually comes from leftover finish, uneven sanding or a wood that absorbs stain unevenly. Try a pre-stain conditioner, sand evenly, and test on a hidden area first.
How do I know if the stripper residue is gone?
The wood should feel clean and dry, not tacky or slick. Follow the cleanup step on your stripper label, then test a small area with your chosen finish before doing the whole piece.