What Size Heat Shrink Tubing Do You Need?
Measure the widest part you need to cover, then choose tubing whose pre-shrink (expanded) diameter is about 25% larger than that. Also check that the fully shrunk diameter is smaller than the thinnest part you want to grip. A higher shrink ratio such as 3:1 or 4:1 lets one size cover a wider range of wires and connectors.
 XHF resuoguan-heiBest overall
 HUAKAYO RSG4:1 ratio, long tubing runs
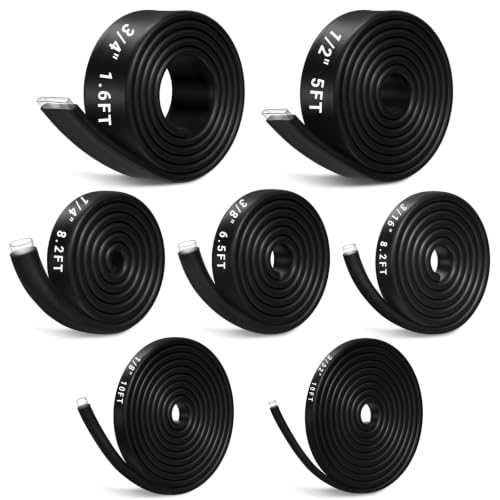 EVOULTES EVHS055Named polyolefin outer layer
The two numbers that decide the size
Every piece of heat shrink has two sizes. The first is the expanded diameter, which is the inside width of the tube as it comes out of the package. The second is the recovered diameter, which is how small the tube gets after heating. Kits and listings usually label the tube by the expanded size, such as 1/4 in.
Your job is to make sure the tube clears the widest point and still squeezes the narrowest point. On a plain wire these are the same number. On a wire with a crimp terminal, a connector or a solder joint, the widest point is usually the bulky end, and the narrowest is the wire jacket behind it.
A common rule of thumb is to pick an expanded size about 25% larger than the widest part. That leaves room to slide the tube on, even with a little solder or adhesive in the way.
How to measure
You do not need special tools. A set of calipers is the easiest option, but a ruler and a bit of care work for larger cables.
Follow these steps before you buy or cut anything:
- Unplug, disconnect or switch off the circuit. Never measure or work on live wiring.
- Measure the widest part the tube must slide over, such as a terminal barrel, connector body or splice. Write it down.
- Measure the thinnest part the tube must grip, usually the wire jacket.
- Multiply the widest measurement by 1.25 to get a minimum expanded size.
- Pick the nearest size at or above that number.
- Divide that size by the shrink ratio to see the recovered diameter, and confirm it is smaller than the thinnest part.
What the shrink ratio changes
The ratio tells you how far the tube shrinks. A 2:1 tube shrinks to one half of its expanded size, 3:1 to one third and 4:1 to one fourth. Our best heat shrink tubing kit page explains why a higher ratio helps: one tube can fit a wider spread of wire and connector sizes.
Here is what happens to a 1/2 in tube at each ratio:
| Shrink ratio | Recovered size of a 1/2 in tube | Good for |
|---|---|---|
| 2:1 | About 1/4 in (0.25 in) | Wires and parts that are close in width, simple insulation |
| 3:1 | About 0.167 in | Connectors with a step between the wire and the terminal |
| 4:1 | About 1/8 in (0.125 in) | Large steps in size, such as a big terminal on a thin wire |
Matching your part to a kit size
Many kits use the same seven sizes: 3/32, 1/8, 3/16, 1/4, 3/8, 1/2 and 3/4 in. The HUAKAYO 4:1 kit on our comparison page lists exactly these, and the XHF kit covers eight sizes across the same 0.09375 to 0.75 in span. The table below applies the 25% rule to that size range.
Treat the left column as the widest part you need to cover, including any terminal or splice.
| Widest part to cover | Minimum expanded size (25% extra) | Kit size to choose |
|---|---|---|
| 0.07 in | 0.0875 in | 3/32 in |
| 0.10 in | 0.125 in | 1/8 in |
| 0.15 in | 0.1875 in | 3/16 in |
| 0.20 in | 0.25 in | 1/4 in |
| 0.30 in | 0.375 in | 3/8 in |
| 0.40 in | 0.50 in | 1/2 in |
| 0.60 in | 0.75 in | 3/4 in |
Check the shrunk size too
Fitting over the part is only half the check. If the recovered diameter is larger than the wire, the tube will stay loose and slide around. That is a common cause of failed seals.
Take the 3/8 in tube from the table. At 3:1 it recovers to about 0.125 in, and at 4:1 to about 0.094 in. Either one will grip a wire jacket thicker than that. A 3/4 in tube at 3:1 recovers to 0.25 in, so it would not tighten on a 0.15 in wire, but a 4:1 tube would reach 0.1875 in, which is still too large for that wire. In that case, step down to the next size.
Tubes do not shrink all the way unless nothing is inside. They stop once they hit the wire, so a snug fit means the tube is partly shrunk and still pressing firmly.
Other things to check besides diameter
Length matters as much as width. The tube should extend past the exposed splice or terminal on both sides so the ends of the covered area are sealed. Pre-cut tubes in some kits are short. The Eventronic kit, for example, is cut to 1.7 in, while the XHF kit is 3.45 in, so a long splice may need the longer pieces.
Waterproofing is a separate question from size. For sealing against moisture, look for adhesive lined, dual wall tubing, because the inner layer melts and bonds to the wire and jacket. Plain 2:1 tubing insulates but does not seal on its own. If you want help comparing sizes, piece counts and lining, see our heat shrink kit comparison.
Also check the top of the size range. A small-size set, like the Ginsco kit that tops out at 0.391 in, suits electronics and thin cables but will not fit heavy automotive or boat cables.
Safety when you shrink the tube
A heat gun or hot air tool gets very hot, so keep it away from skin, insulation you want to keep and anything flammable. Let the work cool before you handle it. Safety glasses are a good idea, since adhesive can ooze and parts can spring back.
Make sure the circuit is unplugged or the battery is disconnected before you start. Avoid open flames near fuel lines, batteries or fumes, and work with some airflow because heated adhesive can smell strong. Keep the nozzle moving and heat evenly so the tube shrinks without scorching.
Frequently asked questions
Is it better to go one size up or one size down?
Go up if the tube will not slide on, then confirm it still shrinks small enough to grip. Never force a tube over a part that is too wide, because it can split when heated.
Can I use one size for several wire thicknesses?
Yes, within limits. A 4:1 tube covers a wider range than a 2:1 tube, so one size can fit a few wire sizes as long as the shrunk diameter is smaller than the thinnest one.
Does adhesive lining change the size I need?
The measuring steps stay the same. The lining adds material inside the tube, so leave a little extra room when you slide it on, and expect a tight seal once the adhesive melts.
How long should the tube be?
Long enough to cover the whole exposed splice or terminal and overlap the insulation on each side. If a pre-cut piece is too short, pick a longer piece or a kit that sells by length.