What Is the Correct Way to Use a Wood Chisel?
Clamp the wood, keep both hands behind the cutting edge, and use a sharp chisel. Push by hand for light paring cuts, and tap the handle with a mallet for heavier chopping. Take thin shavings instead of big bites, and work toward a marked line in several passes.
 Mount Jasper Wood ChiselBest overall
 AZUNO WCS10AWide range, full kit
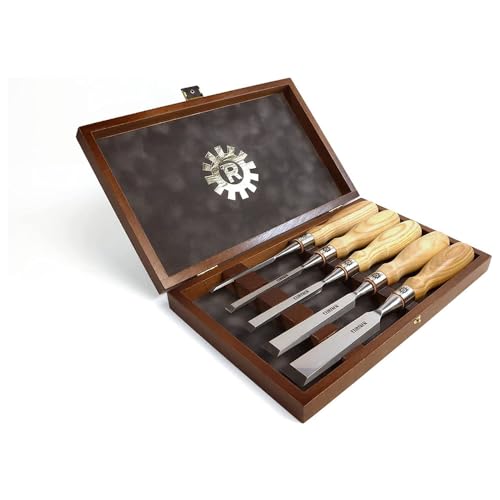 Narex 853600Hardest blades listed
Start with safety and setup
Most chisel injuries happen when the wood moves or a hand sits in front of the blade. Clamp or bench-hook your workpiece so it cannot shift. Never hold the wood in one hand while cutting toward it with the other.
Wear safety glasses, because chips and small fragments can fly. If you are chopping with a mallet for a long stretch, hearing protection is a sensible addition. Keep the chisel's guard or cap on when it is not in use, and set tools down with the edge pointing away from you.
A sharp chisel is safer than a dull one. A dull edge needs more force, and extra force is what makes it slip. Check the edge before every session.
- Clamp the work firmly to a bench.
- Keep both hands behind the cutting edge at all times.
- Cut away from your body and away from your supporting hand.
- Wear eye protection, and hearing protection for long mallet sessions.
- Store chisels with the edge covered.
Pick the right chisel and the right striking tool
Match the chisel width to the job. Narrow blades suit fine paring and small details. Wide blades are better for flattening large surfaces. The sets on our best wood chisel set page run from 6 mm up to 50 mm, so a set with several steps in between covers most household tasks.
Do you use a hammer with a wood chisel? Yes, but use a wooden or plastic mallet, not an iron hammer. Iron can mushroom or split a handle. One listing in our comparison specifically recommends a mallet or plastic hammer over an iron hammer, even though its handle has a metal ring. A metal strike cap or ferrule helps a handle survive repeated blows, but it does not make an iron hammer a good choice.
Many chisels are sold bevel edge, with the angle ground into the sides and the front. The sets we compare list bevel angles from 24° to 28°, and 25° is the most common. A lower angle cuts a little more easily, while a higher angle is a bit tougher on the edge. For general work, any of these angles is fine if the chisel is sharp.
Match the technique to the task
There are two basic ways to drive a chisel: by hand and with a mallet. The table shows when each one fits.
The bevel is the angled face on the blade. Bevel up means the angled face is on top, and bevel down means it faces the wood. Bevel down gives you more control for guided cuts. Bevel up is useful for shallow, sweeping cuts.
| Technique | How it is driven | Best for | Key tip |
|---|---|---|---|
| Paring | Hand pressure only | Fine fitting, trimming to a line, cleaning joints | Hold the blade with one hand and push with the other, keeping both behind the edge |
| Chopping | Mallet taps | Removing waste from mortises, notches and hinge recesses | Make small cuts and clear chips often |
| Flattening | Hand pressure, light mallet taps to start | Dados, housings, and the floor of a recess | Work from both edges toward the middle |
| Shaving a face | Hand pressure, low angle | Smoothing a surface or end grain | Use a wide, sharp blade and take thin slices |
Cut with a chisel step by step
Here is a simple routine for most hand cuts. It works whether you are trimming a joint or removing waste from a recess.
Mark your cut line with a sharp knife or pencil. A knife line gives the chisel a small groove to sit in. Then follow the steps below.
- Secure the workpiece with clamps so both hands are free.
- Mark the line, and decide which side is the waste.
- Set the chisel just on the waste side of the line, with the flat back against the wood for paring.
- Grip the handle with one hand and steady the blade with the other, keeping both hands behind the edge.
- Start with a light cut, then deepen it in thin layers instead of removing everything at once.
- Cut across the grain in short strokes, and with the grain in longer, shallower ones.
- Stop and check your progress often, and clear the chips so they do not jam the blade.
How to chisel wood flat
Getting a flat surface is mostly about using the chisel's flat back as a reference. Start by removing the bulk of the waste in small steps, leaving a little wood above your final line. Then switch to light paring cuts to bring the surface down to the mark.
Work from both edges toward the center when you can. If you cut all the way through from one side only, the wood can tear out at the far edge. Cutting in from each side avoids that splintering.
Watch the grain. If the surface starts to tear or lift, turn the piece or approach from the other direction so the blade is cutting with the grain instead of lifting it. Use a straightedge or the flat side of a chisel across the surface to check for high and low spots.
For wide surfaces, a wide blade helps. Among the sets we list, the widest chisels reach 50 mm, which is useful for cleaning up large flat areas. Narrow blades are better for tight corners.
Cut a mortise or recess with a mallet
For deeper cuts, mark the outline of the recess. Make a few vertical cuts along the edges first, tapping the chisel with a mallet so the walls are crisp. Then remove waste in layers by tapping the chisel in at an angle and levering out the chips.
Take it slowly. Deep, forceful cuts can split the wood or push the blade off line. Check the depth as you go, and finish the walls and floor with careful paring. Keep your supporting hand well back from the blade while you strike.
Let the mallet do the work with controlled taps rather than hard swings. If you need more force than that, the chisel probably needs sharpening.
Keep the edge sharp and avoid common mistakes
Every chisel dulls with use. A honing guide and a sharpening stone let you restore the edge at a steady angle. Some sets include them, and some do not, so plan for sharpening gear if yours leaves them out. Steel type and hardness affect how long an edge lasts, and the sets we compare list hardness from 59 to 62 HRC where it is published.
Common mistakes are easy to fix once you know them:
- Using a dull chisel and forcing it.
- Cutting toward your own hand.
- Removing too much wood in one pass.
- Striking with an iron hammer.
- Using a chisel as a pry bar or screwdriver, which can chip the edge.
- Leaving the chisel loose on the bench where the edge can hit other tools.
Frequently asked questions
Should the bevel face up or down?
For most guided cuts, bevel down gives you more control. Bevel up can work for shallow, sweeping cuts. Try both on scrap wood to see which suits the task.
Can I use a regular steel hammer on a chisel?
It is better to avoid it. A wooden or plastic mallet is gentler on the handle. A steel hammer can deform handles and strike caps over time.
How do I stop wood from splitting when I chisel?
Take thin cuts, keep the blade sharp, and cut from both sides toward the middle. Also watch the grain direction so the edge does not wedge the wood apart.
How often should I sharpen a chisel?
Sharpen whenever it stops cutting cleanly or needs extra force. Light honing between jobs keeps the edge in good shape and saves time later.