What Is the 3 Lighting Rule for Offices?
The 3 lighting rule usually means three-point lighting: a key light, a fill light and a backlight that shape how a person looks on camera. For the room itself, the same idea is often applied as three layers: ambient, task and accent light. Neither version is a building code, so treat it as a simple planning habit for a comfortable, well-lit office.
 LED ENERGY PLUS LEP-2X43K4K5K405060ZEBest overall for grid ceilings
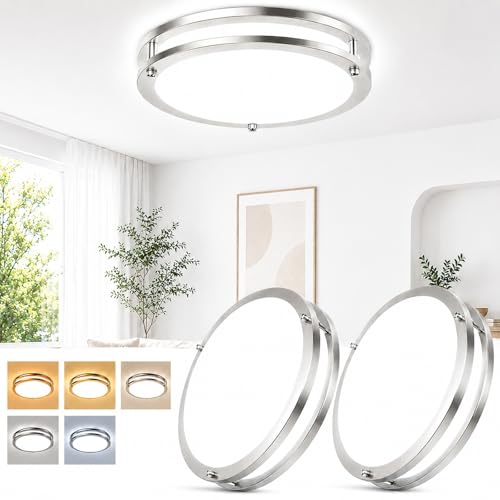 weddeg 63633008-03High CRI, top coverage rating
 LUTEC XDD-74200 lm compact fixture
Two meanings of the rule
Search the phrase and you will mostly find three-point lighting, a method from photography and video. It uses three lights, each with its own job, to give a subject depth and balance.
Interior design uses a similar idea under a different name. Instead of three lights aimed at a person, you plan three layers of light in a space. Both versions share one principle: no single light should do every job.
Offices need both. Video calls are routine, and the room still has to work for reading, typing and moving around. This guide covers each version, then shows how to combine them.
Three-point lighting for video calls
If you spend part of the day on camera, this is the version that matters. The three lights work together so your face is clear, your features have some shape, and you stand apart from the wall behind you.
- Key light: the main and brightest light, placed in front of you and slightly to one side. It does most of the work of showing your face.
- Fill light: a softer light from the opposite side. It reduces the harsh shadows the key light leaves behind.
- Backlight: a light behind and above you, aimed at your head and shoulders. It adds a thin edge of light that separates you from the background.
Three layers for the whole office
For the room itself, think in layers. Each layer covers a different need, and together they keep the space balanced instead of flat or glaring.
Ambient light is the general light that fills the room. Task light is focused light where you read or write. Accent light is a low-key layer that adds depth to walls, shelves or corners.
| Layer | Job | Common fixtures | Where it goes |
|---|---|---|---|
| Ambient | Fills the room so nothing feels dark | Ceiling fixtures, recessed lights, panels | Overhead, covering the whole space |
| Task | Gives focused light for reading and desk work | Desk lamp, adjustable arm lamp, under-shelf strip | Beside or above the work surface |
| Accent | Adds depth and reduces harsh contrast | Wall washer, shelf light, small table lamp | Walls, bookcases, corners |
Where your ceiling light fits in
Your ceiling fixture is almost always the ambient layer. In a room with no windows it carries even more weight, because there is no daylight to help. Our best lighting for office with no windows page compares fixtures on lumens, CRI and color temperature, which are the three specs that matter most for this layer.
On that page, small round lights list 2400 to 4200 lm, while large ring fixtures list 8000 lm or more. As one example, the 13 in two-pack from weddeg lists 3600 lm per light, CRI 90 and a coverage rating of up to 250 sq ft. That coverage figure is the highest any model on the page lists, and only a few makers publish one at all.
Color matters too. Settings around 5000 to 6500 K look cool and closer to daylight, which suits desk work. Warmer settings like 3000 K suit relaxed areas. A fixture that covers both ends gives you room to adjust, and the same page explains which models let you change color after install.
CRI is worth a look as well. It describes how true colors appear, and 90 is the top score in that group. In a windowless room, a higher CRI helps skin tones, paper and fabric look natural.
How to set up the three layers
You do not need special equipment. Work from the ceiling down to the desk, and add one layer at a time so you can see what each one changes.
- Start with the ambient layer. Pick a ceiling fixture sized for the room and set a daylight-style color for daytime work.
- Add a task lamp at the desk. Place it on the side opposite your writing hand so your hand does not cast a shadow on the page.
- Check your screen. Avoid a bright light directly behind or in front of the monitor, since both cause glare.
- Add accent light last. A small lamp or shelf light on a wall softens the contrast between a bright desk and dark corners.
- If you take video calls, place a soft light in front of you at about face height, with the ambient light acting as the fill. A dimmable fixture helps you balance them.
Safety and comfort notes
Turn off power at the breaker, not just the wall switch, before you replace or install any ceiling fixture. Confirm the power is off with a voltage tester, and follow the maker's wiring instructions. If you are unsure about wiring, hire a licensed electrician.
Use a stable ladder on a flat surface and have someone steady it. Ceiling work is a common source of falls.
Check that the fixture type matches your ceiling. Round flush mounts attach to a standard junction box, while lay-in panels need a suspended grid ceiling. Never exceed a fixture's rated wattage or dimmer limits.
For eye comfort, avoid pointing bright lights directly at your eyes or screen. If a light feels harsh, dim it or choose a diffused fixture. Take regular breaks from close screen work.
Frequently asked questions
Is the 3 lighting rule part of any building code?
No. It is a design and photography guideline, not a legal requirement. Offices do have their own lighting standards and local codes, so check those if you manage a commercial space.
Do I need all three layers in a small office?
Not always. A small room can work well with a good ceiling light and a desk lamp. Add an accent light if the room feels flat or the corners look dim.
Can one fixture cover all three layers?
Rarely. A ceiling light handles ambient needs, but a desk needs focused light and walls need softer touches. A remote-controlled, dimmable fixture can cover more ground, but a separate task lamp still helps.
What color temperature is best for video calls?
A neutral to cool white, around 4000 to 5000 K, usually looks natural on camera. The key is to keep all your lights at a similar color so skin tones look consistent.