What Is an Oscillating Spindle Sander and What Is It Used For?
An oscillating spindle sander is a stationary shop machine with a vertical sanding drum that spins and also moves up and down as it runs. It is used to smooth and shape curved edges, inside cutouts and rounded corners on wood. The up-and-down motion spreads wear across the whole drum and helps reduce heat and burn marks.
 Jet JOSS-SBest overall
 VEVOR BOSS200Mid-size benchtop with six sleeves
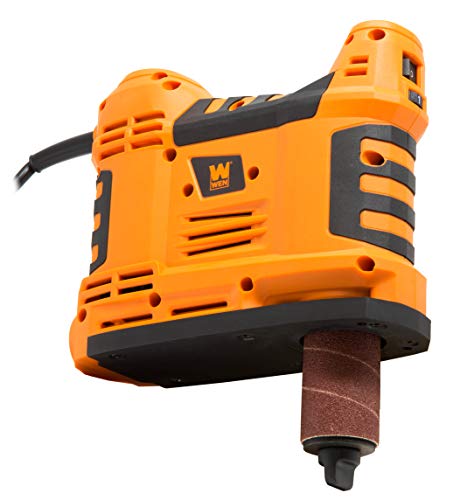 WEN HA5932Lightest in the lineup
How an oscillating spindle sander works
The machine has a table with a hole in the middle. A vertical spindle sticks up through that hole, and a cylindrical sanding sleeve slides over the spindle. The motor turns the spindle at speed, so the sleeve sands whatever you hold against it.
What sets this tool apart is the oscillation. While the spindle spins, it also travels up and down a short distance. That stroke means the workpiece contacts fresh abrasive over and over instead of one narrow band. Many people call it an oscillating drum sander, since the drum and the sleeve are the working part.
A plain spindle sander only spins. It still works, but it wears one strip of the sleeve and can build heat in that spot.
What it is used for
The spindle sander is a shaping and smoothing tool for curves. Once you cut a curved shape with a jigsaw or band saw, the edge is usually rough and slightly wavy. The sander removes saw marks and evens out the curve in a controlled way.
Common jobs include:
- Smoothing the edges of curved furniture parts, such as chair seats and rounded tabletops
- Cleaning up inside curves and cutouts, like handles, scallops and keyholes
- Sanding the edges of templates and patterns so repeat parts match
- Rounding corners on cabinet doors, boxes and picture frames
- Fitting small parts to a curve, such as inlays or joinery on shaped pieces
- Smoothing the edges of craft projects, toys and signs
Why the oscillation matters
Sanding wood creates friction, and friction creates heat. Heat can scorch the wood, leave dark burn marks and clog the sleeve with resin or dust. Because the drum moves up and down, the contact point keeps changing, so heat is spread out and the sleeve stays cleaner.
You also get longer sleeve life, since the whole height of the abrasive does the work. The finish tends to be more even too, with fewer grooves in the edge from one spot on the drum.
Oscillation helps most on woods that burn easily, such as cherry and maple, and on thick stock where you have a lot of edge to sand.
Choosing the right drum size
Spindle sanders come with several drum diameters. The rule is simple: the drum must be small enough to fit inside the tightest curve you plan to sand. Large drums work well on gentle curves and broad edges. Small drums reach into tight inside radii.
Here is a general guide to how drum size affects the work:
| Drum size | Best for | Trade-off |
|---|---|---|
| Small diameter | Tight inside curves, small cutouts, detail work | Wears faster and can leave a rougher surface on large edges |
| Medium diameter | General curved edges and everyday shaping | Cannot reach the tightest radii |
| Large diameter | Gentle curves, long edges, faster stock removal | Will not fit inside small curves |
How to use one step by step
Using the machine takes a little practice, but the basic method is the same each time.
- Pick a drum that fits your curve and match the sleeve grit to the job. Coarser grit removes material faster, and finer grit gives a smoother edge.
- Install the sleeve and fit the table insert that matches the drum, so the gap around the drum is small.
- Mark or cut your piece close to the final line first. A sander is for refining, not for removing large amounts of wood.
- Turn on the machine and let it reach full speed before touching the wood.
- Feed the workpiece against the rotation of the drum, using light, steady pressure. Keep the piece moving so you do not sand a flat spot.
- Check the edge often and switch to a finer grit for the last pass.
Safety notes
A spindle sander is simple, but it makes a lot of fine dust and spins fast. Wear safety glasses and a dust mask or respirator every time. Hearing protection is a good idea during longer sessions.
Connect the machine to a dust collector or shop vacuum if it has a dust port. Fine wood dust is a respiratory irritant and can be a fire risk when it builds up.
Unplug the sander before changing sleeves or inserts. Keep fingers and loose clothing away from the drum, and hold small pieces with a push block or clamp instead of bare fingertips. Never sand with the table insert removed.
Choosing a machine
If you often work with curves, a spindle sander saves a lot of hand sanding time. Look at the number of included drum sizes, the table size, the dust port, and how easily the sleeves change. Our best oscillating spindle sander comparison lines up these published specifications side by side.
When you compare models, think about the pieces you build. Larger workpieces need a bigger table, and tight detail work calls for smaller drums. You can read more in our oscillating spindle sander comparison before you decide.
Frequently asked questions
Is an oscillating spindle sander the same as an oscillating drum sander?
Yes, in everyday use people use both names for the same tool. The sanding drum is the cylindrical part on the spindle that does the work.
Can I sand a flat surface with a spindle sander?
It is not the right tool for that. A spindle sander is made for edges and curves. Flat panels are better handled with a belt sander, random orbital sander or a drum thickness sander.
Do I need a spindle sander if I own a belt sander?
A belt sander handles flat faces and outside curves, but it struggles with tight inside curves. A spindle sander fills that gap.
Can it sand metal or plastic?
Some people use them on plastics and soft materials with the right sleeve, but the tool is designed for wood. Check the maker's manual first, since plastic can melt from heat.