How to Wear a Welding Helmet and Get the Right Fit
Put on safety glasses first, then set the helmet on your head so the headgear band sits snug and level around your skull, not on your forehead or ears. Adjust the circumference, crown strap, lens distance and tilt until the helmet stays put when you nod, and the lens covers your sight line when lowered. Then match the shade and sensitivity to your process and test the helmet before you strike an arc.
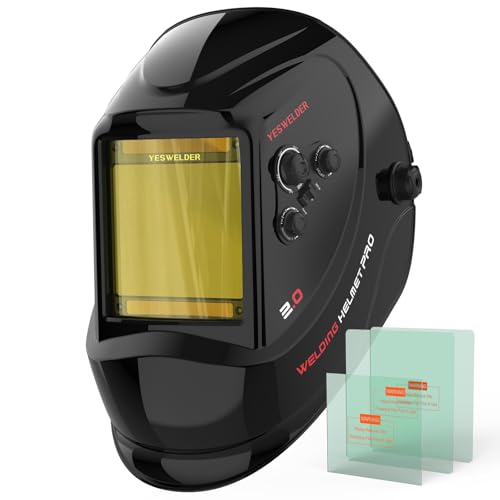 YESWELDER LYG-M800HBest overall
 ARCCAPTAIN Best with built-in light
 YESWELDER LYG-L600A-ABest certified budget
Start with the gear you wear under the helmet
A welding helmet is one layer of protection, not all of it. Before you adjust anything, put on safety glasses with side shields. They protect your eyes when the hood is up, during grinding, and from slag that can fly under the lens edge when you chip a weld.
Add hearing protection if you are grinding or working in a loud shop. Earplugs are easy to wear under a helmet. Large earmuffs can push the headgear out of position, so wear them while you set up the fit, not after.
Wear a snug cap or hair tie if you have long hair, and make sure your collar is covered. Fit changes with what you wear, so adjust the helmet with the same gear you will use while welding.
How to put on a welding helmet, step by step
The order matters. Getting the headgear right first makes every later adjustment easier.
Fit the helmet with the hood flipped or held up, and drop it down only after the headgear feels right.
- Put on your safety glasses and any hearing protection or cap.
- Loosen the headgear's circumference knob or ratchet so it slides on easily.
- Lower the helmet over your head with the headband sitting flat and level around your skull, about where a hat band would sit.
- Tighten the ratchet until the band feels snug but not tight. It should hold the helmet without leaving you with a headache.
- Set the crown strap so it takes some weight off the band and keeps the helmet from tipping forward.
- Nod your head sharply. If the helmet slips, tighten the band or shorten the crown strap.
- Lower the hood, look straight ahead, and check that the lens sits right in front of your eyes.
- Test the auto-darkening function by holding the lens toward a bright light or following the maker's test steps.
Adjustments that decide the fit
Most helmets share the same four or five adjustment points, though the controls look different from model to model. Check your manual for where each one is located. The table below shows what each one does and how to tell it is set correctly.
Change one adjustment at a time. If you change three at once and the helmet still feels wrong, you will not know which change helped.
| Adjustment | What it controls | Set correctly when |
|---|---|---|
| Headband circumference | How tightly the band grips your head | The helmet stays put when you nod, with no pressure points |
| Crown strap | Weight distribution over the top of your head | The helmet feels balanced, not pulling on your forehead or the back of your neck |
| Lens distance | Gap between your face and the lens | You have a wide view and your nose and chin do not touch the shell |
| Pivot tension | How easily the hood flips up and stays down | It stays up when raised and does not drop on its own |
| Tilt or angle | Where the lens sits relative to your eyes | You look through the middle of the lens when your head is in your normal working position |
Fine-tune the lens distance and angle
Lens distance is the adjustment people skip most often. If the lens sits too close, you lose peripheral view and may feel crowded. If it sits too far away, you see less of the joint through the viewing window and have to lean in to get a clear look.
A good starting point is a gap of about an inch or two between your face and the lens, with enough room for your safety glasses. Then check your working position. A helmet that fits well while standing upright can feel wrong when you are bent over a bench or sitting down.
Angle matters for comfort too. If you keep tilting your head back to see through the lens, the helmet is sitting too low. If you look down through the top edge, raise the tilt setting. Also check for light leaks around the sides and under the chin, since stray arc light can reach your skin and eyes.
Set shade, sensitivity and delay
Once the helmet fits, set the lens for the job. Auto-darkening helmets let you pick a dark shade for the process and amperage. Lower-amp TIG generally suits lighter dark shades, while heavy stick welding suits darker ones. Many helmets also offer a grind mode that keeps the lens light so you can grind without darkening.
Sensitivity controls how easily the lens reacts to the arc. Turn it up for low-amp or quiet arcs, and turn it down if bright shop lights or a neighbor's arc trigger the lens. Delay controls how long the lens stays dark after the arc stops, which matters when the metal is still glowing. A longer delay helps with high-amp work, and a shorter one gets you back to the joint faster.
Check the shade on a scrap piece before you weld on the real project. If you see glare, increase the shade number. If you cannot make out the joint, go one step lighter. Never weld with a lens that does not darken. If the lens fails to switch, stop and fix it before you continue.
How weight and specs affect long-term fit
A helmet that fits well still feels worse if it is heavy or poorly balanced. In our best welding helmet comparison, listed weights range from 1 lb to 3.72 lb. For example, the ARCCAPTAIN with a built-in light is listed at 1 lb, the YESWELDER LYG-M800H at 1.32 lb, and the ARCCAPTAIN GT995 at 2 lb. A lighter helmet is easier on your neck over a long session, but balance and headgear quality count as much as the number.
Viewing area also changes how a helmet sits. The LYG-M800H lists a 14.38 sq in view, while the LYG-L600A lists 6.08 sq in. A larger window lets you see more without moving your head, which can reduce the urge to shift the helmet. Both lists include helmets with adjustable headgear, which is the feature that makes a good fit possible.
If you wear a magnifying cheater lens, look for a helmet that accepts one. The LYG-M800H is listed as cheater lens compatible. Check the certification too: the LYG-L600A lists ANSI Z87.1 and CSA Z94.3, and you can compare the rest on the welding helmet comparison page.
Common fit problems and quick fixes
If something feels off after a few minutes of welding, small changes usually solve it. Fix the problem before you continue, since a helmet that moves around can also let light in.
- Helmet slides forward: tighten the band and shorten the crown strap.
- Pressure on your forehead: loosen the band slightly and move the crown strap to take weight off the front.
- Neck strain: tilt the helmet so you do not have to hold your head back, and check that the weight is balanced.
- Light leaks near your cheeks: move the lens closer or check that the shell fully covers your face.
- Hood drops on its own: tighten the pivot tension screws.
- Fogging: lift the hood between welds, and keep safety glasses clean.
Frequently asked questions
Should I wear safety glasses under a welding helmet?
Yes. They protect your eyes when the helmet is up, while grinding, and from flying slag or debris that can get past the helmet.
How tight should the headgear be?
Snug enough that the helmet stays still when you nod, but not so tight that it causes a headache or leaves deep marks on your forehead.
Can I wear a welding helmet over a respirator?
Often yes, but the fit changes. Put the respirator on first, then adjust the helmet and lens distance so the shell does not press on it and no light leaks in.
How often should I recheck the fit?
Check it at the start of each session and whenever you change gear or position. Headgear can loosen with use, so also look for wear on the ratchet and straps.