How to Waterproof Work Gloves Without Ruining Grip
Treat the back of the glove, the cuff and the seams, and leave the palm and fingertips mostly alone. Use a light, even coat of a water repellent that suits the material, let it cure fully, then test your grip on a real tool before you start work. Heavy waxes and oily products on the palm are the usual cause of lost grip.
 HANDLANDY 5972Best overall
 JUMPHIGH Washable mechanical work pick
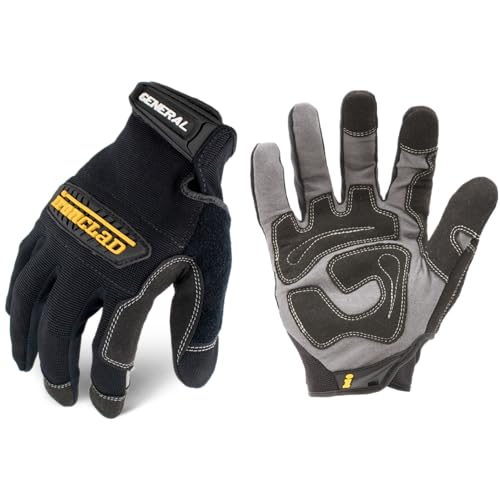 Ironclad GUG-04-LDouble-stitched shop glove
Why waterproofing can hurt grip
Grip comes from the palm surface. Leather, synthetic leather and suede have a slight texture and a bit of friction. Coated knit gloves get theirs from a tacky nitrile or polyurethane layer. A heavy waxy or oily finish fills in that texture and leaves a smooth, slick film.
That is why a glove that sheds water well can feel worse on a wet wrench than the untreated glove did. The goal is water resistance where the glove gets soaked, and bare, clean friction where your hand meets the tool.
It also helps to be realistic. A treatment makes a glove water repellent, not fully waterproof. Water can still get in at the cuff, through stitching and from the inside as sweat. If you need dry hands for hours in soaking conditions, a glove with a built-in waterproof liner is a better fit than a treated shop glove.
Match the treatment to the glove
Check the glove's material before you buy anything. Different materials take different treatments, and the wrong one can stiffen, darken or slicken the surface.
Our best mechanic gloves page lists palm material for every glove, so you can quickly see whether yours is synthetic leather, synthetic suede or a coated knit.
| Glove type | Where to treat | Treatment style | Grip risk |
|---|---|---|---|
| Real leather | Back, cuff and seams | Thin wax or leather conditioner, buffed | High if the palm is waxed |
| Synthetic leather palm with fabric back | Fabric back and cuff only | Spray-on fabric water repellent | Low if the palm is masked |
| Synthetic suede | Back and seams, test first | Light spray repellent | Medium, can flatten the nap |
| Nitrile or polyurethane coated knit | Usually nothing | Rely on the coating | High if you add anything to the palm |
Step by step: treat the glove, not the palm
This routine works for most leather and synthetic work gloves. Do it in a well-ventilated spot and keep the gloves off your hands while you apply product.
- Clean the gloves first. Dirt and grease block repellent from bonding. Wipe them with a damp cloth and mild soap, then rinse.
- Dry them fully, away from heat. Leave them at room temperature. A heater or hair dryer can shrink and crack leather.
- Mask the palm and fingertips if you are using a spray. A piece of cardboard slid inside the glove, or a folded paper towel over the palm side, works fine.
- Apply a thin, even coat to the back of the hand, the cuff and the seams. Two light coats beat one heavy one.
- For leather, rub a small amount of wax-based product into seams and the back, then buff off the excess with a clean cloth.
- Let the gloves cure for the time on the product label before use.
- Test the grip. Pick up a dry tool, then a damp one. If the palm feels slick, wipe it with a lightly damp cloth and a little mild soap to remove residue.
Handling the palm if you must treat it
Sometimes the palm and fingers are where water gets in first, especially on leather gloves used outdoors. In that case, use the least product that works.
Apply a very small amount, rub it in until the surface no longer feels greasy, and buff. Leather should look slightly conditioned, not shiny. If you can see a film, there is too much on it.
Skip touchscreen fingertips. Several of the gloves on our spec sheet, such as the JUMPHIGH synthetic leather glove and the Mechanix Wear Original, list touchscreen compatibility. A repellent or wax on those fingertips can reduce that function, so keep them clean.
Go easy on padded areas too. Foam inside the palm and knuckles can soak up liquid products and stay damp longer. Spray lightly from a distance rather than soaking the glove.
Look at what the glove already does
Some gloves already have water-shedding features, and some are not meant for wet work at all. Check the listing before adding anything.
The Mechanix Wear FastFit lists ripstop material along the back of the fingers that gives water repellence. That glove may need little more than a light refresh on the back. On the other end, the DULFINE DF148 polyurethane coated glove is listed for dry and slightly wet or oily conditions, and the maker does not recommend it for heavy oily or wet conditions. Waterproofing a thin knit like that will not change its stated limits.
Our mechanic glove comparison also includes a nitrile-coated knit glove listed for wet and dry work. If wet jobs are routine for you, starting with a glove built for it is easier than modifying one that was not.
Keep treated gloves working over time
Treatments wear off, especially on high-contact areas. Reapply to the back and seams when water stops beading, rather than waiting until the glove is soaked through.
Washing matters too. One listing on our spec sheet says to machine wash cool and air dry to keep the glove's size consistent. Washing also strips repellent, so plan to retreat after a wash. Check the maker's care instructions first, since not every glove is machine washable.
Rotate between two pairs if you can. A glove that dries fully between uses lasts longer and feels better than one that stays damp.
Safety notes
Use repellent sprays outdoors or with good ventilation. Many contain solvents that irritate the lungs and are flammable, so keep them away from flames, pilot lights and hot engine parts, and let gloves dry before going near heat.
Do not treat gloves that are rated or used for a specific protective purpose, such as electrical insulation or chemical resistance, unless the maker says it is fine. A coating can change how they perform.
Slick gloves are a hazard around rotating tools and moving parts. If grip feels off after treatment, stop and fix it before you use power tools. Wear eye protection when using sprays, and wash your hands after handling waxes and solvents.
Frequently asked questions
Can I use cooking oil or household oil to waterproof leather gloves?
It is best to avoid it. Household oils can leave a greasy surface, soften leather too much and attract dirt. A product made for leather or fabric is safer for grip.
Will waterproofing make my gloves less breathable?
It can, especially with heavy wax or a thick coating. Light spray coats on the back of the glove are less likely to trap heat and sweat than a fully sealed finish.
How do I know the treatment is cured?
Check the product label for the cure time. The glove should feel dry, not tacky or oily, and water should bead on the treated areas.
What should I do if the palm now feels slippery?
Wipe it with a damp cloth and a little mild soap, rinse lightly and air dry. Repeat if needed. If it stays slick, the glove may be better used for lighter tasks.