How to Use an Oscillating Spindle Sander on Wood
Yes, an oscillating spindle sander works very well on wood, especially for smoothing curved edges, inside curves, and shaped cutouts. Pick a drum that fits your curve, choose a grit that suits the job, and feed the workpiece against the drum's rotation with light, steady pressure. The up-and-down oscillation spreads wear across the sleeve and leaves a smoother edge than a plain spinning drum.
 Jet JOSS-SBest overall
 VEVOR BOSS200Mid-size benchtop with six sleeves
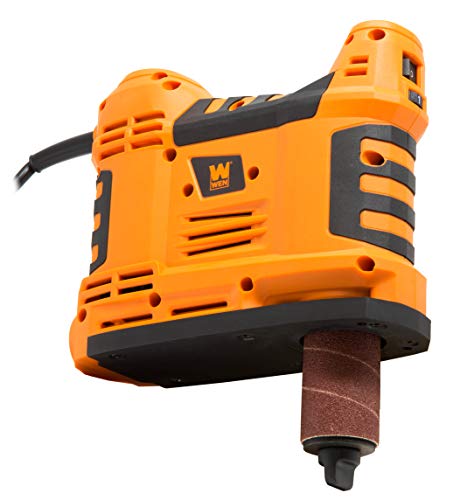 WEN HA5932Lightest in the lineup
What an oscillating spindle sander does
A spindle sander is a vertical drum wrapped in an abrasive sleeve that spins. The oscillating kind also moves the drum up and down as it turns. That extra motion spreads the sanding action over more of the sleeve, so it loads up with dust more slowly and is less likely to leave ridges or burn marks on the wood.
It is the right tool when the edge you want to smooth is curved. A belt or disc sander handles flat edges well, but it struggles with tight inside curves. A spindle sander lets you follow those curves with the wood resting flat on the table.
If you are still choosing a machine, our best oscillating spindle sander comparison lines up the published specifications side by side, so you can match drum sizes and table features to the work you do.
Set up before you switch it on
Good results start with the setup. Take a few minutes to check these points before every session.
Unplug the machine whenever you change a sleeve, drum, or table insert. Then work through the list.
- Choose the drum size that matches the tightest curve in your project. The drum must be smaller than the curve you want to sand, or it will not fit.
- Match the table insert to the drum. A small gap between the drum and the insert keeps thin pieces from catching.
- Fit a fresh sleeve that is snug on the drum, with no tears or worn patches.
- Make sure the drum is fully lowered or raised to the position the manual describes, and that all clamps and nuts are tight.
- Connect a dust collector or shop vacuum to the dust port if your machine has one.
- Clear the table of offcuts and tools.
Choose the right drum and grit
A small drum reaches into tight curves but removes wood in a narrow band. A large drum is gentler on broad curves and gives a flatter, more even finish. Many woodworkers keep several drum sizes on hand and swap them as the work changes.
For grit, start coarse only if you need to remove saw marks or reshape the edge. Then move through finer grits to smooth it. Skipping steps leaves scratches that show up later under a finish.
| Job | Drum choice | Grit approach |
|---|---|---|
| Removing saw marks or reshaping | Largest drum that fits the curve | Coarse grit first |
| Smoothing a tight inside curve | Smallest drum that fits | Medium grit |
| Final edge smoothing before finish | Drum that fits the curve | Fine grit |
| Softwoods that clog easily | Any size, with a clean sleeve | Medium grit, light pressure |
Step-by-step: sanding a curved edge
Cut your piece close to the line first with a band saw or scroll saw. A spindle sander removes a little wood at a time, so it is best for finishing, not for heavy shaping.
Then follow these steps.
- Mark your final line on the wood so you can see how much to remove.
- Turn the sander on and let it reach full speed before the wood touches the drum.
- Rest the workpiece flat on the table and bring the edge to the drum slowly.
- Feed the wood against the direction the drum is turning. This presses the piece onto the table instead of pulling it out of your hands. Check the rotation direction on your machine.
- Use light, even pressure and keep the wood moving along the drum. Holding still in one spot cuts a flat or a groove.
- Sand just up to the line, then stop. Check the edge by eye and by touch.
- Change to a finer sleeve and repeat to remove the scratches from the coarser grit.
Technique tips for cleaner results
Let the machine do the cutting. Pressing hard slows the drum, builds heat, and can scorch the wood. Burn marks are common on hardwoods such as maple and cherry, so keep the piece moving and use a sharp, clean sleeve.
Use the full height of the sleeve. If you only sand with the center, that part wears out while the rest stays fresh. The oscillation helps, but shifting the workpiece up and down slightly where you can also spreads wear.
Pay attention to the grain. End grain sands quickly and can look rough, while long grain sands smoothly. On curves, the grain direction changes as you go around, so expect the surface to feel different from one spot to the next and take extra care at those transitions.
For inside curves, match the drum to the curve as closely as you can. A drum that is only a little smaller than the curve follows it smoothly and avoids wavy spots. Clean the sleeve with an abrasive cleaning stick when it starts to glaze with resin or dust.
When you compare machines, check the published oscillation stroke, drum sizes included, and table size. Our oscillating spindle sander comparison lists these specifications so you can match them to your typical projects.
Safety notes
Sanding wood creates fine dust that is unhealthy to breathe over time, and some woods can irritate skin and lungs. Wear a dust mask or respirator rated for fine particles, and use dust collection whenever possible.
Wear safety glasses, because small chips and abrasive grains can fly off. Hearing protection is a good idea during long sessions, since a sander and a dust collector together can be loud.
Keep fingers clear of the drum, especially when sanding small pieces. If a piece is too small to hold safely, use a clamp or a jig instead. Avoid loose sleeves, jewelry, and long hair that could catch on a moving drum.
Always unplug the sander before changing sleeves or drums. Fine dust can also ignite, so empty the dust collector regularly and keep it away from sparks.
Frequently asked questions
Can I use a spindle sander on straight edges?
You can, but it is not the best choice. The drum tends to leave a slightly wavy edge on long straight pieces. A belt sander or a sanding block gives a flatter result.
How is an oscillating sander different from a regular spindle sander?
A regular spindle sander only spins. An oscillating one also moves the drum up and down, which spreads wear and helps reduce scratches and burn marks.
Why is my wood burning on the sander?
Burning usually comes from pressing too hard, holding the wood in one spot, or using a clogged or worn sleeve. Lighten your pressure, keep moving, and replace or clean the sleeve.
Can I sand plywood and MDF with a spindle sander?
Yes, both work well. They produce a lot of fine dust, so use dust collection and a respirator, and expect the sleeve to wear faster.