How to Use a Wood Planer Correctly: Beginner Guide
Use a thickness planer by first flattening one face of the board, then feeding it with the grain in shallow passes, flipping it between passes, and supporting it on both ends. Wear eye and hearing protection, check the wood for nails and loose knots, and never stand directly behind the board. Light cuts and patience give smoother results than trying to remove a lot of wood at once.
 WEN PL1337Best overall
 CRAFTSMAN CMEW320Longest warranty listed
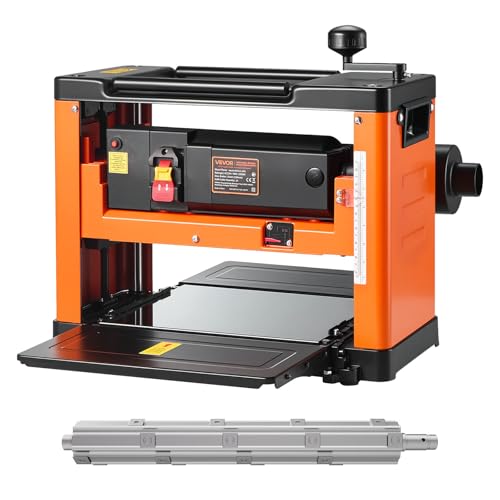 VEVOR M1B-LS-3301Fastest cutterhead speed
What a planer does and does not do
A thickness planer makes a board a consistent thickness. It does not flatten a warped board by itself. The feed rollers press the board flat as it passes through, then it springs back to its curve after the cut. The result is a board of even thickness that is still cupped or bowed.
To get a truly flat board, flatten one face first. A jointer does this job, or you can ride the board on a flat carrier sled with shims under the high spots. Once one face is flat, the planer can make the opposite face parallel to it. Run the flat face down on the bed every time.
If you are still choosing a machine, our best wood planer comparison lists capacity, cutterhead type, and weight side by side, so you can match a model to the boards you plan to work.
Get the machine and workspace ready
Set the planer on a sturdy bench or stand at a height where you can feed boards without bending. Benchtop models in our comparison range from 60 lb to 91.25 lb, so plan where it will sit before you lift it, and ask for help or use a stand if needed. Clamp or bolt it down if the manual allows.
Leave plenty of clear space in front of the infeed and behind the outfeed, at least as long as your longest board. A board that hits a wall or a shelf mid-cut can jam or cause snipe.
Connect dust collection. Planers throw out a lot of chips fast. Models such as the WEN PL1337 list a combination 2-1/2 inch and 4-inch dust port, and the DEWALT DW735 uses fan-assisted chip ejection. A shop vacuum or dust collector on the port keeps the cutterhead clear and the air cleaner.
Safety checklist before you switch on
Planers are loud and can throw chips and splinters. Run through this list every session:
- Wear safety glasses or a face shield and hearing protection. Add a dust mask, since fine dust builds up quickly.
- Unplug the machine before you change knives, inserts, or clear a jam. Never reach into the cutterhead area while it is plugged in.
- Remove rings and watches, tie back long hair, and skip loose sleeves or gloves that can catch.
- Check each board for nails, screws, staples, and grit. Metal ruins cutting edges and can fly out of the machine.
- Skip boards with loose knots, cracks, or heavy twist. They can break apart or kick back.
- Stand to the side of the board path, not directly behind the board.
- Use a dedicated, properly rated outlet and cord. These machines pull a lot of current, and our listings show 15-amp motors on several models.
Step-by-step: planing your first board
Once the board is flat on one face and the machine is set up, follow these steps.
- Read the grain. Look at the edge of the board and find which way the grain rises toward the surface. Feed so the cutters move with that slope, like petting a cat from head to tail. Cutting against it causes tearout.
- Set the depth. Lower the head until the board just fits, then raise it back and take a shallow cut. A common beginner range is about 1/32 to 1/16 inch per pass. Use the depth scale or removal gauge. The WEN lists an onboard material removal gauge, and the CUTECH lists a depth of cut indicator on the front.
- Start with the flat face down. Switch on the machine, let it reach full speed, and feed the leading end into the infeed table until the rollers grab it.
- Let the machine pull the board. Keep your hands to the sides and support the board lightly, without pushing hard or lifting it. As the end nears the outfeed, support the board from the back side so it does not tip.
- Flip and repeat. Take a pass on one face, flip the board, and take a pass on the other. Alternating faces keeps the wood from cupping as stress releases.
- Lower the head a small amount each time until you reach your final thickness. Make the last pass a very light one for the best surface.
Control snipe and tearout
Snipe is a shallow dip at the start or end of a board. It happens when the board tips as it enters or leaves the rollers. Support long boards with outfeed and infeed stands set to table height, and keep steady, even pressure on the board as it enters and exits.
Some planers include features meant to reduce it. Our listings mention a four-column carriage lock on the DEWALT DW734 and a four lead-screw design on the CUTECH 40600H. Even with these, light passes and good support still help. Another trick is to feed boards end to end in a row, so the cutters never see a free end between them.
Tearout is rough, chipped grain, often around knots or on wavy wood. Light cuts and correct grain direction help most. Slowing the feed rate gives more cuts per inch, so the finish is smoother. The WEN lists feed rates of 26 FPM and 16 FPM, and the DEWALT DW735 lists 96 or 179 cuts per inch. Use the slower setting for the final pass on figured wood.
Choosing the right setup for your boards
Match the machine to the stock you plan to work. The table below shows how a few models in our comparison differ on points that affect how you plan boards.
Check width and thickness first. A 13 inch machine will not take a 14 inch board, and a thick beam will not fit under the head.
The two-knife machines have fewer cutting edges than the spiral models, so they can leave a different surface on tricky grain. Our wood planer comparison explains the trade-offs between cutterhead types in more detail.
| Model | Max width | Cutterhead | Weight |
|---|---|---|---|
| WEN PL1337 | 13 in | 26-knife spiral | 69 lb |
| CRAFTSMAN CMEW320 | 12.25 in | 2 knife | 62.92 lb |
| DEWALT DW735 | 13 in | 3 knife | 91.25 lb |
| CUTECH 40600H | 13 in | 26-knife spiral | Not listed |
A note on hand planers
If you meant a hand tool, the idea is similar. With a hand plane, set a shallow blade, work along the grain, and keep pressure on the front of the plane at the start of the stroke and on the back at the end. Clamp the board so it cannot move, and keep your free hand behind the blade path.
An electric hand planer is faster but removes wood quickly, so practice on scrap first. Always let the cutter reach full speed before touching the wood, and set the tool down only after the blade has stopped.
Frequently asked questions
Can I plane wet or green wood?
It is best to avoid it. Wet wood clogs the cutterhead, tears easily, and can shrink or warp after planing. Let lumber dry to a stable moisture level first.
How do I know when the knives or inserts are dull?
Look for rough or fuzzy surfaces, burn marks, or ridges running along the board. Straight-knife heads may need new knives, while spiral heads let you rotate individual inserts.
Can I plane a board that is very short?
Short pieces can tip, jam, or be thrown back. Check your manual for the minimum length, and plane short parts by running them as part of a longer board and cutting them afterward.
Why does my board come out thinner on one side?
The board may not be sitting flat, or the cutterhead may be out of alignment. Check that the bed is clean and the board rests flat, then follow the manual for adjusting the head.