How to Use a Wood Carving Chisel Set Step by Step
Clamp your workpiece, keep both hands behind the cutting edge, and take thin shavings with a sharp chisel. Push by hand for light paring, and tap with a mallet for heavier cuts. Start with a mid-width chisel on softwood, cut with the grain, and sharpen as soon as the edge begins to tear the wood instead of slicing it.
 Mount Jasper Wood ChiselBest overall
 AZUNO WCS10AWide range, full kit
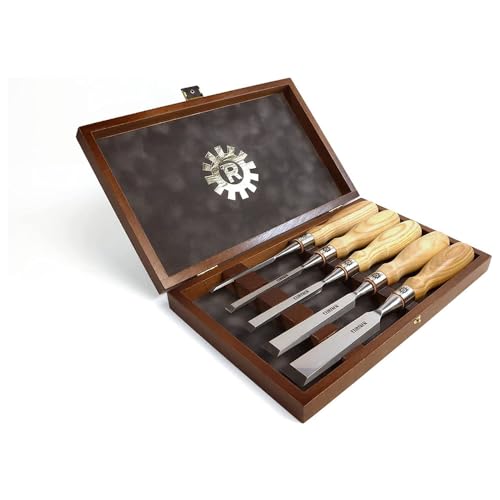 Narex 853600Hardest blades listed
Set up your workspace and protect yourself
A chisel is simple, but the edge is sharp enough to cause a deep cut in a moment. Most injuries come from holding the wood in one hand while pushing a chisel toward it with the other. Good setup removes that risk before you make your first cut.
Work at a bench or sturdy table at a height where you can stand over the work and use your body weight. A bench with a flat top and a stop on one side makes everything easier.
- Clamp the wood to the bench so it cannot slide. Never hold it in your hand or against your lap.
- Keep both hands behind the cutting edge at all times. The hand that guides the blade stays behind the edge, never in front of it.
- Wear safety glasses, because chips and splinters can fly, especially when you tap with a mallet.
- Wear a cut-resistant glove on the hand that holds or steadies the work if you are new to this.
- Keep blade guards or caps on any chisel you are not using, and never carry a chisel with the edge exposed.
- Use a mallet or plastic hammer for tapping. Our best wood chisel set guide notes that makers advise against iron hammers.
Choose the right chisel for the job
A good set gives you several widths so you can match the tool to the cut. Narrow chisels suit detail work and tight corners. Wide chisels flatten surfaces and remove larger areas of waste. Many sets cover roughly 6 mm up to 50 mm, and sets that stop near 25 mm suit smaller projects.
If you are starting out, reach for a middle width first. It is easy to control and forgiving. Move to narrow or wide chisels once you understand how the wood reacts.
| Job | Chisel width to reach for | Why |
|---|---|---|
| Fine detail and small corners | Narrow | Easy to steer and fits tight spaces |
| General shaping and trimming | Medium | Balanced control and material removal |
| Cleaning a flat surface or wide recess | Wide | Wider edge keeps the surface level |
| Cutting a mortise | Close to the mortise width | The walls of the cut guide the blade |
Step by step: your first cuts
Practice on a piece of scrap softwood before you touch your real project. Pine is a common choice because it cuts easily and shows you what the grain is doing. Draw a line with a pencil so you have something to cut to.
- Secure the wood in a clamp or vise and make sure you can reach it comfortably.
- Pick a medium-width chisel and check that the edge is sharp. A sharp edge should slice a thin shaving, not crush the fibers.
- Hold the handle in your dominant hand, with the palm behind it. Rest the fingers of your other hand on the blade near the edge, behind the cutting point, as a guide.
- Place the bevel against the wood, bevel side down for most paring cuts, and raise the handle slightly until the edge bites.
- Push forward in a smooth motion and take a thin shaving. Aim for several light passes rather than one deep one.
- Stop short of your pencil line, then take a final light pass to reach it. This keeps the cut clean and gives you room to correct mistakes.
- Check your work often. Brush away chips so you can see the surface.
Read the grain before every cut
Wood splits and tears along its grain. If you cut against it, the chisel can dig in and lift a splinter. If you cut with it, the wood peels away smoothly and leaves a clean surface.
Look at the edge of the board and notice which way the lines slope. Cut in the direction that leaves the fibers supported by the wood beneath. If the surface starts to look ragged, turn the piece around or approach from the opposite direction.
Take extra care near the end of a cut. When the chisel reaches the far edge, the wood can break out in a chip. Work in from both ends toward the middle, or clamp a scrap board behind the cut to support the fibers.
Use a mallet for heavier work
Hand pressure is enough for light paring. For tougher cuts, such as chopping a mortise or removing a lot of waste, tap the handle with a mallet. Use short, controlled taps instead of big swings, and keep your eyes on the edge.
A metal strike cap or ferrule on the handle helps it survive repeated mallet blows. Hardwood handles feel traditional, while rubber and plastic handles are shaped for grip and comfort. Whichever you choose, strike only the handle end, never the blade.
When chopping across the grain, make a vertical cut first and then take a shallow angled cut up to it to lift out the waste. Work in layers rather than trying to reach full depth in one go. Take care not to chop past your layout lines.
Keep the edge sharp
Dull chisels are more dangerous than sharp ones because you have to push harder, and they slip. If you need force to make a cut, or the wood looks crushed or fuzzy, it is time to sharpen.
Most chisels are ground to a set bevel angle. In the sets we compare, listed bevel angles run from 24° to 28°, and 25° is the most common. A honing guide holds the blade at that angle while you work it across a sharpening stone, so you get the same edge each time.
Use the coarse side of the stone to restore a dull edge, then the finer side to polish it. Hold the guide steady, use even strokes, and wipe the blade clean when you finish. If a set does not include a stone and guide, plan to get them separately. Our wood chisel set comparison shows which sets include a sharpening kit.
Storage and common mistakes
Store chisels so the edges do not knock against each other. A case, a wooden box, or individual blade guards all work. Wipe the blades dry after use, since moisture can cause rust.
Watch for a few habits that cause trouble:
- Using a chisel as a pry bar or screwdriver, which can chip or bend the blade.
- Cutting toward your body or toward a hand holding the work.
- Taking cuts that are too deep, which makes the chisel hard to control.
- Ignoring a dull edge and pushing harder instead of sharpening.
- Working on unsecured wood that can shift mid-cut.
Frequently asked questions
Should the bevel face up or down?
For most paring and flattening, keep the bevel down against the wood so it guides the cut. Turn the bevel up when you want to take a very shallow cut or work into a corner, and watch the angle closely.
What wood should a beginner practice on?
Clear, straight-grained softwood such as pine is a common starting point. It cuts easily and shows how the grain affects the chisel. Move to hardwoods once your control improves, and expect to sharpen more often.
How do I know my chisel is dull?
A dull chisel crushes or tears the wood, leaves a fuzzy surface, and needs more force to push. A sharp one slices a thin, clean shaving with light pressure.
Can I use the whole set on one project?
Usually not. Most projects need two or three widths. Pick the sizes that match your cuts and leave the rest guarded in the case.