How to Use a Polisher to Remove Scratches From Car Paint
Wash and dry the car, tape off nearby trim, then work a small section at a time with a foam pad, a little polish and slow, overlapping passes. Check the scratch after each round and stop as soon as it fades, because clear coat is thin and you can only remove so much. Polishing fixes light scratches in the clear coat. Scratches that catch your fingernail usually need professional repair or touch-up paint.
 Niusken PGJ-21V-RED
 Niusken PGJ-21V
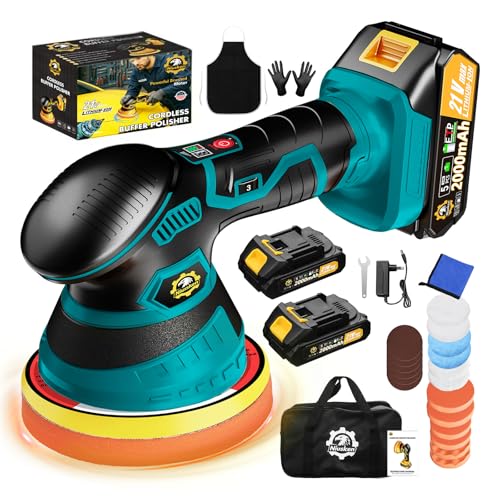 Niusken PGJ-21V-BLUE
What polishing can and cannot fix
Modern car paint has several layers. The top layer is clear coat, which gives the shine and protects the color underneath. A polisher spins or oscillates a pad with a fine abrasive that levels the clear coat a tiny amount, so the edges of a scratch round off and stop catching the light.
That means polishing works best on light surface marks, such as swirl marks, faint scuffs and hairline scratches from washing or brushing past something. It does not fill a scratch. It removes a thin layer of paint around it, so a scratch must be shallow enough to level out.
Try the fingernail test. Wipe the area clean and drag a fingernail lightly across the scratch. If your nail glides over it, polishing will probably help. If your nail catches in the groove, the scratch likely goes through the clear coat. If you can see white, gray or bare metal, polishing alone will not fix it, and you will need touch-up paint or a body shop.
What you need before you start
Gather everything first so you are not hunting for supplies with polish drying on the paint.
- A machine polisher. A dual action (random orbital) model is the more forgiving choice for beginners.
- Foam polishing pads in a cutting grade and a finishing grade, plus clean spares
- Compound or polish. Compounds cut more, and polishes refine the finish.
- Several clean microfiber towels
- Painter's tape for plastic trim, rubber seals and sharp panel edges
- Car wash soap, a wash mitt and a bucket
- A bright light, such as a handheld LED, to see scratches clearly
- Safety glasses, and ear protection if your polisher is loud
Prepare the car and the area
Park in a shaded, cool spot. Polish dries faster on hot paint and gets harder to wipe off. Wash the whole car, or at least the panel you are working on, and dry it with a clean towel. Any grit left on the surface can be dragged under the pad and create new scratches.
Mask off trim, badges, door handles and rubber seals with painter's tape. Polish stains textured plastic and is hard to remove from crevices. Tape also protects trim from a spinning pad.
Mark out a working section about two feet square. Smaller sections give you better control and let you judge your progress. Your bright light helps here, because scratches that vanish in shade can show up again in sunlight.
Step-by-step: polishing out the scratch
Go slowly and keep every pass light. The pad and polish do the work, so you do not need to lean on the machine.
- Prime a clean pad by dabbing a few small dots of polish on it, about the size of a pea each. Too much product makes a mess and cushions the abrasive.
- Set the pad flat on the paint before you switch the machine on. Starting the polisher in the air can fling polish across the car.
- Spread the polish at the lowest speed setting, using slow arm movements across the section.
- Raise the speed to a low or medium setting and work in overlapping passes. Go side to side, then up and down, keeping the pad flat.
- Use light, even pressure and keep the polisher moving. Never let it rest in one spot, especially near edges and body lines where paint is thinnest.
- Switch off the machine while the pad is still on the paint, then lift it away.
- Wipe the residue with a clean microfiber towel, then inspect the area under your light.
- Repeat only if needed. When the scratch is gone or no longer improving, finish with a softer pad and a fine polish to bring back the gloss.
How much should you polish a scratch?
Less than you think. Each pass removes a small amount of clear coat, and you cannot put it back. A good rule is to work in rounds and check the result after each one. Two or three rounds on the same spot is often a sensible limit. If a scratch has barely changed after that, it is probably too deep for polishing.
Start with the gentlest combination, a finishing pad and fine polish, and only move to a more aggressive pad or compound if the scratch will not budge. Stepping up gradually protects your paint.
This table gives a rough guide to what to expect.
| Scratch type | Fingernail test | Likely approach |
|---|---|---|
| Swirl marks and hairline scuffs | Nail glides over | Fine polish on a finishing pad |
| Light scratch in the clear coat | Nail barely notices | Polish on a cutting pad, then refine with a finishing pad |
| Deeper clear coat scratch | Nail catches slightly | Cautious compound work, with realistic expectations |
| Through the clear coat to color or primer | Nail catches firmly | Touch-up paint or professional repair |
Choosing the right polisher
If you are buying a machine for this job, the type matters more than any single feature. Dual action machines move the pad in a random pattern, which spreads heat and makes burning paint much less likely. Rotary machines spin on a single axis, cut faster and are better left to experienced users.
Our comparison of the best polisher for car use is a good place to start if you mainly want to remove scratches and restore shine on your own vehicle. If you plan to go further into the craft, the best polisher for car detailing page covers machines suited to regular detailing work.
For deeper defects and larger jobs, see our guide to the best polisher for paint correction. If you want a general overview of the category, our page on the best polisher lays out the options side by side, based on published specifications.
Safety and aftercare
Wear safety glasses, because polish spatters. Use hearing protection if the machine is loud. Keep the power cord behind you and clear of the pad, since a cord caught under the pad can jerk the machine out of your hands. Use a corded model only with a properly grounded outlet, and never polish in wet conditions. Do not use a polisher near water or with damp hands.
Be extra careful on edges, ridges and corners. Paint is thinner there, and pads can burn through it quickly. Hold the polisher at a slight angle to the edge, or polish edges by hand.
When you finish, wipe the car down to remove leftover residue. Polishing strips away any wax or sealant, so apply a fresh coat of wax or paint sealant to protect the surface. Wash used pads with mild soap and let them dry completely before storing them.
Frequently asked questions
Can I use a polisher on a deep scratch?
Polishing can soften the edges of a deeper scratch so it looks less obvious, but it cannot remove one that goes through the clear coat. Those need touch-up paint or professional repair.
Is a dual action or rotary polisher better for beginners?
A dual action polisher is the safer choice. Its random motion spreads heat and lowers the risk of burning the paint, while a rotary machine takes practice to control.
Can I polish a car in direct sunlight?
It is best not to. Hot paint makes polish dry too quickly, which makes it harder to work and wipe off. Shade or a cool garage gives better results.
Should I polish by hand or with a machine?
Hand polishing can handle a single faint mark with patience, but a machine gives more even results and works faster on larger areas or swirl marks.
Do I need to wax after polishing?
Yes. Polishing removes the existing protection, so a fresh coat of wax or sealant helps protect the paint and keeps the shine.