How to Use a Multimeter to Test Automotive Wiring
Set your multimeter to DC volts, put the black lead on a clean ground, and touch the red lead to the wire or terminal you want to check. A reading near battery voltage means the wire has power. For breaks and bad connections, switch the circuit off and use continuity or resistance, and use a voltage drop test to find hidden resistance while the circuit is running.
 allsun EM133AWidest RPM range
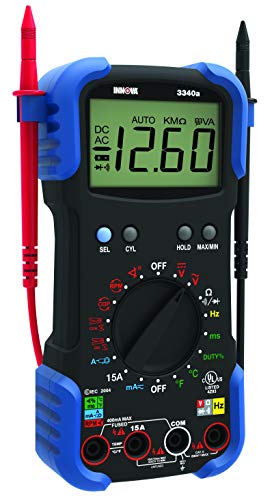 Innova 3340Lightest and simplest
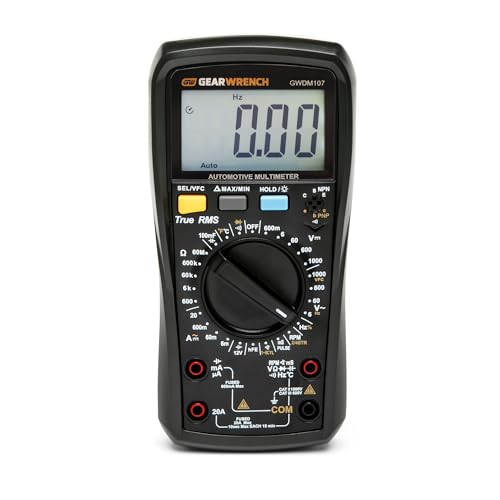 GEARWRENCH GWDM107_1Highest safety rating
Get set up and stay safe first
Most car wiring runs at 12 volts DC, which will not shock you the way household power can. The real risks are shorts, sparks and damaged electronics. A metal tool or a loose lead across the battery terminals can create a hard short, heat up fast and burn skin.
Take off rings and watches before you work near the battery. Wear safety glasses, because a battery can vent gas and a shorted wire can spit sparks. Keep leads and loose clothing away from the fan and belts, and never probe near moving parts with the engine running unless the test truly requires it. Hybrid and electric vehicles have high voltage systems with orange cabling. Do not probe those with a basic meter.
- Check that the test leads have no cracked insulation or exposed metal.
- Plug the black lead into COM and the red lead into the voltage port for most tests.
- Move the red lead to the amp port only for current tests, and move it back afterward.
- Use back-probe pins or thin probes on connectors so you do not spread the terminals open.
- Never test continuity or resistance on a live circuit.
Check whether a wire has power
This is the test most people want first. Turn the dial to DC volts (marked V with a straight line, sometimes V DC). If your meter is auto-ranging, it will pick the scale for you. If it is manual, pick a range just above 12, such as 20 volts.
Start by testing the battery so you know your meter and your reference are good. With the engine off, a healthy, fully charged battery usually reads around 12.6 volts. With the engine running, a working charging system typically reads about 13.7 to 14.7 volts.
Now test the wire. Connect the black lead to a known good ground, such as bare metal on the chassis or the negative battery terminal. Touch the red probe to the metal of the wire end, the terminal or the back of the connector. Turn the circuit on (key on, switch on or lights on) as needed.
- A reading close to battery voltage means the circuit has power at that point.
- A reading of zero means no power is reaching that point. Move back toward the source to find where it stops.
- A low or wandering reading, such as 5 or 9 volts, points to a poor connection, corrosion or a failing ground.
Test continuity and resistance with the power off
Continuity tells you whether a wire is one unbroken path. Turn the circuit off, and for extra safety disconnect the negative battery cable. Set the dial to the continuity symbol, which looks like a sound wave or diode, or to ohms. Touch the probes together first. The meter should beep or show close to zero ohms.
Then put one probe on each end of the wire. A beep or a very low reading means the wire is intact. A reading of OL (open loop) or an infinite display means the wire is broken somewhere. Wiggle the harness gently while you watch the screen. A reading that flickers points to a break inside the insulation or a loose pin.
Resistance mode is also useful for checking sensors, switches and coils against the values in a repair manual. Always unplug the part from the car first, or the meter may read through other circuits and give you a false result.
Find hidden resistance with a voltage drop test
A wire can pass a continuity test and still fail under load. Corrosion or a few broken strands may carry a tiny test current but choke a headlight or starter. A voltage drop test finds this while the circuit is actually working.
Set the meter to DC volts. Turn the circuit on so current is flowing. Place the red probe on the source side of the wire or connection and the black probe on the load side, and read the difference. Ideally the number is very small. Many technicians treat a drop above roughly half a volt on a normal circuit as a sign of trouble, though sensitive circuits may allow less, so check your vehicle's service information.
You can run the same test on the ground side. Put one probe on the battery negative post and the other on the metal case of the component or the ground point. A noticeable reading there means a poor ground path.
Measure parasitic drain
If your battery keeps going flat, something may be drawing current after the car is off. This test puts the meter in series, so it carries all the current. That is why meters with 10A or more of current range are useful, as our best multimeter for automotive page explains.
Follow these steps carefully, because switching to amps wrongly can blow the meter's fuse.
- Turn everything off, close the doors and let the modules go to sleep. This can take many minutes on newer cars.
- Move the red lead to the amp port and set the dial to DC amps.
- Disconnect the negative battery cable.
- Connect the meter between the cable end and the battery post, so current flows through the meter.
- Read the draw. A small figure, often cited as under about 50 milliamps, is typical, but your manual has the exact limit.
- If the reading is high, pull one fuse at a time until the number drops. The circuit for that fuse holds the culprit.
- Do not start the engine or turn the key while the meter is connected in series.
What your readings usually mean
Use this table as a starting point. Exact values vary by vehicle, so confirm against the factory spec when you have it.
Keep notes as you go. Writing down each reading and where you took it makes it much easier to trace a fault backward through a circuit.
| Test | Meter setting | Typical good result | What a bad result suggests |
|---|---|---|---|
| Battery, engine off | DC volts | About 12.6 V | Low charge or a weak battery |
| Charging, engine running | DC volts | About 13.7 to 14.7 V | Alternator or belt problem |
| Wire has power | DC volts | Near battery voltage | Open circuit, blown fuse or bad switch |
| Wire is intact | Continuity | Beep or near 0 ohms | Break or damaged wire if OL |
| Circuit under load | DC volts across the path | Very small drop | Corrosion or loose connection |
| Drain with car off | DC amps in series | Low and stable | Something is staying awake |
Choosing a meter for car wiring
Any decent digital meter can do the basic voltage and continuity checks above. For car work, a few features help. High input impedance protects control modules and sensors. The Innova 3340 lists 10 MegOhm input impedance and measures up to 15 amps, and it is also listed at 0.5 lb, which keeps it easy to handle in a tight engine bay.
A strong current range matters for drain tests. The GEARWRENCH GWDM107 is listed with a 20A current range and a CAT IV safety rating, while the FROGBRO unit lists a CAT III rating. Backlit screens also help in dark engine bays. You can see these and more specs side by side on our automotive multimeter comparison.
Frequently asked questions
Why does my meter show a voltage but the part still does not work?
A wire with a weak connection can show full voltage with no load, because the meter draws almost no current. Run a voltage drop test with the circuit switched on to see if the connection fails under load.
Can I test a wire while it is still connected to the module?
Voltage checks are generally fine. Do not test resistance on a connected circuit, and be careful with continuity tests near electronic modules. Disconnect the battery and unplug the part first when in doubt.
What does OL mean on my meter?
OL stands for over limit or open loop. In continuity or resistance mode it usually means no complete path, so the wire is broken or the probes are not touching metal.
Why did my meter stop reading amps?
The most common cause is a blown internal fuse, often from measuring current with the leads left in the amp port while probing a battery or live circuit. Replace it with the same type of fuse the manual specifies.