How to Use a Miter Saw to Cut Angles
To cut an angle, unlock the saw's turntable, rotate it to the angle you want on the miter scale, lock it again, and make the cut with the workpiece held firmly against the fence. For a 45 degree cut, set the scale to 45 on the left or right, and always test on scrap first. Two 45 degree cuts that face each other make a tight 90 degree corner.
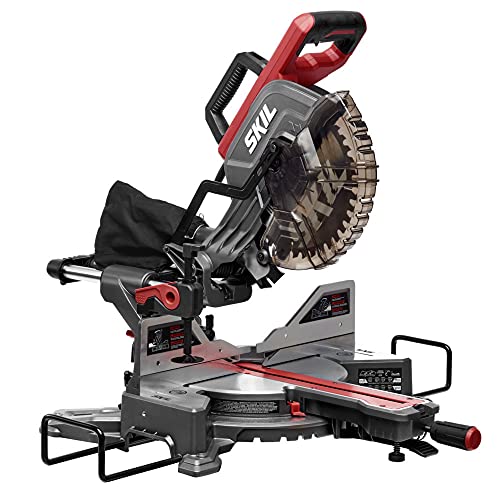 Skil MS6305-00Best overall
 DEWALT DEWALTCordless with 14 in cut
 DEWALT DCS361B
Miter angles and bevel angles: what is the difference?
A miter saw makes two kinds of angled cuts. A miter cut swings the blade left or right across the board, like cutting the end of a picture frame piece. A bevel cut tilts the blade so the edge of the board is slanted instead of square.
Combining both at once is called a compound cut. It is common for crown molding, where the board sits at an angle against the wall and ceiling. Most people start with simple miters, so this guide focuses on those and covers bevels briefly.
Not every saw offers the same features. A basic miter saw only pivots left and right. A compound saw also tilts, and a sliding compound saw adds rails so the blade can travel across wider boards. If you are still choosing, our guide to the best miter saw for beginners explains which features matter most when you are starting out.
Safety first
A miter saw is loud, fast and throws chips, so set up for safety before you plug it in. Wear safety glasses and hearing protection every time. A dust mask is smart too, since cutting makes fine dust.
Keep your hands well away from the blade path. Many saws mark a no-hand zone on the base, so follow it. Let the blade reach full speed before it touches the wood, and let it stop spinning before you lift the saw or reach near the cut.
- Unplug the saw before changing blades or making adjustments near the blade.
- Clamp or hold the work flat against the table and fence. Never cut a board that rocks or lifts.
- Never cross your arms or reach across the blade.
- Keep the cord out of the cutting path.
- Do not cut pieces so short that your fingers must be near the blade to hold them.
How to set and cut a miter angle
Start with the saw unplugged. Make sure the blade guard moves freely and the table is clear of scraps and dust. A loose or dusty table can throw off your angle by a hair.
- Loosen the miter lock handle or knob at the front of the saw.
- Press the detent release if your saw has one, then rotate the turntable to the angle on the scale.
- Tighten the lock so the table cannot shift.
- Set the board flat on the table with its edge firmly against the fence.
- Plug in the saw, hold the board with a hand well clear of the blade, and squeeze the trigger.
- Bring the blade down slowly through the board, then release the trigger and wait for the blade to stop before raising it.
How to cut a 45 degree angle
Most saws have a built-in stop, called a detent, at 45 degrees on both the left and right sides. You can feel it click into place. Rotate the table to the 45 mark, check the pointer lines up with the scale, and lock it down.
The direction matters. For a corner, one piece is cut with the table swung left and the matching piece with the table swung right, so the two angled ends meet. When both pieces are cut correctly, they form a 90 degree corner.
Always cut a scrap piece first and hold the two ends together. If there is a gap, adjust slightly and test again. Small errors double at a corner, so a gap of just a degree off on each piece becomes visible.
| Corner you need | Angle on each piece | Result |
|---|---|---|
| 90 degree outside or inside corner | 45 degrees | Two pieces meet at a right angle |
| Picture frame (four sides) | 45 degrees on each end | Four pieces form a rectangle |
| Wider corner (for example a six-sided shape) | Smaller angle, calculated from the corner | Check the math, then test on scrap |
Get cleaner, more accurate cuts
Good results come from small habits. Mark your cut line clearly and line the blade up with it before you start. Many saws have a laser or shadow guide, but verify with the blade itself by lowering it, unpowered, to see where it falls.
Use support for long boards. A board that hangs off the table tips and pinches the blade. A stable stand or wings on each side keeps long pieces level. Our best miter saw stand comparison covers options that help with this.
Keep the work area tidy. Dust builds up on the table and fence and can nudge boards out of position. A saw with good dust collection helps, and our best miter saw for dust collection page compares models on that point.
Check your saw's accuracy now and then. Use a reliable square to confirm that the blade is square to the fence at zero degrees. If the scale and the actual cut do not match, adjust the pointer or detent according to your manual.
Choosing a saw for angled work
For occasional trim and basic frames, a simple compound saw can do the job. If you cut wide boards or do detailed projects, a sliding model gives you more reach, and our look at the best 12 sliding compound miter saw options shows what is available. For furniture and fine joinery, see the best miter saw for woodworking comparison.
Whatever you choose, the steps above are the same. Set the angle, lock it, secure the board, and cut slowly. With a little practice on scrap, clean angles become routine.
Frequently asked questions
Should I cut on the line or beside it?
Cut so the blade removes the line or leaves it just visible, depending on your preference, but stay consistent. Test on scrap to learn where your blade falls.
Why do my 45 degree corners show a gap?
Common causes are a table that is not fully locked, dust under the board, walls that are not truly square, or a scale that needs adjusting. Check the saw with a square and test on scrap.
Can I cut angles on both ends of one board?
Yes. Cut one end, flip or reposition the board, then set the angle for the second end. Take care that the angles face the right directions.
What is a compound cut?
It is a cut with both a miter angle and a bevel angle set at the same time. It is often used for crown molding.
Do I need a special blade for angles?
No special blade is required, but a sharp blade with a suitable tooth count for your material gives cleaner edges.