How to Use a Miter Saw for Trim and Long Boards
Set the saw to the angle you need, clamp or hold the board flat against the fence, let the blade reach full speed, then lower it slowly through the wood. For trim, cut a little long and sneak up on the fit. For long boards, support the overhanging end at the same height as the saw table so the board does not tip or pinch the blade.
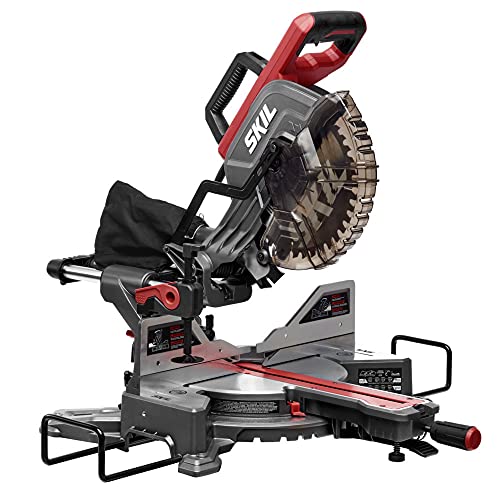 Skil MS6305-00Best overall
 DEWALT DEWALTCordless with 14 in cut
 DEWALT DCS361B
Get the saw ready before you cut
A miter saw makes crosscuts and angled cuts. The blade pivots left or right for miters, and many models also tilt for bevels. Before you plug it in, check that the blade is sharp, the fence is square to the blade, and the table is clear of scraps.
Set the saw on a stable, level surface. A wobbly saw produces wobbly cuts, and it is also a safety risk. A dedicated stand keeps the saw steady and gives you a place to add board supports, so it is worth a look at our best miter saw stand comparison if you cut often.
Always wear safety glasses and hearing protection. A dust mask helps too, since cutting wood and MDF trim throws fine dust into the air.
Basic cutting steps
The same routine works for nearly every cut. Practice it on a scrap piece first so the motion feels natural.
- Unplug the saw while you adjust the angle, then lock the miter setting firmly.
- Lay the board flat on the table with its back edge tight against the fence.
- Mark the cut line, then lower the blade (saw off) to see where it will fall. Remember the blade removes a thin strip, called the kerf. Keep the kerf on the waste side of your line.
- Keep your hands well outside the blade path. Many saws have marks on the table showing where not to place them. Clamp the board if your hand would be close.
- Squeeze the trigger and let the blade reach full speed before it touches the wood.
- Lower the blade slowly and steadily through the board.
- Release the trigger and wait for the blade to stop completely before lifting it and removing the piece.
Cutting baseboards and other trim
Trim is thin and shows every gap, so accuracy matters more than speed. Always cut a hair long, test the fit, and shave off small amounts until it sits tight.
Inside corners are commonly joined in one of two ways. You can cut both pieces at 45 degrees to form a miter, or you can square-cut one piece to sit flush in the corner and cut a profile on the other so it wraps over it (a coped joint). Walls are rarely a perfect 90 degrees, so check the actual angle of the corner and adjust the miter setting a little if the joint opens up.
Outside corners almost always use two mitered pieces. For a standard 90-degree corner, each piece is cut at 45 degrees, but test with scraps because real corners vary.
Position matters too. Baseboard and crown molding must be oriented correctly against the fence and table, because they sit at an angle on the wall. Crown molding in particular is cut either upside down and backward against the fence or flat on a saw with bevel capacity, so mock up a pair of scrap pieces and check them in the corner before cutting your good stock.
If your trim is prone to splintering, apply a strip of painter's tape over the cut line, or use a fine-tooth blade made for finish work. Place the finished face where the blade exits the wood the least, as tearout shows on that side.
Cutting long boards safely
A long board is heavy at the ends, and that weight can lift the board off the fence or pull it sideways as you cut. That can pinch the blade, ruin the cut, and cause kickback.
The fix is support. Place a roller stand, a support arm, or a sturdy sawhorse at the same height as the saw table at each end of the board. Check the height by sliding the board across the table. It should glide level without rising or sagging.
Cut so the piece you are keeping is supported, and so the offcut will not drop and bind the blade as it separates. Never hold the offcut with your hand near the blade. Let it fall free onto a support or a clean floor.
For repeat cuts of the same length, clamp a stop block to the support or fence extension and push each board against it. This gives matching lengths without marking each one.
Check your saw's capacity for the job
Every saw has a maximum cut width and height, and wide boards or tall baseboard may exceed what a basic model can handle. A sliding saw moves the blade along rails to cut wider boards, which is helpful for shelving, deck boards and wide stock. If you need that reach, see our best 12 sliding compound miter saw comparison.
Match the saw to the task using the table below as a general guide.
If you are new to the tool, our best miter saw for beginners page covers models with friendlier controls. For furniture and fine joinery, take a look at best miter saw for woodworking.
| Task | Saw feature that helps | Why |
|---|---|---|
| Baseboard and narrow trim | Fixed or sliding saw with a fine-tooth blade | Clean, accurate cuts on small pieces |
| Crown molding | Compound miter (bevel) capability | Cuts angles in two directions |
| Wide boards or shelving | Sliding rails | Extra cutting width |
| Long framing or deck boards | Saw plus side supports | Keeps the board level and stable |
| Lots of indoor cutting | Good dust port or collection | Less airborne sawdust |
Manage dust and stay safe
Miter saws throw a lot of sawdust. Connecting a vacuum to the dust port and using the dust bag helps, though no saw catches everything. Our best miter saw for dust collection page compares how models handle it.
A few more habits keep you safe. Keep the cord clear of the blade path, and never reach across a spinning blade. Do not cut very small pieces by hand. Cut them from a longer board instead, then trim to size. Unplug the saw before changing the blade or clearing a jam.
Frequently asked questions
Which way should the blade teeth face the wood on a trim cut?
The blade cuts as it moves down, so the top face of the board gets the cleanest edge. Place the show face up when using a standard miter saw, and check your trim's profile before you cut.
Can I cut two pieces at once to save time?
It is better not to. Stacking pieces can shift them and make the cut inaccurate or unsafe. Cut one piece at a time and clamp when needed.
Why do my corner joints leave a gap?
Walls are often slightly off square. Measure the corner angle, adjust the miter setting a little, and test with scrap pieces before cutting the finished trim.
How do I stop a board from splintering at the cut?
Use a sharp, fine-tooth blade, lower the blade slowly, and apply painter's tape over the cut line. Back the board against the fence firmly so it cannot chatter.