How to Use a Magnetic Tool Holder on a Wall
Mark the spot, find a stud or other solid backing, hold the bar level, and screw it to the wall with the included hardware. If the surface is thick steel, a drill-free bar with magnets on its back can attach with no screws. Then load the heaviest tools low and near the ends, and keep lighter ones in the middle.
 TOOLEAGUE Strip Rack-1Best overall
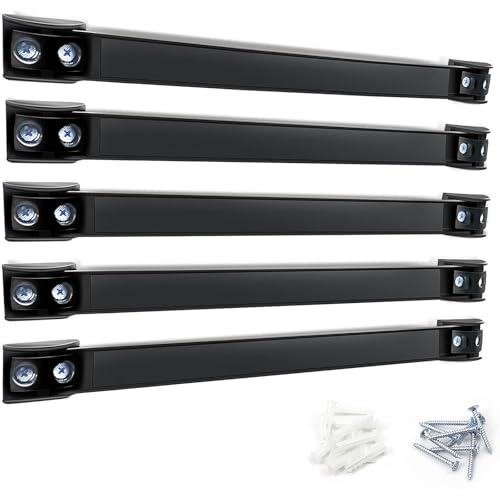 DGSL Magnetic Strip 001Five 16 in wall strips
 BEILITEMAG BEILITE-DJ17inchDouble-sided with knuckle gap
Pick the right spot first
Start with how you work, not with the drill. Put the bar where you can reach it with one arm, at about chest height, and where you will not bump it while carrying lumber or boards. Over a workbench is a classic choice because the tools you grab most are right at hand.
Then check the wall itself. Look for studs, pipes and wiring before you mark anything. A stud finder helps, and so does knowing where outlets and switches sit, since cables usually run straight up and down from them.
Also think about direction. Some bars can go up horizontally or vertically. The DGSL 5 pack listing, for example, says its strips can be installed either way, which is handy for narrow spaces beside a door or shelf.
Choose a mounting method that fits your wall
The surface decides how the holder goes up. Solid backing is best for heavy tools. Hollow drywall is the weakest spot, so aim for a stud whenever the bar will carry real weight.
Our magnetic tool holder comparison shows which products list included hardware and which can attach to steel without drilling, so check that before you buy.
| Surface | Best approach | Notes |
|---|---|---|
| Wood stud or plywood | Screw through the mounting holes | Strongest option for heavy tools |
| Drywall | Screw into a stud, or use a drywall anchor between studs | Anchors suit light tools only |
| Masonry or concrete | Drill pilot holes and use masonry anchors | Wear eye and hearing protection |
| Steel toolbox, cabinet or cart | Drill-free magnet mounting, if the holder supports it | Surface must be thick enough to grip |
| Slatwall | Use a holder listed for slatwall | The SEDY 7-piece listing mentions slatwall use |
Mount the holder step by step
These steps work for a typical screw-mounted bar. Read the maker's instructions too, since hole spacing and hardware differ.
- Hold the bar against the wall and mark the hole positions with a pencil. Use a level so the bar does not tilt.
- Check the marks against a stud finder. Move the bar if you can land at least one screw in a stud.
- Drill pilot holes at the marks. Use a bit slightly narrower than the screw so the threads bite.
- For drywall between studs, press in an anchor that matches the screw.
- Hold the bar over the holes and drive the screws until snug. Do not overtighten, since that can bend a thin bar.
- Give the bar a firm tug. It should not shift or flex before you hang anything on it.
Using a no-drill bar on steel
Some holders have magnets on the back so they cling to a steel surface. This is a good fit for toolboxes, cabinets and carts, and for renters who cannot drill.
The surface matters more than people expect. The BEILITEMAG 17 in listing warns that a steel surface must be thicker than 0.047 inches (1.2 mm) or the holder will slide off. Thin sheet metal, such as the side of some cheap cabinets, may not work.
Many of these bars also include screws, so the same product can go onto wood or drywall when the surface is not magnetic. The TOOLEAGUE listing, which lists 110 lb of holding force, says it works both ways.
Load tools the smart way
Match the load to the rating. Holding force is listed per bar or per product, and the numbers vary a lot. The DGSL and DURATECH listings both say about 22 lb per strip, while the TOOLEAGUE listing says 110 lb. If a tool is heavy, use a bar rated well above its weight, or add more bars side by side. The DURATECH listing suggests exactly that for extra capacity.
Place tools so the weight spreads out. Put wrenches and hammers low and near a mounting point. Keep small bits and screwdrivers in the gaps.
Most bars need a little clearance to pull tools off. The BEILITEMAG listing mentions a 0.94 inch gap between the bar and the wall to protect your knuckles. If your bar sits flat, leave room beside it for your hand.
Using a magnetic holder for knives
The steps are the same for a kitchen knife bar. Mount it where you can reach it easily, but out of the way of children. Several listings in our data are marked kitchen safe, so check the product page before you choose one for the kitchen.
Place knives on the bar with the spine first, then lower the blade flat against the magnet. Pull them off the same way, by sliding the blade away rather than yanking it straight out. This keeps edges away from the metal and away from your fingers.
Safety notes
Switch off power to nearby circuits if you are unsure where wiring runs, and never drill near an outlet without checking first. Wear safety glasses when drilling and driving screws. Use hearing protection if you are drilling into masonry.
Use a stable step stool, not a chair, when mounting above shoulder height. Keep strong magnets away from pacemakers, credit cards and phones. Finally, never hang sharp tools where they can fall on someone, and test the bar with a light load before trusting it with heavy ones.
Frequently asked questions
Can I mount a magnetic tool holder on drywall?
Yes, but use a stud for anything heavy. Between studs, drywall anchors can handle light tools such as small screwdrivers or pliers.
Can I put two bars side by side for more strength?
Yes. Space them so each one has solid support, and spread heavy tools between them rather than piling them in one spot.
Do magnets damage tools?
Magnets can leave a small amount of magnetism in steel tools. That is usually harmless, and for many tools it is even helpful when holding screws.
How high should I hang the bar?
Roughly chest height works for most people. Pick a height where you can see and reach every tool without stretching.