How to Use a Leak Detector on Your Car
Run the A/C so the system holds some pressure, then sweep the likely leak points with an electronic detector or a UV light after adding dye. Move slowly, wear eye protection, and mark every spot the tool flags. Never vent refrigerant just to find a leak. If the system is empty, a shop can pressure test it.
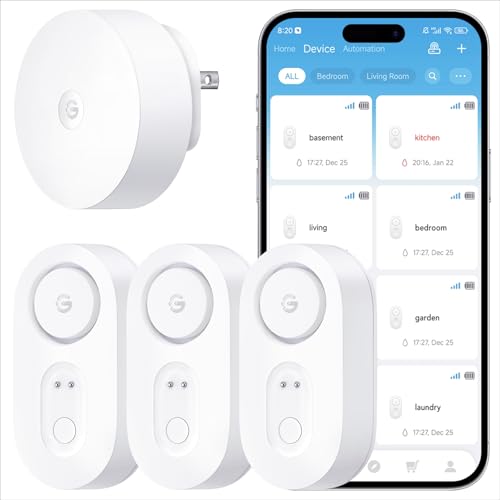 GoveeLife H5059+H5044Best overall
 YoLink YS1603+6YS7906Freeze alerts and shutoff
 YoLink YS1603+4YS7903Long-range shutoff starter
Pick the right type of car leak detector
Most car leak detection for an A/C system uses one of three tools. Each one finds the same problem in a different way, so the best choice depends on what you own and how small the leak is.
An electronic detector (often called a sniffer) beeps or lights up when it senses refrigerant near its tip. A UV kit adds a fluorescent dye to the system, and you scan the parts with a UV light to see where the dye escaped. An ultrasonic detector listens for the hiss of escaping gas and turns it into a sound you can hear through headphones.
| Tool | How it finds the leak | Good for | Watch out for |
|---|---|---|---|
| Electronic sniffer | Senses refrigerant near the probe | Quick checks of hoses, fittings and the compressor | Can false alarm near solvents, brake cleaner or strong wind |
| UV dye and light | Dye glows where it leaks out | Slow leaks that need days to show | Needs dye added and time to circulate; old dye can mislead you |
| Ultrasonic detector | Picks up the sound of escaping gas | Louder leaks in a noisy engine bay | Needs the system under pressure; background noise can confuse it |
| Soap bubble solution | Bubbles form at the leak | Checking one accessible fitting | Only works on larger leaks you can reach |
Safety before you start
An A/C check puts your hands near moving and hot parts, so take a minute to set up safely. Refrigerant is also regulated in the US. Releasing it on purpose is illegal, so leave any recovery or evacuation to a shop with the right equipment.
- Wear safety glasses. Refrigerant and dye can spray, and UV light is hard on unprotected eyes, so use the tinted glasses that come with a UV kit.
- Wear gloves. Refrigerant can cause frostbite on skin, and dye is messy.
- Keep hands, hair, loose sleeves and tools away from the belt, fans and pulleys while the engine runs. Radiator fans can start on their own.
- Work outdoors or in a well ventilated space, and never run the engine in a closed garage.
- Let the exhaust manifold and other hot parts cool before you reach around them.
- Do not use an open flame near refrigerant or other fluids.
How to use an electronic leak detector
Electronic sniffers are the easiest place to start. The exact controls vary by model, so read the manual for its sensitivity settings and warm-up time. The basic method is the same for most.
Start with a clean, dry engine bay if you can. Oil and spilled cleaners can trigger the sensor and hide the real source.
- Park the car in a calm spot, out of strong wind, with the hood open.
- Start the engine and set the A/C to maximum cold with the fan on high. Let it run for a few minutes so the system builds pressure.
- Turn the detector on and let it warm up. Test it in clean air so you know the normal reading.
- Hold the probe tip about an inch from each part and move it slowly, roughly an inch per second. Fast sweeps miss small leaks.
- Check the underside of lines and fittings. Refrigerant is heavier than air and tends to sink, so a leak can read lower than it sits.
- When the detector alarms, pull the probe away, let it clear, and test the spot again to confirm. Mark confirmed spots with a paint pen or tape.
How to use UV dye and a UV light
Dye is slower but good at catching leaks too small for a sniffer. Use dye made for your refrigerant type and follow the kit directions for how to inject it. Add only the amount the instructions call for, since extra dye does not help.
After adding dye, run the A/C for several minutes so it circulates. Slow leaks may need a few days of driving before the dye collects at the source.
Then work in a dim space and sweep the UV light over lines, fittings, the compressor, the condenser and the area under the dash. Wear the tinted glasses. Dye shows up as a bright yellow-green glow. Wipe the spot with a rag to check that the glow is dye and not something else that reacts to UV, like some paint or a past spill.
Where A/C leaks usually show up
You do not need to scan the whole car. Start with the parts that flex, vibrate or sit exposed to road debris, and work toward harder spots.
- Compressor shaft seal and the connections at its body
- Hose crimps and the fittings where lines meet other parts
- Service ports and their valve cores (the caps and cores are common weak points)
- Condenser at the front of the car, where stones and debris can cause damage
- Evaporator, which hides behind the dash. Check the drain tube under the car for dye or an oily residue, since you cannot see the evaporator directly
- O-rings at line joints, which harden and shrink with age
What to do after you find a leak
Mark the spot, take a photo, and note what the detector showed. A leak at an accessible fitting or a bad service valve core may be a simple repair. A leak at the condenser, evaporator or compressor body usually means a part replacement, and some of that work needs refrigerant recovery.
Avoid topping off a leaking system again and again. It hides the problem, wastes refrigerant, and releases it into the air. If you cannot find the leak, a shop can add nitrogen or run a controlled pressure test.
If your detector shows nothing but the A/C still blows warm, the cause may not be a leak. Low pressure from a failed switch, a bad compressor clutch or a clogged orifice tube can give the same symptom. A shop can read system pressures to sort this out.
A note on home water leak detectors
Some readers searching for a leak detector actually want one for the house. Water leak sensors are a different tool. They sit on a floor and alarm when they touch water, and they cannot find refrigerant or oil in a car.
If that is what you need, our leak detector comparison lines up home sensors by alarm volume, wireless range, sensor count and alert type. For example, one listed kit has 3 sensors, a 105 dB alarm and a 5-year battery, while a standalone 5-pack reaches 120 dB but sends no app alerts. Check the full spec sheet to match a setup to the spots at risk in your home, such as the water heater, washer or sinks.
Frequently asked questions
Can a leak detector find a leak if the A/C system is empty?
Not reliably. Electronic and ultrasonic detectors need refrigerant or pressure in the system to sense anything. A shop can add nitrogen to pressure test an empty system, which avoids releasing refrigerant.
Is UV dye safe to leave in the system?
Dye made for automotive A/C is designed to stay in the system, and many kits say so. Use the right type for your refrigerant, follow the dose on the label, and do not mix several brands of dye.
Why does my electronic detector beep everywhere?
Sensitivity may be set too high, or something nearby is triggering it. Brake cleaner, gasoline vapor, coolant and cleaning sprays can all cause false alarms. Move to a cleaner area, let the unit reset, and lower the sensitivity.
Can I use a home water leak sensor on my car?
No. Home sensors detect water on a surface, such as a drip under a sink. They do not sense refrigerant and are not built for an engine bay.
Do I need to find the leak myself?
Not always. If the leak is hidden, such as inside the evaporator, or the repair needs refrigerant recovery, a shop with proper equipment is the safer choice.