How to Use a Jointer to Straighten a Warped Board
Flatten one face first, then square an edge to that face. Take light passes of about 1/16 in or less, with the board's concave or rocking side down, until the whole face shows cutter marks. Always use push blocks and keep your hands off the cutterhead. A jointer works best on boards that are not much thinner than 3/4 in and not too short for the tables.
 CUTECH 401120HI-IFBest overall
 Jet JJ-6HHDXLongest 6 in tables
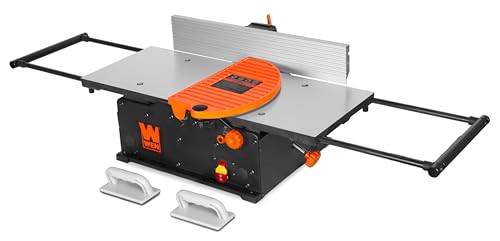 WEN JT1224HBest wide benchtop value
Know what kind of warp you have
Before you turn the machine on, look at the board. Sight down its length and lay it on a flat surface to see how it moves. The kind of warp tells you which face goes down and how many passes to expect.
Mark the board with a pencil first. Draw wavy lines across the face you plan to joint. When the lines are gone after a pass, you have reached the whole surface.
| Warp type | What it looks like | How to place it on the jointer |
|---|---|---|
| Cup | Edges higher than the center across the width | Cupped (concave) side down |
| Bow | Curves along the face, like a shallow arc | Concave side down, ends touching the table |
| Crook | Edge curves sideways along the length | Fix at the edge, after the face is flat |
| Twist | Opposite corners sit high, board rocks on a flat surface | Rest on the two high corners and take light passes |
Check your machine and the board first
A jointer has two tables. The infeed table is the one the board starts on, and its height sets how much wood you remove. The outfeed table must sit level with the top of the cutter's arc, or your cuts will taper or snipe.
Table length matters for warped stock. A longer bed supports the board better and bridges the dips, so the machine cuts a flatter surface. Our best jointer page lists table lengths from 23 in to 73 in, which helps if you often work with long boards.
- Unplug the machine before you adjust the tables, fence or cutters.
- Check that the outfeed table is level with the cutter's high point.
- Make sure knives or inserts are sharp and secure.
- Confirm the board is long enough. The JET JJ-6HHDX manual, for example, calls for stock at least 8 in long, 3/4 in wide and 1/4 in thick.
- Check the board for nails, screws and loose knots.
- Set the fence to 90 degrees and confirm it with a square.
Face jointing step by step
Face jointing is the step that removes the warp. Follow the order below on every board.
Keep passes light. Most jointers cut up to 1/8 in per pass, and the models on our comparison page list that as their normal maximum. A deep cut on a warped board only raises the risk of tear-out and kickback, so use a much smaller setting for most passes.
- Set the infeed table to remove about 1/16 in or less.
- Place the board with the concave face down. Check the grain direction and feed so the cutter slices with the grain, not against it.
- Start the machine and let it reach full speed.
- Hold the front end of the board down on the infeed table and push it forward with a push block.
- Once the board is over the outfeed table, move your downward pressure to the outfeed side. Keep that pressure there so the cut stays flat.
- Keep your hands on the board and push blocks. Never place them over the cutterhead.
- Repeat until the pencil marks vanish across the entire face and the board sits flat.
Square an edge to the flat face
With one face flat, you can joint an edge. Press the flat face against the fence and feed the board along the tables. This makes the edge square to the face, which is what gives you tight glue joints later.
Take light passes here too, and keep steady pressure against the fence. If the edge is crooked, the first pass will cut only the high spots near the ends of the board. Keep going until a continuous shaving comes off the full length.
Check the result with a square against the face. If the angle is off, check the fence stop before cutting more. Spiral and helical cutterheads, which our jointer comparison explains, tend to leave a cleaner edge in figured grain.
Handle wide, twisted or very bowed boards
A jointer can only flatten a board as wide as its cutterhead. If a board is wider than your machine, rip it into narrower pieces, joint each one, and glue them back together. This often works better than forcing a wide board through.
Twist is the hardest problem on a short bed. Rock the board to find the two high corners, then take light passes until it stops rocking. If the board is badly twisted, cut it into shorter pieces first.
After face and edge jointing, a thickness planer brings the second face parallel to the first. A jointer on its own cannot make two faces parallel, so plan on both machines for a finished board. Our best jointer guide helps you pick the width that suits your usual stock.
Safety rules that matter
A jointer is a fast, exposed cutter, so build safe habits from the first pass. Wear safety glasses and hearing protection, since the cutterhead is loud. Wear a dust mask or connect a dust collector, because the machine throws a lot of chips.
Keep the guard in place and make sure it springs back over the cutter after every pass. Use push blocks on any board that brings your hands close to the cutter. Skip loose sleeves, gloves and jewelry.
Do not joint very short or very thin pieces. Cut the board longer than you need and trim it later. If a board is too short to hold safely, do not joint it.
Frequently asked questions
Can a jointer fix a twisted board?
Yes, in many cases, but it takes several light passes. Longer tables help the most, and a badly twisted board is easier to deal with once you cut it into shorter pieces.
Why does my jointed edge end up curved?
Usually the outfeed table sits too low or too high, or you moved pressure to the outfeed side too late. Reset the outfeed table level with the cutter and try again.
Do I need a planer too?
For boards with two flat, parallel faces, yes. The jointer flattens one face and one edge. The planer then makes the other face parallel.
Which way should I feed the grain?
Feed so the cutter shears with the grain, which usually means the grain rises toward you as it moves through. If you see tear-out, flip the board end for end.
How do I know when a face is flat?
The board should sit on a flat surface without rocking, and the cutter marks should run the whole length and width of the face.