How to Use a Drill Driver: Step-by-Step Basics
To use a drill driver, pick the right bit, tighten it in the chuck, set the clutch and speed, then press the bit against your mark and squeeze the trigger gradually. For screws, drill a pilot hole first, then switch to a driver bit and drive the screw until it sits flush. Wear eye protection and keep both hands steady.
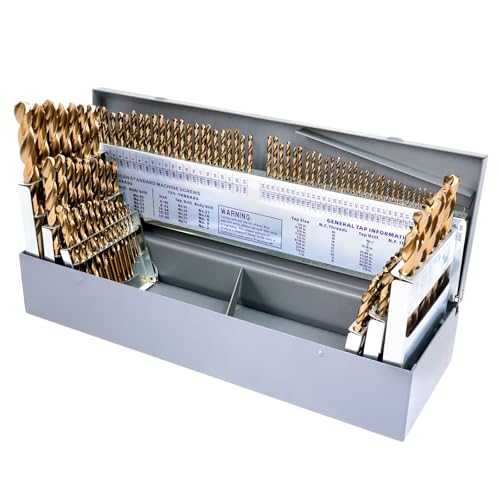 SEDIANAS 115 PCS Cobalt Drill Bit Set
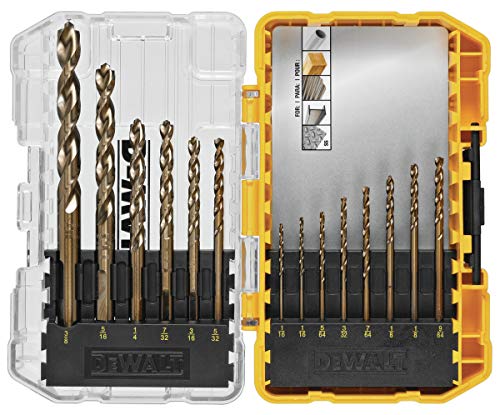 DEWALT DWA1240Cobalt set with adjustable case
 CRAFTSMAN CMAM2214Best overall
Know the parts of your drill driver
A drill driver is a rotating tool with a few controls that matter. Learning them first makes everything else easier.
The chuck is the clamp at the front that holds the bit. The trigger controls speed: the harder you squeeze, the faster it spins. The forward/reverse switch sits above or beside the trigger. The clutch is the numbered collar behind the chuck, and it stops the drill from turning when a set resistance is reached. Many models also have a speed selector on top, usually with a low setting for driving screws and a high setting for drilling.
- Chuck: holds the bit.
- Trigger: variable speed control.
- Forward/reverse switch: reverse backs screws out.
- Clutch collar: numbers for driving, a drill icon for drilling.
- Speed selector: low for screws and big bits, high for small bits.
Choose the right bit
Drill bits make holes. Driver bits turn screws. They are not interchangeable, so match the bit to the job.
For wood, a twist bit or brad-point bit works well. For masonry such as brick or concrete, use a masonry bit and a drill with a hammer mode if you have one. For thin sheet metal, a step bit cuts clean round holes in one pass, and our best step drill bit page compares the options. For screws, the driver bit must fit the screw head snugly, such as Phillips, square or Torx. A loose fit strips the head.
If you need a variety, a boxed assortment saves trips. You can see how they stack up on our best drill driver bit set page.
Load the bit and set the controls
Unplug a corded drill or remove the battery from a cordless one before changing bits. This prevents an accidental start.
Follow these steps:
- Open the chuck by turning it counterclockwise by hand.
- Insert the bit shank about as deep as it will go.
- Tighten the chuck clockwise by hand. On a keyless chuck, a firm twist is enough. Tug the bit to confirm it is secure.
- Set the switch to forward.
- Choose the clutch: the drill icon for drilling holes, or a number for driving screws.
- Pick the speed range. Start low for screws, and use high for small bits in soft material.
Drill a hole, step by step
Mark your spot with a pencil. A small dimple from a nail or center punch keeps the bit from wandering. Painter's tape over the mark also helps on smooth surfaces.
Hold the drill with one hand on the handle and, if there is a side handle, the other hand on it. Keep the drill level and square to the surface. Start slowly, then build speed once the bit bites.
Push with steady, light pressure and let the bit do the cutting. Pull the bit out now and then to clear dust or chips. When you break through the far side, ease off the pressure so the material does not splinter. Placing a scrap board behind the workpiece also reduces tear-out.
Clamp small workpieces. Never hold them in your hand, because a bit that catches can spin the piece and cause injury.
Drive screws, including into a wall
For most screws, drill a pilot hole first. It should be slightly narrower than the screw's threaded core so the threads still grip. This keeps wood from splitting and makes driving easier.
Swap to the driver bit, set the clutch to a low number, and press firmly in line with the screw. Squeeze the trigger slowly. If the clutch clicks before the screw is fully seated, raise the setting one step and try again. Stop when the head sits flush with the surface.
Walls need extra thought. Into a wooden stud, a pilot hole and a standard screw work fine. Into drywall alone, use an anchor rated for the load. Into brick or concrete, use a masonry bit and the matching plug. Before drilling any wall, check for hidden electrical wiring and pipes. A stud finder or detector helps, and it is smart to avoid drilling near outlets and switches.
| Material | Bit type | Pilot hole needed? | Notes |
|---|---|---|---|
| Softwood or hardwood | Twist or brad-point | Yes | Clamp the piece |
| Drywall | Twist bit for anchors | Depends on anchor | Use a rated anchor |
| Brick or concrete | Masonry bit | Yes, with plug | Wear a dust mask |
| Thin metal | Step or metal twist bit | Yes | Use low speed |
Safety and common mistakes
Wear safety glasses every time. Dust and chips can fly. For masonry or long sessions, add hearing protection and a dust mask. Avoid loose sleeves, jewelry and dangling hair near the chuck.
Common mistakes are easy to fix. Pushing too hard overheats the bit. Using the wrong clutch setting strips screws or sinks them too deep. Drilling at an angle bends the bit. If the drill stalls, back the bit out in reverse rather than forcing it.
If you are still choosing a tool, our best drill and best drill driver set pages compare the options side by side.
Frequently asked questions
Which way does the switch go to remove a screw?
Set the forward/reverse switch to reverse, which spins the bit counterclockwise. Press firmly so the driver bit stays seated in the screw head.
Why does my drill stop before the screw is flush?
The clutch is set too low and is disengaging. Turn it up one number at a time until the screw seats fully without stripping.
Can I use the same bit for drilling and driving?
No. Drill bits cut holes and driver bits turn screws. Swap them as the job changes, and keep the chuck tight each time.
How do I stop the bit from slipping on the mark?
Make a small dimple with a nail or center punch, start at low speed, and keep the drill square to the surface until the bit bites.