How to Use a Detail Sander on Wood and Small Areas
Use a detail sander by choosing a sandpaper grit that suits the job, letting the pad rest lightly on the wood, and moving it with the grain while the tool does the work. Start coarser only if you need to remove old finish or flatten a rough spot, then step up to finer grits for a smooth surface. Wear eye and dust protection, and check your work often by hand.
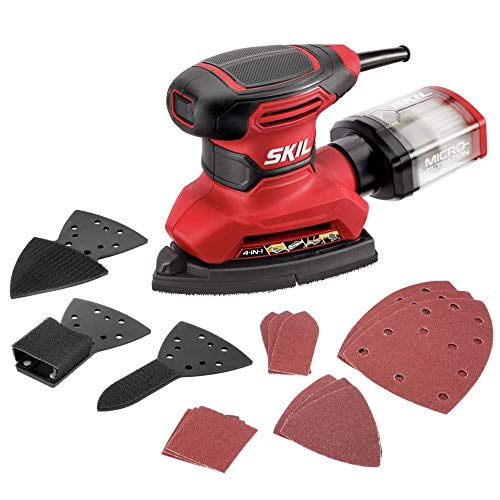 Skil SR232301Best overall
 HYCHIKA BETTER TOOLS FOR BETTER LIFE MS200WCompact with dust bag
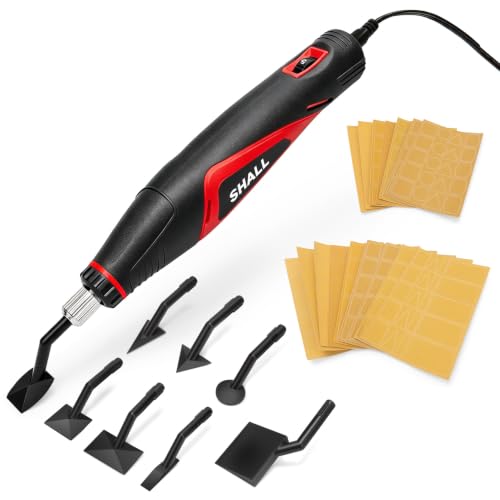 SHALL SH111052Lightest in the lineup
What a detail sander is good at
A detail sander, often called a mouse sander because of its shape, has a small pointed pad that vibrates or oscillates in tiny movements. The pointed tip reaches into corners, along trim, around spindles and into the narrow gaps that a larger sander cannot touch.
It is not built for big flat panels. A tabletop or door is faster and more even with a larger sander. Keep the detail sander for chair parts, moldings, louvers, picture frames, small repairs and any spot where a bigger pad would round over an edge or miss the corner.
If you are still deciding which model suits your projects, our best detail sander comparison lines up published specifications side by side.
Get ready before you switch it on
Good prep saves sanding time and protects both you and the wood. Take a minute to set up the workpiece and the tool.
Safety comes first. Wood dust irritates the eyes and lungs, and some old finishes may contain lead or other harmful materials. If a piece is old and painted, find out what is on it before sanding. Never sand it dry without proper protection.
- Wear safety glasses and a dust mask or respirator rated for fine dust.
- Add hearing protection if the sander is noisy in a small room.
- Clamp or steady the workpiece so it cannot slide or vibrate.
- Check that the cord is clear of the pad and your hands.
- Connect a dust bag or vacuum if your sander supports it.
- Unplug the sander or remove the battery before changing paper.
Pick the right sandpaper and grit
Detail sanders use small triangular or shaped sheets, usually attached with hook-and-loop backing. Match the sheet to your tool, make sure it sits flat and lines up with the dust holes, and replace it as soon as it clogs or wears smooth.
As a general rule, a lower grit number cuts faster and leaves deeper scratches. A higher number cuts slower and leaves a finer surface. Work through grits in order and do not skip too far, or the earlier scratches will show under stain or finish.
| Job | Typical grit range | Notes |
|---|---|---|
| Removing old finish or rough spots | 60 to 80 | Use briefly and check often |
| General smoothing of bare wood | 100 to 120 | Good starting point for most jobs |
| Prep before stain or paint | 150 to 180 | Leaves an even surface |
| Final pass between coats | 220 or finer | Very light pressure |
Step by step: sanding wood
Follow these steps for a clean result on bare or finished wood. Go slowly. A detail sander is small, so it is easy to dwell too long in one place.
- Wipe the surface clean so grit and dust do not scratch it.
- Fit the sandpaper and secure the workpiece.
- Place the pad flat on the wood before you start the tool.
- Turn it on and let it reach full speed.
- Move it steadily along the grain, overlapping each pass a little.
- Let the weight of the tool do the work. Do not lean on it.
- Stop, wipe off the dust and feel the surface with your fingertips.
- Change to the next finer grit and repeat until smooth.
Working corners, edges and tight spots
Use the tip for inside corners and the long edge of the pad for narrow flat strips. Keep the pad flat. Tilting it digs in and leaves a dip or a rounded edge.
Across the grain, sanding leaves visible marks, so near a joint where grains meet, finish the last pass along the grain of each piece as closely as you can. For curved or carved parts, fold a piece of sandpaper and finish by hand where the pad cannot follow the shape.
Keep the sander moving near edges. Corners and edges have less wood behind them, so they wear away quicker than flat areas. If the tool is a Ryobi or another cordless or corded model, the technique is the same: check the manual for how the paper attaches and what speed settings it offers.
Finish and clean up
After the last grit, vacuum the piece and wipe it with a slightly damp cloth or a tack cloth. Water can raise the grain a little. If it does, let the wood dry fully and give it a very light pass with fine paper before staining or sealing.
Empty the dust bag, brush out the pad and replace worn sandpaper. Store the sander where the cord will not be pinched. Never leave fine dust piled up near heaters or open flames, since fine wood dust can burn.
Frequently asked questions
Can I use a detail sander on a large flat surface?
You can, but it is slow and easy to leave uneven patches. A larger sander is a better fit for tabletops and doors.
Why does my sander leave swirl marks?
Swirls usually come from sandpaper that is too coarse, worn or clogged, or from pressing too hard. Switch to fresh, finer paper and use lighter pressure.
How often should I change the sandpaper?
Change it when it stops cutting, looks glazed or clogs with dust. Fresh paper works faster and gives a better finish than a worn sheet.
Can I sand painted wood with a detail sander?
Yes, but check whether the paint could contain lead, especially on older pieces. If you are unsure, test first and use proper protection.