How to Use a Cordless Caulking Gun
Retract the plunger, load the cartridge, cut and puncture the tip, then press the trigger lightly and move along the joint at a steady pace. Release the trigger and use the gun's pressure-release or reverse control to stop the flow. Note that the products on our comparison page are all manual guns, so this guide covers battery guns in general terms.
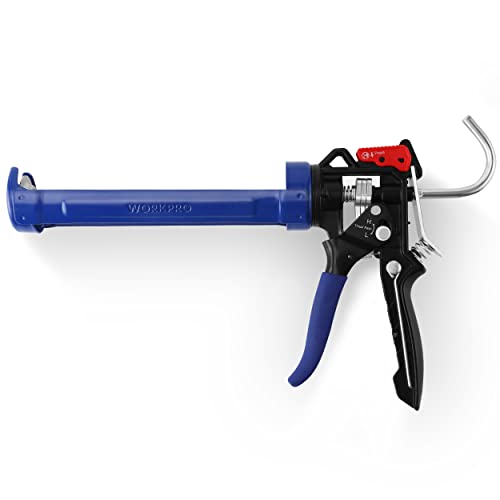 WORKPRO W024006Best overall
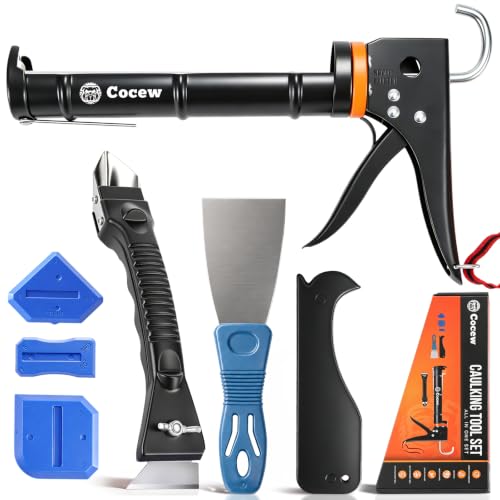 Cocew scraper varKit with scraper included
 Newborn 250Steel frame, 18:1 thrust
What a cordless caulking gun does differently
A cordless caulking gun uses a battery and a small motor to push the plunger, so you press a trigger instead of squeezing a lever again and again. The rest of the job is the same as with a manual gun: load a cartridge, open the tip, lay a bead, smooth it and clean up.
One thing to know up front. Our best cordless caulk gun page looks at manual guns only, and none of the top ten run on a battery. If you already own a battery model, the steps below apply. If you are still choosing, the manual specs on that page can help you decide whether battery power is worth looking for.
Get ready and stay safe
Good prep makes the bead cleaner and the job faster. Remove old caulk, wipe the joint clean and let it dry. Run painter's tape along both sides if you want sharp edges.
Check the battery before you start. A weak battery can slow the motor partway down a long joint, and that leaves uneven beads.
- Wear safety glasses. Pressurized sealant can squirt out of a split cartridge or a blocked tip.
- Ventilate the room. Many sealants give off fumes while they cure, so open a window or run a fan.
- Wear gloves if the product label recommends them, and read the label for cure time and surface limits.
- Use a stable ladder for high joints and keep both feet on the rungs. Do not lean out to reach one more foot of joint.
- Remove the battery or lock the trigger when you set the gun down, so it cannot fire by accident.
Load the cartridge step by step
Most battery guns follow the same loading routine. Your owner's manual shows the exact controls, but the order below holds for nearly every model.
- Remove the battery or engage the trigger lock.
- Pull the plunger fully back. On many guns you do this with a release button, a reverse switch or a manual pull.
- Drop the cartridge into the cradle, nozzle forward.
- Cut the nozzle tip at an angle. A small opening gives a thin bead, and you can always cut more later.
- Pierce the inner foil seal with a long nail or the puncture tool built into the gun, if it has one.
- Reinstall the battery and move the plunger forward until it touches the back of the cartridge.
Lay a clean bead
Set the speed first if your gun has a speed dial or modes. Start low. Thin sealants such as silicone and acrylic flow easily, while thick construction adhesive needs more push. A slow start also gives you time to learn how the trigger responds.
Hold the nozzle at about a 45 degree angle to the joint. Press the trigger, wait for the bead to appear, then move along the joint at a steady pace. Pushing the nozzle ahead of you tends to force sealant into the gap, and pulling it can leave a thinner line. Pick one method and keep it for the whole run.
Release the trigger just before the end of the joint. Many battery guns have a release or reverse function that backs the plunger off and stops the ooze. If yours has one, use it every time you pause. If it does not, lift the gun away and wipe the nozzle.
Tool the bead soon after you lay it. Skin-over time varies by product, so check the cartridge label. Run a gloved finger or a finishing tool along the line with light, even pressure, then pull the tape while the caulk is still wet.
Battery gun or manual gun?
A battery gun saves your hand on long runs, but it is not the right tool for every job. A manual gun gives very direct feel, and it needs no charging. The table below sums up the general trade-offs.
For manual guns, thrust ratio is the number to watch. On our page, a switchable WORKPRO model lists 18:1 for adhesives and 9:1 for acrylics, while the Red Devil lists 26:1 and 950 pounds of force for thick materials. That same model weighs 1.691 lb, and the lightest listed WORKPRO weighs 0.625 lb. Those figures describe manual guns, not battery ones.
| Feature | Battery gun | Manual gun |
|---|---|---|
| Hand effort | Low, the motor does the pushing | Higher, depends on thrust ratio and rod type |
| Control feel | Trigger and speed settings | Direct, through your grip |
| Power needs | Needs a charged battery | None |
| Weight overhead | Usually heavier because of the battery | Can be very light, see weight specs |
| Best for | Long runs and repeated jobs | Short touch-ups and small tubes |
Using Ryobi, Milwaukee and similar models
Brands such as Ryobi and Milwaukee make battery caulk guns, and their controls differ in small ways. Some have a dial for speed, some have a trigger that varies the flow, and the release function may be a switch or an automatic back-off. We do not have product data for those guns, so check your owner's manual for the exact loading steps, battery type and cartridge sizes.
Pay attention to the cartridge size your gun accepts. Most standard tubes are 10 oz, while some guns take larger ones. A tube that does not fit the cradle can jam the plunger and strain the motor.
Clean up and store the gun
Remove the battery first. Pull the plunger back, take out the cartridge and wipe sealant from the cradle and plunger with a rag. Wet silicone and acrylic are easier to wipe away than cured sealant, so do not wait.
If the cartridge has some caulk left, seal the nozzle with a screw or a nozzle cap and store the tube upright. Store the gun and battery in a dry place away from heat. Charge the battery according to the maker's guidance before the next job.
Frequently asked questions
Why does my cordless caulk gun keep oozing after I release the trigger?
Pressure is still in the cartridge. Use the release or reverse function if your gun has one, cut the nozzle opening smaller next time, and wipe the tip between passes.
Can I use a battery caulk gun with construction adhesive?
Often yes, but check your manual for the supported cartridge sizes and sealant types. Thick adhesive needs more force, so start on a higher power setting and watch for slowing.
How full should the battery be for a long joint?
Start with a full charge. A tired battery can slow the motor and produce a bead of uneven thickness, which is hard to fix once the caulk begins to skin over.
What size should I cut the nozzle opening?
Cut small, at an angle, so the opening is a little narrower than the gap you are filling. You can trim again if the bead comes out too thin.