How to Use a Benchtop Jointer: Step-by-Step for Beginners
A benchtop jointer flattens one face of a board and then squares one edge to it. Set the outfeed table level with the cutterhead knives, take light passes with the board's concave side down, keep steady pressure on the tables and fence, and use push blocks to finish each pass. Do this once for the face and once for the edge, and you have two reference surfaces for every cut that follows.
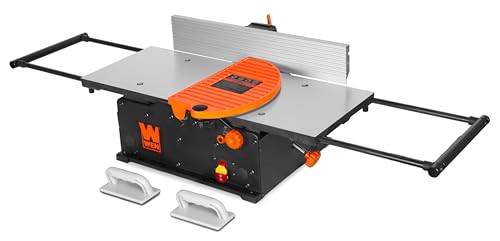 WEN JT1224HBest overall
 CUTECH 401120HI-IF#1 on our Best Score
 CUTECH 40180HBMid-size 8 in spiral
What a benchtop jointer does (and what it does not)
A jointer has two flat tables with a spinning cutterhead between them. The board travels from the infeed table, across the cutterhead, and onto the outfeed table. The outfeed table sits level with the cutting edge, so the freshly cut surface rests on it and stays flat as you push forward.
Its job is to create one flat face and one square edge. It does not make the opposite face parallel to the first. That is the job of a thickness planer. If you are still choosing a machine, our best benchtop jointer page compares compact models side by side, and our best jointer page covers larger floor-standing options.
Benchtop jointers also have limits. Their tables are shorter and their cutting width is narrower than a full-size machine, so they suit short to medium boards. Very long or very wide boards are better handled another way, which we cover below.
Safety first: read this before you plug in
A jointer has an exposed rotating cutterhead, and most injuries happen when a hand passes over it or a board kicks back. A few habits prevent most problems.
Always unplug the machine before you change knives, adjust the tables or clear a jam. Follow your manual for the exact adjustment procedure on your model.
- Wear safety glasses and hearing protection. Jointers are loud and throw chips.
- Skip loose sleeves, gloves, jewelry and dangling cords or drawstrings that could catch.
- Never joint a board shorter than your manual allows. Short stock is hard to control.
- Check for nails, staples and screws. Metal chips the knives and can fly out.
- Keep your hands on top of the board and off the cutterhead. Use push blocks or a push pad to pass over the cutters.
- Stand to the side of the board's path, not directly behind it, in case of kickback.
- Use dust collection or a shop vacuum if the machine has a port, and wear a dust mask. Fine dust builds up quickly.
Set up the machine
Good results come from setup. Start with the machine unplugged and check three things.
First, confirm the outfeed table is level with the knives at their highest point. If the outfeed table is too low, the end of the board dips and you get a gouge at the end of the cut. If it is too high, the cut tapers and the board never comes out flat. Your manual explains how to check this with a straightedge.
Second, set the infeed table for a light cut. The difference in height between the infeed and outfeed tables is your depth of cut. Beginners get cleaner results with a thin shaving per pass, and repeating passes is safer than one heavy cut.
Third, check that the fence is square to the table. Set the fence with a reliable square, lock it down, and test it again after tightening. A fence that drifts out of square will give you an edge that is not square, no matter how good your technique is.
Step-by-step: flatten the face of a board
Start with the face, because the edge is squared to it afterward. Pick the board's cupped face to go down on the table so the board does not rock.
- Inspect the board. Look down its length to find the cup, bow or twist. Mark the face you plan to flatten with pencil squiggles so you can see the cutter working.
- Place the board cupped side down on the infeed table, with the grain direction set so the cutters cut with the grain. Look at the edge of the board: the grain lines should rise toward the direction you are feeding, not dive into the knives.
- Turn the machine on and let it reach full speed before the board touches the cutterhead.
- Feed the board steadily with both hands, using push blocks. Apply downward pressure over the infeed table at the start of the cut.
- As the board's leading end reaches the outfeed table, shift your downward pressure to the outfeed side. This keeps the cut surface flat on the outfeed table. It is the single most important habit in jointing.
- Keep the feed speed steady. Pausing in the middle of a cut can leave burn marks or a dip.
- Lift the board off at the end, return to the start without dragging it across the cutterhead, and repeat until the pencil marks are completely gone and the face lies flat on a known flat surface.
Step-by-step: square an edge
Once one face is flat, turn the board so the flat face is against the fence and joint one edge. This edge becomes square to the reference face.
Hold the flat face firmly against the fence as you feed. Use light downward pressure on the board and more sideways pressure toward the fence. Use the same infeed to outfeed pressure shift as before.
Check the edge with a square after each pass or two. When the edge is straight along its length and square to the face, stop. You now have two reference surfaces that can ride on a table saw fence or planer bed.
If you want to widen or thin the board afterward, use these two surfaces as your starting point. Mark them with a pencil so you do not forget which is which.
Fixing common problems
Most beginner problems trace back to table alignment, pressure or grain direction. This table covers the usual ones.
If a fix does not help, unplug the machine and re-check the table and fence settings before you try again.
| Problem | Likely cause | What to try |
|---|---|---|
| Board rocks or ends up tapered | Outfeed table not level with knives | Re-level the outfeed table to the knife height |
| Dip or gouge at the end | Pressure stayed on the infeed side too long | Shift pressure to the outfeed side once the board is over the knives |
| Rough, torn grain | Cutting against the grain or dull knives | Flip the board's direction, or replace or sharpen the knives |
| Edge not square | Fence out of square | Reset the fence with a square, then lock it |
| Board still not flat | Too few passes or a twisted board | Keep taking light passes and watch the pencil marks |
| Burn marks | Pausing or feeding too slowly | Keep a steady, moderate feed speed |
Tips, jigs and when to use a different tool
A few simple aids make a small machine more capable. Push blocks with a grippy sole let you keep your hands high and your pressure even. A carrier board can help you hold a narrow or thin piece safely.
Some woodworkers also use a planer sled to flatten a board that is too long or too wide for the jointer. If you try any jig, keep it simple and make sure the board cannot shift while it passes the cutters.
For long boards, support the ends with roller stands or a helper so the board does not tip off the tables. Badly warped boards are often easier to cut into shorter pieces first and joint one piece at a time.
If you are working with a particular brand, such as a Jet model, the basic steps are the same. Check the manual for its table adjustment, fence stops and knife settings, since these differ between machines. If your projects keep outgrowing a compact machine, our best jointer page is a good next stop.
Frequently asked questions
Should I joint the face or the edge first?
Face first. A flat face gives the edge a true reference to sit against the fence, so the edge comes out square to it.
Can I use a jointer to thickness a board?
No. A jointer flattens one surface at a time. To make the second face parallel to the first, run the board through a thickness planer with the jointed face down.
What if the surface tears as I cut?
Flip the board end for end so the knives cut with the grain, and take a lighter pass. If tearing continues, the knives may be dull.
How often should I check my settings?
Check the fence and outfeed table before each session, and again if you move the machine or change the knives. It takes a minute and prevents most bad cuts.
Is a video useful for learning this?
Yes, watching the pressure shift from infeed to outfeed can make the technique easier to picture. Use video alongside your manual and the safety steps above.