How to Sharpen Pruning Shears at Home
Yes, you can sharpen pruning shears at home with a small sharpening file or a whetstone, a little oil and about 15 minutes. Sharpen only the beveled edge of the cutting blade, keep the original angle, and leave the flat back of the blade alone. Clean the tool first and wear gloves and eye protection.
 FELCO F-2Best overall
 Fiskars 91095935JSap groove and coating
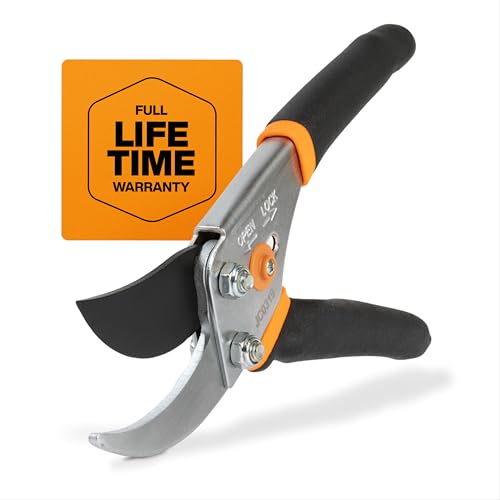
 Kynup V11 RedLight with 1 in capacity
Can You Sharpen Pruning Shears?
Yes. Most pruning shears, and most garden shears and loppers, can be sharpened at home. Dull blades crush stems instead of slicing them, which leaves ragged wounds and makes your hand work harder. A few minutes with a stone or file usually brings a blade back to a clean cut.
The method depends on the blade type. A bypass pruner has a curved cutting blade with a beveled edge on one side and a flat back, much like scissors. That bevel is the only part you sharpen. An anvil pruner has a blade that presses onto a flat surface, so it is sharpened on both sides of the edge. If you are not sure which you own, check whether the blades pass each other or meet head on.
What You Need
You do not need much gear. The right choice depends on how dull the blade is and how much you enjoy hand work. A small diamond file or whetstone is enough for most home gardeners.
Here is what to gather before you start:
- A sharpening tool from the table below
- Cut-resistant gloves and safety glasses
- A rag and a stiff brush or old toothbrush
- Light machine oil or a similar thin tool oil
- Rubbing alcohol or a mild cleaner for sticky sap
- A bench vise or clamp if you want both hands free
| Sharpening tool | Best for | Things to know |
|---|---|---|
| Diamond file or pocket sharpener | Quick touch-ups in the garden | Easy to control and small enough to carry. Works in one direction along the bevel. |
| Whetstone (medium and fine sides) | Dull blades and careful, even edges | Needs a little water or oil and some practice holding the angle. |
| Flat mill file | Nicked or rolled edges | Removes metal quickly, so use light strokes and check often. |
| Rotary tool with a grinding stone | Heavily worn blades when you want speed | Easy to remove too much metal. Needs eye protection and a steady hand. |
Clean and Inspect First
Sharpening over sap and rust just clogs your stone. Wipe the blades with a rag and a little rubbing alcohol, and scrub off any rust or dried resin with a brush. If the shears are stiff, a drop of oil at the pivot can help you see how the parts move.
Next, check the blade for damage. Small nicks can be filed out, but a bent blade, a loose or worn pivot, or a crack means the tool needs repair or replacement. Some pruners are built with replaceable parts, such as the Felco F-2 and the Corona BP 3180D on our best pruning shears page. On those, a worn blade can be swapped instead of sharpened again and again.
If your shears have a safety lock, leave the blades open while you work. Clamp the handle in a vise, or brace it firmly on a bench, so the tool cannot slip.
How to Sharpen Pruning Shears by Hand
These steps work for a bypass pruner and a file or stone. Go slowly. You are removing a thin layer of metal, not reshaping the blade.
Follow this order:
- Open the shears fully and look at the bevel, the slanted edge on the outside of the cutting blade. Your goal is to keep that angle exactly as it is.
- If you can, take the pruner apart at the pivot bolt so you can reach the blade edge. Note how the spring and parts fit, or take a photo. If it does not come apart easily, you can sharpen it assembled.
- Hold the file or stone against the bevel so it lies flat on the existing slope. Lifting the tool changes the angle and rounds the edge.
- Push the tool along the bevel from the base of the blade toward the tip, in one direction only. Do not saw back and forth.
- Use light, even strokes. Ten to twenty passes is a common starting point for a dull blade, but stop when you see a clean, bright strip of metal along the whole edge.
- Run a finger carefully along the back of the blade, never the edge, and feel for a tiny raised lip called a burr. This tells you the edge is sharp.
- Flip the blade over and lay the file flat on its back. Make one or two light passes to knock off the burr. Do not grind a bevel on the flat side.
- Wipe the blade clean, then work the same way on the other blade only if it has a cutting edge. On most bypass pruners, the lower hook is not sharpened.
Long Handled Pruning Shears and Garden Shears
Long handled pruning shears, often called loppers, follow the same method as hand pruners. The blades are bigger, so a flat mill file or a wide stone is easier to control than a tiny pocket sharpener. Open the handles wide and clamp the tool so the blade you are sharpening cannot swing. Many loppers also have a pivot bolt you can loosen to separate the blades, which gives you better access.
Garden shears, such as hedge shears, have two long blades that work like big scissors. Sharpen each blade along its own bevel using the same one-direction strokes. Take the blades apart if you can, because it is easier and safer to sharpen each one on its own. Afterward, check that the pivot is snug but not tight, since a loose pivot leaves gaps that chew leaves.
For any of these tools, a larger blade means more surface to keep consistent. Work in sections along the edge and check your angle often.
Using a Power Tool Safely
A rotary tool with a small grinding stone can speed up the job, but it takes the most care. Spinning stones throw sparks and fine particles, and a slip can cut you or ruin the edge. Wear safety glasses, gloves rated for handling sharp blades, and hearing protection if the tool is loud. Unplug a corded tool or remove the battery before you change stones or reposition the pruners.
Clamp the shears firmly and keep your free hand clear of the blade path. Use light contact and short passes so the steel does not overheat, which can soften the edge. If you are new to this, finish with a hand file so you can clean up the burr and check the angle.
Test, Oil and Store
When you finish, wipe away metal dust and put a thin coat of oil on the blade and pivot. Reassemble the parts if you took them apart, and make sure the blades close smoothly with the spring working. Test on a small live stem. A sharp bypass blade should slice cleanly without squeezing or tearing the bark.
If the cut is still ragged, the edge may have a gap or the blades may not meet properly. Repeat a few light passes on the bevel, or check the pivot for wear. Store the tool with the safety lock on if it has one, and keep it dry.
After each use, wipe off sap and moisture. Blades with a low-friction coating or a sap groove tend to stay cleaner, and you can see which models list those features on our pruning shears comparison. Clean blades need sharpening less often.
Frequently asked questions
How often should I sharpen my pruning shears?
Sharpen when cuts start to look crushed or you notice more effort per snip. For regular use, a quick touch-up once or twice a season is a sensible habit. Cleaning after each use helps the edge last.
Should I use a different angle than the factory bevel?
No. Match the angle already on the blade. Changing it takes more metal off and can leave the edge weaker or uneven.
Can I sharpen a coated blade?
Yes, but sharpening will wear the coating off the bevel you file. The blade still cuts well, though that spot may stick to sap more. Keep it clean and lightly oiled.
Can I sharpen shears that have a bent blade?
Not effectively. A bent blade will not meet its partner correctly, so sharpening will not fix the cut. Repair or replace the blade or the tool.
What if my pruners still will not cut after sharpening?
Check for a loose pivot, a bent blade, or sap and rust built up between the blades. Clean and adjust the pivot, then test again.