How to Set Up Water Leak Detectors: A Step-by-Step Guide
Plan the spots at risk, connect the hub (if your kit has one) to your router, pair each sensor in the app, then place sensors flat on the floor where the first drip would land. Finish by testing every sensor with a few drops of water and confirming the alert reaches your phone or the room. The whole job usually takes an afternoon.
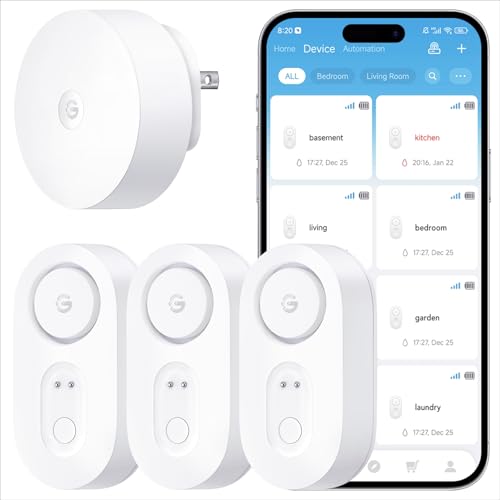 GoveeLife H5059+H5044Best overall
 YoLink YS1603+6YS7906Freeze alerts and shutoff
 YoLink YS1603+4YS7903Long-range shutoff starter
Step 1: Pick your kit and count your spots
Setup goes smoother when you know what you are installing. Walk through the house and list every place a leak could start: the water heater, washing machine, dishwasher, under each sink, behind toilets, and near a sump pump if you have one. One sensor per spot is the safest plan.
Then decide how you want to be warned. A loud local alarm helps when someone is home. App, SMS or email alerts matter when you are traveling or at work. Our best leak detector page lines up alarm volume, range, sensor count and alert options so you can match a kit to your list.
Kit types set up a little differently. Hub kits need a power outlet and a network link. Standalone alarms need only batteries and a good location, but they make noise only and send nothing to your phone.
Step 2: Gather what you need
Have these items ready before you open the app or peel any adhesive.
- Your sensors, with batteries installed (some kits ship with them already in place)
- The hub, if your kit includes one, plus a nearby outlet
- Your Wi-Fi name and password, noting that some hubs only join 2.4 GHz networks
- A smartphone with the maker's app downloaded
- A dry cloth and a small cup of water for testing
Step 3: Connect the hub and pair the sensors
Place the hub close to your router first. It needs power and an internet link to send phone alerts. Some hubs connect by Ethernet cable or 2.4 GHz Wi-Fi, and one listing notes its gateway supports only 2.4 GHz Wi-Fi. If your router combines bands under one name, check the app instructions if the hub will not connect.
Next, open the app and follow the prompts to add the hub. Then add each sensor. Some kits let you scan a QR code on the device, which avoids pairing each sensor to Wi-Fi one by one.
Name each sensor by room as you add it, such as Basement Water Heater or Kitchen Sink. When an alert arrives, you will know where to look without guessing.
If your kit sends SMS or email alerts, add the contacts you want. Some apps let you add extra email addresses so family or a neighbor also hears about a leak.
Step 4: Place each sensor
Sensors work only when water reaches them, so placement matters more than anything else. Set each one flat on the floor in the spot where the first trickle would collect. Keep it close to the appliance, not across the room.
Avoid placing a sensor where it will sit in a spill that is not a leak, such as right in front of a door that gets tracked with wet shoes. Also keep it out of the way of mops and pets.
Use this quick guide for common spots.
| Location | Where to put the sensor |
|---|---|
| Water heater | On the floor beside the tank, near the drain pan edge or low point |
| Washing machine | On the floor near the hoses and the front or back edge |
| Dishwasher | On the floor beside the unit or under the sink next to it |
| Sink | Flat in the cabinet beneath the drain and supply lines |
| Toilet | On the floor beside the base, near the supply line |
| Sump pump | Near the pit, at a height that would warn you before water rises too far |
Step 5: Check range and signal
Range numbers on a spec sheet are measured in open air. Walls, metal appliances and floors cut the real distance. Hub kits on our comparison page list ranges from 1804 ft to 2034 ft, which suits big homes, but a sensor in a metal cabinet in a far basement still needs a check.
After placing the farthest sensor, look in the app to confirm it shows as connected. If the signal is weak, move the hub toward the middle of the house or move the sensor a short distance and check again.
Also glance at the waterproof rating. Sensors sit on wet floors, so an IP67 or IP66 rating is a good sign. One YoLink starter kit lists an IP68 housing but says indoor use only, so follow each maker's guidance.
Step 6: Test every sensor
Do not skip this step. A sensor that never got tested might not work on the day you need it.
Follow these steps for each one:
- Touch two drops of water to the bottom probes or contacts, then wait for the signal
- Confirm the local alarm sounds, if the model has one
- Confirm the phone alert arrives by app, SMS or email
- Wipe the sensor dry and return it to its spot
- Check that the app shows the alert cleared
Safety and upkeep
Keep water and electricity apart. Plug the hub into a dry outlet away from sinks and the floor, and do not run cords through damp areas. If a sensor goes off near an outlet, appliance or breaker panel, do not touch standing water. Shut off power at the breaker only if you can reach it safely and dry.
Loud alarms can reach 105 dB or more. Do not hold a sensor next to your ear during testing, and lower the volume in the app if the model allows it.
Check battery status in the app every few months. Most kits on our page list 5 years of battery life, while one single sensor lists 2 years, so that one needs a calendar reminder. Also retest after any plumbing work or after you move a sensor.
If you add an automatic shutoff valve later, remember that valves are sold separately and that only some kits support them. Our leak detector comparison shows which kits list shutoff support and freeze alerts.
Frequently asked questions
Can I put a sensor on a shelf or wall?
No. Sensors detect water on the surface they touch, so they belong flat on the floor or a low shelf where water would pool, not up high.
Do I need a hub?
Only if you want phone alerts from a long-range kit. Standalone alarms work without one, but they only make noise, so no one will know if you are away.
What if the sensor keeps going off with no leak?
Check for condensation, damp floors or a spot that is often wet. Some sensors have top probes that can react to heavy humid mist, so move the sensor to a drier, flatter location.
How often should I replace batteries?
Follow the rating listed for your model and check the app for battery status. Replace them as soon as the app or a flashing light shows low power.
Can a leak sensor shut off my water?
Only with compatible shutoff hardware, which is sold separately. A sensor on its own detects and alerts.