How to Remove Shingles Without Damaging Them
Break the sealant bond gently, lift the shingle above, and pull each hidden nail with a claw pry bar instead of tearing the shingle off. Work slowly on a mild day, and use a short pry bar for a few shingles or a longer shovel or ripper for larger areas. Wear fall protection and eye protection the whole time.
 PacTool RS501 Roof SnakeBest overall
 Hoqqf 54UCB060Most compact
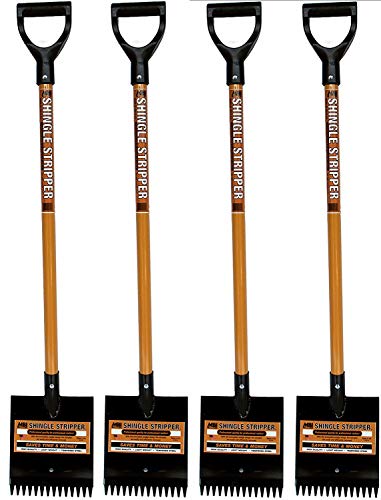 MBI Tools MBISS-4LBest for full tear-offs
Why shingles get damaged during removal
Most damage comes from two things: pulling a shingle up while its nails still hold it, and bending the good shingles above it too far. Asphalt shingles are stuck down with a sealant strip and held by nails that sit under the row above. If you yank, the nail heads tear through the mat and the neighbors crack.
The fix is to treat it as a nail removal job, not a shingle removal job. Free the nails first and the shingle slides out with little force. That is the idea behind every pry bar and roof snake design.
Prepare the roof and yourself
Check conditions before you climb. Shingles are more flexible when it is mild and dry, and they crack more easily when it is cold. A very hot roof is a different problem: it is slippery underfoot and the sealant strips grip harder. Early or late in a mild day is often the sweet spot.
Roof work carries real risk, so set up your safety gear first:
- Fall protection: a harness tied to a secure anchor, plus a ladder that extends well above the roofline and is tied off.
- Eye protection: nails, grit and old shingle fragments can fly when you pry.
- Gloves and sturdy shoes with good grip, since shingle edges are sharp and granules are slippery.
- A clear zone below, so no one stands under the work area.
- A dry roof, with no wet leaves, frost or dew.
Pick the right tool for the job
The best tool depends on how much you are removing. For a few shingles, a short claw pry bar or roof snake slides under the shingle above and grabs the hidden nails. For larger areas, a long shovel or ripper lifts rows at once. Our best shingle removal tool comparison lists length, weight and features for each type so you can match one to your project.
Here is how some of the tools on that page differ, based on published specifications:
| Tool | Style | Length | Best use |
|---|---|---|---|
| PacTool RoofSnake | Pocket pry bar | 13 in | A few shingles, with claw and nail slot |
| Hoqqf 2-in-1 | Pry bar | 11.6 in | Tight spots and single-nail removal |
| SDSNTE | Pry bar | 12 in | Small repairs, 4140 steel per listing |
| Dasco Pro 640 | Shingle ripper | 24 in | Larger sections with more leverage |
| MBI Stripper | Roof shovel | 47 in | Full tear-offs |
Remove a single shingle step by step
This method works for replacing one or two damaged shingles. Go slowly, because patience is what protects the shingles around the one you are replacing.
- Find the damaged shingle and the row above it. Each shingle is nailed under the course above, so you will work from that upper row.
- Gently lift the tabs of the shingle above to break the sealant bond. Use the flat of a pry bar and light pressure. Do not bend the tabs sharply.
- Slide the claw end of your pry bar under the shingle to reach a nail head.
- Hook the claw under the nail, then twist or roll the bar to lift the nail out. Pulling the nail straight up keeps the shingle intact.
- Repeat for every nail holding the damaged shingle, and for any nails from the row above that pass through it.
- Slide the damaged shingle out. If it resists, you probably missed a nail, so check again instead of pulling harder.
- Clear any loose nails and granules from the area before fitting the new shingle.
Removing a larger area for a repair
If a leak or storm damage affects a whole section, a longer tool saves effort. A ripper or shovel slides under a row of shingles and breaks nails loose across a wider span. The trade-off is less precision, so plan which shingles are going to be thrown away before you start.
Work from the top of the repair area down so debris slides away from you, and stop at a clean edge where good shingles remain. Keep a pry bar handy for the shingles at the border, where careful nail pulling protects the courses you plan to keep. Our shingle removal tool comparison helps if you need both a long tool and a small bar for the edges.
Longer tools bring more leverage, but also more reach over an edge. Keep your footing stable, and do not lean on a tool that could suddenly give way.
Fit the new shingle and finish up
A nail slot on the pry bar holds a roofing nail at the correct offset, which helps you fit the new shingle under the row above without bending it or striking your fingers. If your bar has no slot, lift the upper tabs lightly and set nails by hand.
Nail the new shingle in place, then seal the tabs with a dab of roofing cement if the sealant strip does not engage on its own. Old shingles rarely survive removal perfectly, so expect that some of the ones you pull may crack, and match the new one as closely as you can.
Finish by sweeping debris off the roof, collecting every loose nail with a magnet, and checking the ground below. Stray nails on a driveway or lawn are a hazard for tires and feet.
Frequently asked questions
Can I reuse shingles I remove?
Sometimes, but not reliably. Old asphalt shingles can crack, lose granules or leave sealant residue. If a removed shingle is flat, intact and still flexible, it may work as a patch. Otherwise, a new matching shingle is safer.
Should I remove shingles when it is cold?
Try to avoid it. Cold shingles are stiff and tear or crack when lifted. Wait for a mild, dry day if you can, and move slowly if you cannot.
Do I need a roof permit to replace a few shingles?
Rules vary by city and county. Small repairs often need no permit, but full re-roofs commonly do. Call your local building department to confirm before starting.
How do I find which nails to pull?
Nails sit under the row above, usually near the top of the shingle. Lift that upper row slightly, then feel or look for nail heads and slide the claw under each one in turn.