How to Polish Car Paint at Home Step by Step
To polish car paint at home, wash and decontaminate the car, test your polish and pad on a small hidden spot, then work one small section at a time with light to moderate pressure. Wipe off the residue, check the result under good light, and seal the paint with wax or sealant. You can do it by hand or with a machine polisher, and a machine is faster and more consistent on larger areas.
 Niusken PGJ-21V-RED
 Niusken PGJ-21V
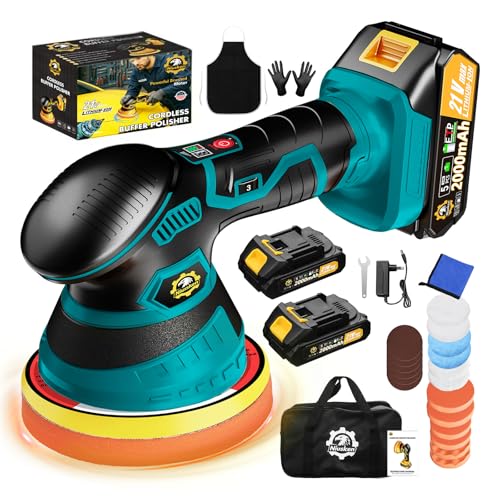 Niusken PGJ-21V-BLUE
What polishing does and what it does not do
Polishing uses very fine abrasives to remove a thin layer of clear coat. That levels out light swirl marks, hazy oxidation, water spot etching and shallow scratches, so the paint reflects light more evenly and looks deeper and glossier.
It does not fill damage or fix everything. A scratch that catches your fingernail has usually gone through the clear coat, and polish will only make it less noticeable at best. Peeling clear coat, rust and deep gouges need a body shop or a paint repair kit, not polish.
Because polishing removes a small amount of clear coat each time, treat it as an occasional correction job rather than routine care. Use the least aggressive combination that gets the result you want.
What you need before you start
Gather everything first so you are not hunting for supplies with product drying on the paint. Most of the list is inexpensive and reusable.
If you plan to use a machine, it helps to understand the differences between types before you commit. Our comparison of the best polisher for car options lays out the published specifications side by side, so you can match a tool to the size of your vehicle and your comfort level.
- Car wash soap, two buckets and a wash mitt
- Clay bar or clay mitt with lubricant (for bonded contaminants)
- Painter's tape for trim, rubber seals and sharp edges
- Car polish, plus a more abrasive compound only if the paint is badly swirled
- Foam applicator pads for hand work, or a machine polisher with foam pads
- Several clean, soft microfiber towels
- A bright, portable light to reveal swirls and haze
- Wax or paint sealant to protect the finish afterward
Step 1: Wash and decontaminate the paint
Start with a thorough wash in the shade, when the paint is cool to the touch. Polishing over dirt grinds grit into the finish and creates new scratches, so this step matters more than it seems.
After rinsing, run your fingertips over the paint inside a thin plastic bag. If it feels rough or gritty, use a clay bar with plenty of lubricant to lift embedded contaminants such as tree sap, industrial fallout and overspray. Wipe the panel clean afterward and dry the whole car with a clean microfiber towel.
Then tape off plastic trim, rubber seals, emblems and panel edges. Polish stains textured plastic and the paint is thinnest along edges and body lines, so keep abrasives away from them.
Step 2: Test a small spot first
Pick a small area that is easy to hide, such as a lower door panel or the trunk lid near the edge. Work a patch roughly two feet by two feet with your chosen polish and pad, then wipe it clean and inspect it under your light.
If the swirls and haze are mostly gone, you have your combination. If they remain, step up gradually: use a bit more pressure, a few more passes, or a slightly more abrasive product. Avoid jumping straight to the harshest option. Repeat the test whenever you move to a very different panel or a different kind of paint.
Step 3: Apply and work the polish
Put a few pea-sized drops of polish on the pad. Spread it over one small section, again about two feet square, before you start working it in. More product does not mean better results. Too much just gums up the pad and is harder to wipe off.
The steps below work for both hand and machine polishing:
- Spread the polish across the section using light pressure.
- By hand, rub in overlapping straight lines or small circles. With a machine, move slowly across the section in overlapping passes, keeping the pad flat on the surface.
- Add pressure gradually, and keep the pad moving so heat does not build up in one spot.
- Keep working until the polish turns thin and almost clear, or until it begins to dry to a light haze.
- Stop and wipe the residue off with a clean microfiber towel, folding it to a fresh side as it loads up.
- Check the section under your light before moving to the next one.
Hand polishing vs. machine polishing
Yes, you can polish a car by hand, and it is a perfectly reasonable way to refresh paint that is in decent shape. It takes more time and effort, and it is less effective on deeper swirls. A machine polisher does the same job with more consistent motion, which is why people with larger vehicles or heavily swirled paint often prefer one.
| Factor | By hand | With a machine |
|---|---|---|
| Best for | Small areas, light haze, spot touch-ups | Whole vehicles, moderate swirl marks |
| Effort | Physically demanding on big panels | Much less arm fatigue |
| Consistency | Varies with pressure and stamina | More even results |
| Learning curve | Very low | Moderate; needs a practice section |
| Risk of paint damage | Low | Higher if misused, especially near edges |
| Extra safety needs | Gloves optional | Eye protection, hearing protection if loud, careful cord handling |
Step 4: Protect the paint
Fresh polish leaves bare, clean paint with no protection. Once every panel is done, wipe the car down once more to remove any leftover residue, then apply a coat of wax or paint sealant following the product directions. This locks in the shine and gives the clear coat a barrier against sun, rain and road grime.
Keep the car out of direct sunlight and rain while the protective coat cures, as the label recommends. Many products need a short window before they are ready to get wet.
If you are in a similar frame of mind for other exterior projects, our guide to the best paint for mobile home exterior covers coatings for a very different kind of surface.
Safety notes and common mistakes
Machine polishers run on electricity, so keep the cord and plug away from wet ground and standing water, and use a properly grounded outlet. Wear safety glasses, because polish can sling off a spinning pad, and consider hearing protection if your tool is loud. Always unplug the tool before changing a pad.
Avoid these frequent slips:
- Polishing in direct sun or on a hot panel, which makes product dry out too fast
- Skipping the wash and clay step
- Pressing too hard or staying in one spot, which can burn through thin clear coat
- Polishing over edges, sharp creases and badges where paint is thinnest
- Using a dirty pad or towel, which scratches the paint
- Working a section too large to finish before the polish dries
Frequently asked questions
How often should I polish my car?
Only when the paint needs it, such as when you can see swirls, dullness or oxidation. Polishing removes a thin layer of clear coat, so once or twice a year at most is plenty for most cars. Regular washing and waxing keep the finish in good shape between polishes.
What is the difference between polish, compound and wax?
Compound is the most abrasive and removes deeper defects. Polish is finer and refines the finish to a high gloss. Wax is not an abrasive at all. It is a protective layer that goes on after polishing.
Do I need to polish the whole car?
No. You can polish a single panel or a small problem area. Just wash the car first and blend the edges of the polished area carefully so the finish looks even, and protect the area afterward.
Why does my paint look hazy after polishing?
Haze usually means residue is still on the surface, the polish was too abrasive for the final pass, or the pad was dirty. Wipe the area with a clean towel and inspect it under bright light. If haze remains, repeat with a finer polish and a clean pad.