How to Perform a Cooling System Pressure Test Step by Step
Let the engine cool completely, fit the correct adapter to the radiator or expansion tank neck, and pump the tester up to the pressure printed on your radiator cap. Then watch the gauge for several minutes. A steady needle means the system holds pressure, and a falling needle means there is a leak to find. Never go above the cap rating, and never open a hot system.
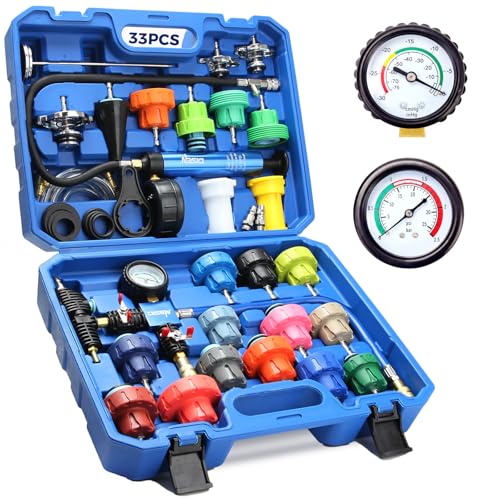 DISEN DS-33LQYZKJZTJBest overall
 Orion Motor Tech RCPDual-scale 35 psi gauge
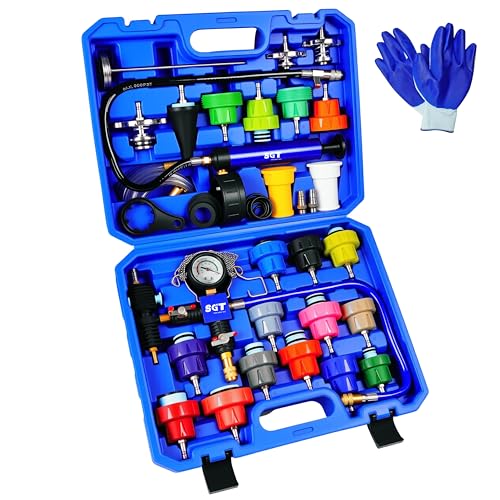 SGT SUPER GARAGE TOOLS SGT-Q295-BLUEListed pressure and vacuum ranges
What a cooling system pressure test tells you
A cooling system runs under pressure, which raises the boiling point of the coolant and keeps it in liquid form. If a hose, gasket, radiator core, heater matrix, or water pump seal lets pressure escape, the engine can overheat or lose coolant slowly. A pressure test recreates that pressure while the engine is off, so you can find the leak without the heat and hazards of a running engine.
The test also helps with leaks you cannot see. Coolant can seep into a cylinder or burn off on a hot exhaust before it ever drips on the ground. When the gauge drops but you see nothing outside, an internal leak such as a head gasket is one possibility worth investigating further.
What you need before you start
Most kits use a hand pump with a gauge, a set of adapters, and a few extras. The adapter is the part people get wrong, because it has to seal on your exact filler neck or expansion tank. If you are still choosing a tool, our best cooling system pressure tester comparison lists adapter counts and pressure limits side by side.
- A pressure tester with a gauge and hand pump
- The adapter that matches your radiator or expansion tank neck
- Safety glasses and gloves
- Clean rags and a drain pan
- A flashlight and a small mirror for tight spots
- Your vehicle manual, to confirm the system pressure rating
- Spare coolant of the type your vehicle calls for
Step-by-step pressure test
Work on level ground with the engine fully cold. Cold means you can touch the radiator hoses comfortably and the engine has sat for several hours.
- Open the hood and check the coolant level. Top it up to the cold fill mark if it is low, because a low level can hide a leak or give a false result.
- Find the pressure rating, which is usually stamped on the radiator cap or listed in the manual. It may appear in psi, bar, or kPa. A gauge that shows both psi and bar makes conversion easier.
- Remove the cap slowly. Cover it with a rag and turn it a quarter turn first, so any residual pressure can escape before you lift it off.
- Pick the adapter that seats snugly on the neck. It should lock on like the original cap. If it feels loose or cross-threaded, try another size rather than forcing it.
- Attach the tester to the adapter and make sure the connection is tight.
- Pump slowly and watch the gauge. Stop at the rated cap pressure. Several of the kits on our comparison page list a 35 psi maximum, which is the ceiling of what the gauge can show, not a target. Use your cap rating as the target.
- Wait and watch for at least 10 to 15 minutes. A steady needle suggests the system is sealed. A needle that creeps down points to a leak.
- If the gauge drops, inspect the hoses, clamps, radiator seams, water pump area, heater hose connections, and the ground under the car with a flashlight. Look for wet spots, crusty dried coolant, or drips.
- Release pressure slowly using the tester's relief valve before you remove the tester. Point any spray away from your face and body.
- Refit the original cap, check the coolant level again, and clean up any spilled coolant.
How to read the results
The needle tells most of the story. Use the table below as a starting point, then confirm with a visual check.
If you see a slow drop and no visible leak, wait for more time and recheck connections first. A loose adapter can look like a system leak, so make sure the tester itself is sealed before you blame the engine.
| What you see | What it may mean | Next step |
|---|---|---|
| Needle holds steady | System is sealed at this pressure | Check the cap if you still lose coolant |
| Fast drop, visible drips | External leak at a hose, clamp, or radiator | Find the wet spot and repair it |
| Slow drop, nothing visible | Small seep or internal leak | Recheck adapter, then inspect further |
| Pressure rises on its own when warm | Possible combustion gas entering coolant | Have a mechanic investigate |
| Gauge will not reach pressure | Large leak or poor adapter seal | Reseat the adapter and inspect hoses |
Test the radiator cap too
A worn cap can cause coolant loss even when the rest of the system is fine. Many kits include a cap test connector, and some listings, such as the VTG Vogten kit, mention one. Attach the cap to the connector, pump to the pressure stamped on the cap, and see whether it holds. A cap that releases early or fails to hold should be replaced with one that matches the rating in your manual.
Do this check every time you pressure test. It takes a minute and rules out an easy cause.
Refill without air pockets
After you repair a leak or drain the system, air can get trapped and cause overheating or poor cabin heat. Kits with a vacuum refill tool pull air out first, then draw coolant in. The DISEN and SGT kits on our pressure tester comparison page list this function. The SGT listing shows a vacuum gauge range of 0 to 30 inHg, and the VTG listing names a best refill range of -25 to -20 inHg.
In general, you attach the vacuum tool to the filler neck, pull a vacuum, check that it holds, and then open the coolant line so the system fills itself. Follow the instructions that come with your kit, because valve layouts differ by brand. DISEN says it provides a video tutorial on its product page, which is worth a look if you own that kit.
Safety notes
Coolant is toxic and has a sweet smell that attracts pets. Wipe up spills and store used coolant in a sealed container for proper disposal. Check your local rules for where to take it.
Hot coolant under pressure can scald badly. Never open a warm system. Wear safety glasses throughout, because a loose adapter can pop off or spray when you release pressure. Keep hands, hair, and loose clothing away from the fan and belts, and remember that some electric fans can start without warning on a car with a connected battery. If you are unsure about the fan, disconnect the battery or its plug first.
Frequently asked questions
How long should I leave the tester pumped up?
Ten to fifteen minutes is a practical window for most checks. If the needle stays put, the system is holding. If it drops, start looking for the leak.
Can I over-pressurize the system?
Yes. Going above the cap rating can damage hoses, the radiator, or the heater matrix. Stop at the rated pressure and do not use the gauge maximum as your target.
Why does my gauge drop but I cannot see a leak?
The adapter may not be sealing, or the leak may be internal or hidden behind a part. Reseat the adapter, then check around the water pump, heater hoses, and underneath the intake area.
Do I need a different adapter for each car?
Often yes. Filler necks and expansion tanks vary by make and model, so match the adapter to the vehicle and confirm it seals before you pump.
Can I run the engine during the test?
Not for a basic pressure test. Keep the engine off and cold. Running the engine adds heat and moving parts, which raises the risk of burns and injury.