How to Paint Kitchen Cabinets Like a Pro
Professional cabinet results come from prep, not from the paint itself. Remove the doors, degrease, scuff-sand, prime if your paint needs it, then apply thin coats of a cabinet-grade paint with light sanding between coats. A brush and small roller give a very good finish, and a sprayer gives the smoothest one if you can handle the setup and safety needs.
 Rust-Oleum Home 372011Fastest drying
 INSL-X CC560109A-01Best for a full kitchen
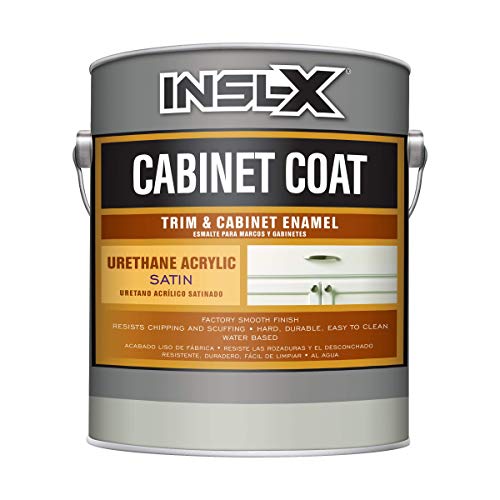 INSL-X CC550109A-01Best satin finish
Start with a work plan
Pros spend most of their time before the paint can opens. A cabinet job goes well when you treat it as a short production line: set up a clean space, work in stages and keep dust away from wet paint.
Choose a spare room, garage or covered table area where doors can lie flat while they dry. Flat surfaces let paint level out instead of running. Plan for several days, because cabinets need time between coats and gentle use afterward while the paint hardens.
Check the temperature too. For example, the INSL-X Cabinet Coat listings say to apply when the air, product and surface temperature are between 50 °F and 90 °F. Other paints have their own ranges, so read your label.
Prep is where the pro finish happens
Take off the doors, drawer fronts and hardware. Label each door and its matching opening with painter's tape so everything goes back in the right place. Bag the hinges and screws by cabinet.
Kitchen cabinets carry a film of grease that you often cannot see. Paint will not stick to it, so degrease every surface first, then rinse with clean water and let it dry.
- Fill dents, old screw holes and chips with wood filler, then sand flush.
- Scuff-sand all surfaces with fine sandpaper so the paint has something to grip. Some paints say they bond without primer, but they still expect a clean, scuffed surface.
- Wipe off all sanding dust with a damp cloth or tack cloth.
- Mask walls, counters and appliances, and cover floors with drop cloths.
- Caulk gaps along face frames and trim if needed, and let it dry fully.
Choose the right paint and tools
Regular wall paint stays soft and scuffs easily. Cabinet paints are made to level smoothly and cure harder. Urethane-modified acrylics are a common DIY pick because they flow well but clean up with water. Our best paint for kitchen cabinets page compares several on one spec sheet.
Sheen matters. Semi-gloss wipes clean most easily, while satin hides flaws and brush marks better. Both appear in the products we compare. INSL-X Cabinet Coat comes in semi-gloss and satin, and its gallon is listed at 350 to 450 sq ft of coverage. The Giani kit is listed at 100 sq ft and includes tools.
Pros also lean on a few small tools: a quality angled brush, a fine foam or microfiber roller for flat panels, sanding sponges, and a tack cloth.
Brush, roll or spray?
Each method can look professional. The best choice depends on your space, budget for tools and patience for masking.
Rust-Oleum's Cabinet Transformations listing names brush, roller, pad applicator or airless sprayer as options. The Giani kit is listed for brush and roll. Check your paint's label before choosing a method.
| Method | Best for | Watch out for |
|---|---|---|
| Brush | Edges, grooves, raised panels | Brush marks if you overwork the paint |
| Small foam or microfiber roller | Flat doors, drawer fronts, frames | Thick coats can leave a bumpy texture |
| Brush plus roller | Most DIY kitchens | Needs light touch and thin coats |
| Airless sprayer | Smoothest, factory-like finish | Masking, setup, cleanup and safety needs |
Step-by-step painting
Once everything is clean and dry, work in a steady order. Thin coats are the habit that separates pros from beginners.
- Prime if your paint calls for it. Bare wood, glossy surfaces and stained spots often need primer, while paints marked as no-primer do not.
- Lightly sand the dry primer with fine sandpaper and wipe away the dust.
- Paint the back of each door first, then let it dry before flipping.
- On the front, brush the grooves and edges first, then roll the flat areas. Keep a wet edge and avoid going back over tacky paint.
- Let the coat dry for the time on the label. The Rust-Oleum listing gives 30 minutes to touch and 2 hours to recoat, for example.
- Sand very lightly between coats if the surface feels rough, wipe clean, then apply a second thin coat.
Spraying cabinets safely and well
A sprayer lays down an even film with no brush marks, which is why many pros use one. It also makes overspray, so mask everything nearby or spray doors in a separate space. Thin the paint only as the manufacturer allows, and practice on scrap board first.
Move steadily, overlap each pass a little and keep the tip a consistent distance from the surface. Several light coats beat one heavy coat that sags.
Safety: wear a respirator rated for paint vapors and mist, plus eye protection. Ventilate the area well. An airless sprayer works at very high pressure, so never point it at yourself or anyone else, and never put a hand in front of the tip. Follow the tool's manual for cleaning and relieving pressure.
Let it cure, then finish the details
Dry to the touch does not mean cured. Rust-Oleum's listing says its paint is ready for normal use after 24 hours, while other paints may need longer. Handle doors gently, avoid stacking them, and wait before hanging them back on cabinets with heavy use.
Reattach doors by following your labels. This is also a good moment to upgrade pulls and knobs, since new paint makes old hardware stand out. Our best hardware for white kitchen cabinets page can help you match finishes to a white or light kitchen.
Safety: wear eye protection and a dust mask while sanding, and use a stable ladder or step stool for upper cabinets. If your home was built before 1978, test old paint for lead before sanding.
Frequently asked questions
What do professional painters use to paint cabinets?
Most use a cabinet-grade urethane or acrylic paint, a degreaser, fine sandpaper, and either a sprayer or a good brush with a small roller. They apply thin coats and sand lightly between them.
Do I always need primer?
No. Some cabinet paints, such as the INSL-X and Giani products we compare, are listed as no-primer. Bare wood, stains or slick finishes may still benefit from primer, so follow your paint's label.
How many coats do cabinets need?
Two thin coats is common. A third may help over a big color change. Thin coats dry harder and level better than one thick coat.
Can I paint cabinets without removing the doors?
You can, but results are usually worse. Paint can pool in hinges and drip on vertical surfaces. Removing doors lets you paint them flat for a smoother finish.