How to MIG Weld Mild Steel: Settings and Technique
Use ER70S-6 solid wire, shielding gas, and DC electrode positive polarity. Match wire diameter to your metal thickness, start from the chart inside your welder, and fine-tune wire speed by ear until the arc sounds like steady, even sizzling. Then hold a short wire stickout, keep a steady travel speed, and push or drag the gun at a slight angle.
 HYW Products ER70S603504544Best overall
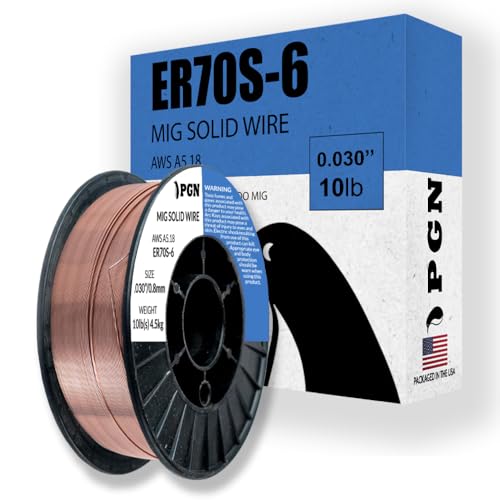 PGN Bearings WW-ER70S6-030-10LBBest for hobby welders
 PGN Bearings WW-ER70S6-035-33LBBest mid-size spool
What you need before you strike an arc
MIG welding feeds a wire electrode through the gun while shielding gas protects the molten puddle from air. On mild steel, the setup is simple, but each piece matters. Missing one is the usual reason for ugly, porous or weak welds.
Here is the basic kit:
- A MIG welder that runs solid wire with gas, set to DC electrode positive
- ER70S-6 solid wire in a diameter that suits your metal and machine
- Shielding gas, commonly an argon and CO2 mix, with a regulator and hose
- A welding helmet, gloves, a flame-resistant jacket and closed leather shoes
- A wire brush or flap disc, locking pliers or clamps, and a ground clamp
Choose the right wire
ER70S-6 is the standard choice for mild steel. Its extra silicon and manganese deoxidizers help it cope with light rust and mill scale and leave a smooth, well-wetted bead. Our best MIG wire for mild steel page compares several ER70S-6 options on one spec sheet.
Diameter is the key decision. The wires on that page run from 0.023 to 0.035 in. Thinner wire suits thin sheet and smaller welders. Thicker wire suits heavier steel and machines with more output. For general hobby work, 0.030 in is a popular middle ground, and several of the 10 lb spools we list use it.
Spool size is the other choice. Spools on our page run from 2 to 44 lb. Check what your spool holder accepts before you buy a big roll, and keep the wire dry and covered. Rusty wire causes porosity and rough feeding.
Set up the machine
Work through the setup in order. It takes a few minutes and prevents most feeding problems.
Start with the wire path, then move on to gas and polarity.
- Load the spool and match the drive roll groove to your wire diameter.
- Set drive roll tension just tight enough to feed without slipping. Too much squeezes the wire and causes jams.
- Fit a contact tip that matches the wire diameter, and trim the wire to a short length.
- Connect the gas and set the flow to the range in your welder's manual. Too little flow and too much flow both let air into the puddle.
- Confirm polarity. Solid wire with gas runs electrode positive. Flux-core wire uses the opposite, so do not mix them up.
- Clamp the ground close to the weld on clean, bare metal.
Dial in voltage and wire speed
Voltage controls arc length and bead width. Wire feed speed controls how much metal is deposited, which also sets amperage on most machines. Most welders have a chart inside the door that gives a starting point for each thickness. Start there rather than guessing.
Then tune by sound and by looking at the bead. A good arc makes a steady, even crackle, like frying bacon. A harsh popping sound often means the wire speed is too high for the voltage. A soft hiss with the wire stubbing into the work often means the voltage is too high.
Run a test bead on scrap of the same thickness before you weld the real part. Adjust one control at a time.
| What you see | Likely cause | Adjustment |
|---|---|---|
| Tall, narrow bead sitting on top | Voltage too low or wire speed too high | Raise voltage a little or slow the wire |
| Wide, flat bead with undercut at the edges | Voltage too high or travel too fast | Lower voltage or slow your travel |
| Wire stubs and pushes the gun back | Wire speed too high | Slow the wire feed |
| Wire burns back to the tip | Wire speed too low | Speed up the wire feed |
| Small pits or holes in the bead | Gas problem or dirty metal | Check flow, drafts and cleanliness |
Technique that gives clean welds
Good settings only help if your hand position is steady. Practice on scrap until the bead looks even before you move on to real parts.
- Clean the joint to bright metal. Remove heavy rust, paint, oil and loose scale.
- Keep wire stickout short, about 3/8 in, and keep it consistent.
- Hold the gun at roughly 10 to 15 degrees from vertical. Pushing gives a wider, flatter bead. Dragging gives deeper penetration.
- Start the arc, pause a moment to form the puddle, then move at a steady speed. Watch the puddle, not the arc.
- Let the puddle wet into both pieces on a T-joint or lap joint. Favor the thicker piece if the two are different.
- At the end, pause briefly to fill the crater, and keep the gas flowing for a moment so the weld stays shielded as it cools.
Welding sheet metal and exhaust
Thin sheet burns through easily. Use thinner wire, a lower heat setting, and short stitch welds instead of one long run. Jump to another area between stitches so heat does not build up in one spot. Tack the panel every inch or two first to hold the shape.
Exhaust work follows the same rules, with extra cautions. Tubing is thin, so use low heat and small tacks, then join them with short passes. Clean off rust and scale inside the joint, since old exhaust metal is often contaminated. Mild steel exhaust welds well with ER70S-6. Stainless exhaust is a different material, and aluminized or coated pipe releases fumes when heated, so grind the coating off the weld area first.
Never weld near a fuel tank, fuel lines or any container that held fuel. Remove the part from the vehicle if you can, and keep a fire extinguisher close.
Safety essentials
Wear an auto-darkening helmet with the right shade for your amperage. Arc light can damage your eyes in seconds, and flash burns hurt hours later. Wear safety glasses under the helmet, and use earplugs when grinding grinding or working in loud spaces.
Weld in a well-ventilated area, and keep your head out of the fume plume. Do not weld galvanized or coated steel without removing the coating and ventilating well. Check cables and the gun for damaged insulation, never weld on wet ground, and keep flammable materials well away. Sparks can travel and smolder. Treat hot metal as hot long after the arc stops.
Frequently asked questions
Do I need shielding gas for MIG welding mild steel?
Yes, with solid wire such as ER70S-6. Gas keeps air out of the puddle. Without it, the weld turns porous and weak. Gasless welding uses a different wire type called flux-core.
Should I push or drag the gun?
Both work on mild steel. Pushing gives a flatter, wider bead and is common on sheet. Dragging digs in deeper and suits thicker joints. Pick one, keep the angle small, and stay consistent.
Why is my wire feeding badly?
Common causes are a worn or wrong-size contact tip, the wrong drive roll groove, too much or too little roll tension, and a kinked or dirty liner. Rusty or damp wire can also cause rough feeding.
Can I weld over light rust?
ER70S-6 handles light rust and mill scale better than most wires, but clean metal always gives better results. Grind to bright steel at the joint for structural or safety-critical parts.