How to Measure a Gate Latch for Replacement
To measure a gate latch for replacement, record the overall length, the spacing between mounting holes, the screw size, the gap between gate and post, and which way the gate swings. Then check the thickness of the gate frame and post. With those numbers and a few photos, you can compare them against any product listing.
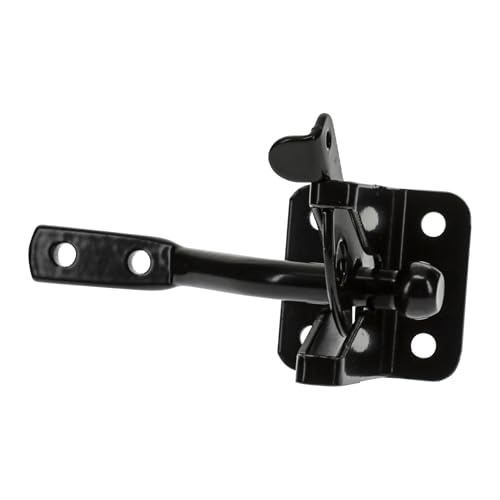 National Hardware N184-861Best overall
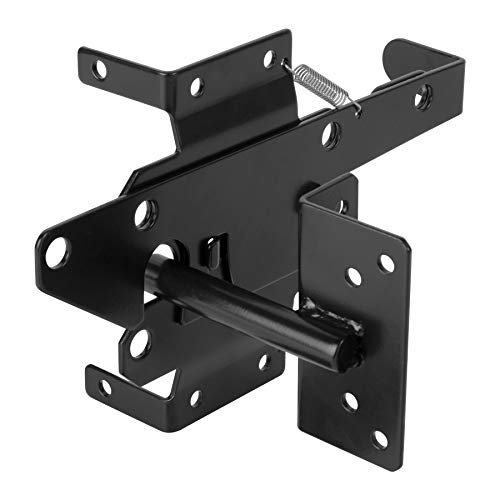 HILLMASTER 001112 screws, both swings
 HTHOOOOOME N-Gate Latch-1Wood to iron gates
Start by identifying what you have
Before you pull out a tape measure, look at how the old latch works. Most yard gates use one of a few styles: a gravity latch with a lever that drops into a catch, a thumb latch with a bar you press, a drop bolt, or a simple hook and eye. The style tells you which measurements matter most.
Take three or four clear photos before you remove anything. Shoot the latch from the front, the side, and the back if you can reach it. Photos help when you compare your gate with a listing, and they remind you how the pieces lined up.
Gather simple tools
You do not need much. A tape measure with fractions of an inch, a small ruler or calipers, a pencil, and a screwdriver cover most jobs. A notepad or your phone works for recording numbers.
Safety first: old latches can have rusted screws and sharp edges, so wear work gloves when you take them off. If you later drill new holes, wear safety glasses. Splinters and metal chips fly faster than you expect.
The measurements to take, step by step
Work with the gate closed and the old latch still in place for the first few measurements. Then remove it and measure the parts one at a time.
Write every number down with its unit, and measure twice. A sixteenth of an inch can decide whether the screw holes line up.
- Overall length of the latch body, from end to end, with the lever or bar in its resting position.
- Length and width of the strike or catch, the part that sits on the post or the other gate.
- Distance between mounting holes on each piece, measured center to center.
- Hole diameter and screw length, so you know what size fasteners the old holes accept.
- Gap between the gate and the post when the gate is closed and sitting where it normally rests.
- Thickness of the gate frame and the post where the latch mounts.
- Height of the latch from the ground, so the new one sits in the same place.
What each measurement tells you
Length matters because latches are made in a range of sizes. Among the models on our spec sheet, listed lengths include 4.125 in for a compact option, 8.5 in for a longer gravity latch, and 9 in for the HILLMASTER 0011. If your old latch is around 4 in, a very long latch will look out of proportion and may not clear your trim.
The gap is the measurement people skip most often. One listing says its 4 in latch works for a gap up to 1-9/16 in between gate and post. If your gap is wider than a listing allows, the lever will not reach the catch. Check the gap in the product data before you order, and compare it with our best gate latch spec sheet if you want several options side by side.
Thickness matters for screws. A screw that is too long can poke through a thin vinyl rail, and one that is too short will not grip. If a listing does not state screw length, treat that as a gap in the data and plan to buy matching screws separately.
| Measurement | How to take it | Why it matters |
|---|---|---|
| Latch length | End to end along the body | Checks that the new latch fits the space and looks balanced |
| Hole spacing | Center to center of mounting holes | Lets you reuse old holes and avoid new drilling |
| Gate to post gap | Closed gate, post face to gate edge | Decides whether the lever or bolt can reach the catch |
| Frame thickness | Rail and post where the latch mounts | Sets safe screw length and shows if the material is strong enough |
| Mounting height | Ground to the latch center | Keeps the new latch where users expect it |
Check swing direction and handedness
Stand on the side where people usually open the gate and note which way it swings: toward you (inward) or away from you (outward). Some latches only suit one swing. For example, the National Hardware N184-861 is listed for outswing gates only, while the HILLMASTER 0011 and the SANKINS models list both inward and outward swing.
Also note which side the hinges are on. Many latches can be mounted for left or right hand use, but the strike has to face the right direction. If you may change how the gate hangs later, a latch that lists both swing directions leaves you more room to adapt.
Match material, screws and special needs
Wood, vinyl and metal gates hold screws differently. Several listings cover all three, and the HILLMASTER 0011 notes that aluminum or metal gates may need harder screws than the ones in the box. Check the compatible gate types in the product data, not just the length.
Screw counts in the listings that state them run from 4 to 12, and some listings give no count. Confirm what comes in the box, and compare the screw size with the holes you measured.
If the gate guards a pool, a pen or a pet area, think about the height and the way the latch releases. Rules for pool gates vary by location, so check your local requirements before you pick a latch height. If you want the gate to open from either side, see our page on the best gate latch to open from both sides. For a gate that has to hold up to pets pushing on it, our best gate latch for dogs comparison covers that use.
Put your numbers to work
Compare your notes with each listing. Rule out any latch that does not match your swing direction, any that are much longer or shorter than your old one, and any whose stated gap range is smaller than yours. If your gate is large or sees heavy use, also look at our best heavy duty gate latch page.
When the new latch arrives, hold it against the old holes before you drive any screws. Mark any new holes with a pencil and drill pilot holes if the material calls for them. Wear safety glasses while you drill, and keep your fingers clear of the strike while you test the gate.
Frequently asked questions
Should I measure the old latch or the gate?
Do both. The old latch gives you length and hole spacing. The gate and post give you the gap, thickness and mounting height, which decide whether a different model will fit.
What if my old latch is missing or broken?
Measure the old screw holes and the marks it left on the wood or metal. Then measure the gap and the thickness of the gate frame and post. Those numbers are enough to shop with.
Can I use a latch with different hole spacing?
Yes, but you will need new holes. Fill the old ones with wood filler or a plug if they are in the way, and use pilot holes so the material does not split.
Do I need to know the screw size?
It helps. If the listing gives no screw details, bring the old screws or write down their length and diameter so you can match them.