How to Make a First Aid Kit for Home, Step by Step
To make a first aid kit for home, pick a sturdy, clearly organized container, then fill it with wound care supplies, basic tools, any medications your household uses and an emergency contact list. Store it where adults can reach it fast, and check it twice a year to replace anything used or expired. A good kit takes about an hour to put together.
 1st Aid first aid kitBest overall
 Vriexsd Compact tourniquet kit
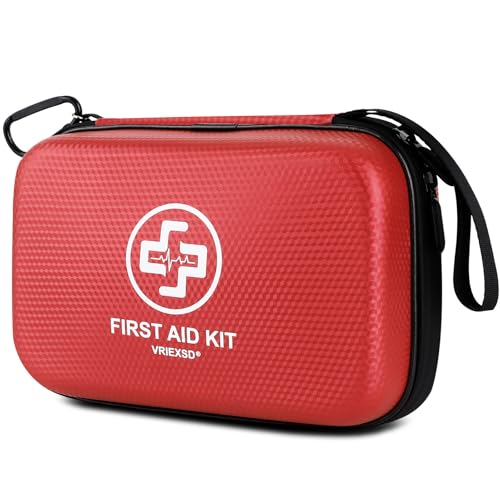 Vriexsd Hard shell, 320 pieces
Step 1: Choose the right container
Start with the box or bag, because it decides how much you can store and how fast you can find things. A good container is easy to carry, closes securely and is clearly marked as a first aid kit so any adult in the house can spot it.
Think about where it will live before you buy anything. A drawer needs something low and flat. A garage or kitchen wall suits a case you can mount. If you plan to carry it between rooms or to the car, a handle or strap helps.
| Container | Best for | Watch out for |
|---|---|---|
| Hard shell case | Drawers, shelves and the car | Fixed shape, so bulky items may not fit |
| Soft bag with compartments | Closets and tight spaces | Contents can shift if loosely packed |
| Wall-mountable plastic case | Garage, kitchen or utility room | Needs a spot out of children's reach |
| Plastic tote or tool-style box | Large households with many supplies | Easy to dump everything in without sorting |
Step 2: Stock the wound care basics
Most home injuries are small: scrapes, cuts, blisters and minor burns. Build the core of your kit around those, and buy more than you think you need of the items you use most, such as bandages.
Here is a solid starting list for the supplies and tools:
- Adhesive bandages in assorted sizes
- Sterile gauze pads and a roll of gauze
- Adhesive cloth tape
- Absorbent compress dressings for larger cuts
- Antiseptic wipes and antibiotic ointment
- Burn dressings or burn gel
- Triangular bandages for slings and wrapping
- Elastic bandage for sprains
- Disposable gloves (nitrile if anyone has a latex allergy)
- Tweezers, blunt-tip scissors and safety pins
- A non-glass digital thermometer
- An instant cold pack
- An emergency blanket
Step 3: Add medications and personal items
Medications make a kit far more useful for everyday problems, but they need extra care. Pick only what your household actually uses, and read each label for age limits and dosage. Common choices include a pain reliever, an antihistamine for allergic reactions and hydrocortisone cream for itchy skin.
Add personal items too. If someone in your home has asthma, diabetes or a serious allergy, keep a backup of their prescribed supplies and note where the main supply lives. Write down their doctor's name, allergies and current medications on a card.
Safety note: Keep all medications out of reach of young children, and never give adult doses to kids. Do not share prescription drugs between people. If you are unsure what is safe, ask a pharmacist or doctor.
Step 4: Tailor the kit to your household
A kit for one adult looks different from a kit for a family with toddlers or an elderly parent. Piece count is a rough guide to how much you get. On our best first aid kit for home page, counts run from 150 to 520 pieces, and larger households will want the higher end. A bigger number is not automatically better, so look at what the pieces actually are.
Consider adding items for your own situation:
Families with small children may want a child-safe thermometer, extra bandages and a few comfort items. Households with older adults may want extra gauze, medical tape for fragile skin and a list of current medications. Anyone who does a lot of DIY or cooking may want extra burn dressings and eye wash.
- Households with children: smaller bandages, a thermometer that is easy to read
- Older adults: extra gauze and skin-friendly tape
- Allergies: backup medication and a written action plan
- Workshop or kitchen: burn care, eye wash and extra dressings
Step 5: Think about a tourniquet and training
Some premade kits include a tourniquet, and you can add one to a homemade kit. For example, the Vriexsd Mini kit lists 150 pieces and a tourniquet in a 0.73 lb hard shell. If you want one, see our best first aid kit with tourniquet comparison for options with that item listed.
A tourniquet is for severe, life-threatening bleeding from an arm or leg that direct pressure cannot control. It is not for everyday cuts.
Safety note: Using a tourniquet incorrectly can cause serious harm. Take a hands-on first aid or bleeding control class before you rely on one, and always call your local emergency number for severe bleeding.
Step 6: Organize, label and store it
Organization matters most when you are stressed. Group like items together in zip bags or small pouches and label each one, such as Cuts, Burns, Medications and Tools. Compartments, labeled sleeves and clear lids all help you find a bandage in seconds.
Storage is just as important. Keep the kit somewhere central and known to every adult and older child, such as a hallway closet or kitchen cabinet. Keep it away from heat and moisture, since a hot car or damp bathroom can damage supplies. If you use a wall case, mount it high enough to keep it away from small children.
Tape a card to the inside lid with emergency numbers, poison control, your address and a short list of what each family member is allergic to. Include a printed first aid guide in case you cannot search for instructions.
Check and refresh your kit
A kit only helps if it is complete. Set a reminder to check it twice a year, for example when the clocks change. Look for expired medications, dried-out ointments, torn packaging and anything you have used up.
Restock right after you use something, not at the next check. Replace thermometer batteries and test that cold packs and scissors still work. If you want a ready-made option to compare against your homemade list, our home first aid kit comparison shows piece counts, sizes and included items side by side. Building your own and filling gaps with a premade kit can work well too.
If you plan to take supplies outdoors, a separate smaller kit is easier to carry. See best first aid kit for hiking for that use.
Frequently asked questions
How long does it take to build a first aid kit?
Most people can gather supplies and pack a kit in about an hour. Expect extra time if you need to pick up items from a pharmacy first.
Is a premade kit better than a homemade one?
Neither is automatically better. A premade kit saves time and often has organized compartments, while a homemade kit lets you choose exactly what your household needs. Many people start with a premade kit and add to it.
Should I keep one kit or several?
Several small kits can be handier than one large one. A common setup is one in the kitchen or main living area, one in the car and one in a workshop or garage.
What should I do after using something from the kit?
Replace it as soon as you can and note the date. Also check that every item in the kit is still sealed and clean, since a used or damaged item may not be safe next time.
When should I skip the kit and call for help?
Call your local emergency number for severe bleeding, trouble breathing, chest pain, a possible head or neck injury, a serious burn or any situation where you are unsure. A home kit is for minor injuries and for care until help arrives.