How to Install Recessed Lighting Yourself
Yes, many homeowners can install canless LED recessed lights in an existing ceiling if they are comfortable with basic wiring. The job comes down to planning the layout, cutting clean holes, wiring each light's junction box, and pressing the fixture into place with its spring clips. Always turn off power at the breaker first, and hire a licensed electrician if you must run new circuits or find wiring you do not understand.
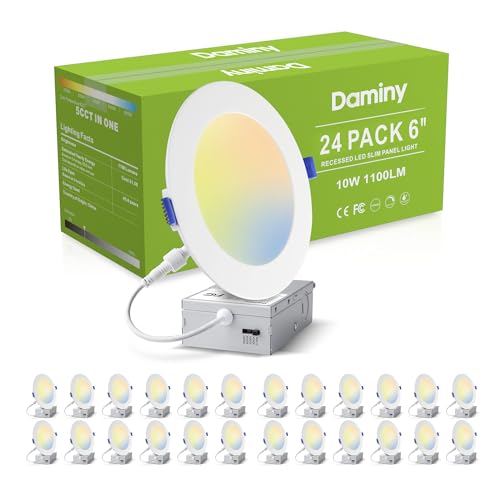 DAMINY PA-80R123Best overall
 Amico KOK-6EJCT12SR05Rated life in a 12-pack
 Ensenior 6I-5CCT-6PACKBright with a warranty
Is this a good DIY project?
For most people, yes, as long as you pick the right kind of light. Canless wafer lights are slim LED discs that connect to a small junction box. They need very little ceiling depth, so they suit retrofit work in an existing ceiling.
Some parts of the job are better left to a pro. If your ceiling has no nearby power source, if the existing wiring is old or damaged, or if your local code requires a permit and inspection, bring in a licensed electrician. Check your local rules before you start.
Choose the right lights first
The fixture you buy shapes the whole job, so decide before you cut anything. Our best recessed lighting page puts the main specs side by side, including brightness, color temperature, and ratings.
Look at these points before you buy. Each one affects how the install goes and how the room feels afterward.
- Install type: canless wafer lights use a junction box and spring clips, so they need little ceiling depth.
- IC rating: choose an IC-rated light if it will touch ceiling insulation.
- Location rating: damp-rated lights suit bathrooms and covered soffits. Wet-rated lights are for spots with more exposure, such as showers.
- Color temperature: many models let you pick from 2700 K to 5000 K with a switch on the junction box.
- Lumens: bigger rooms and kitchens need more output or more fixtures than bedrooms and hallways.
Tools and materials
Most of what you need is common. Check the box for a hole template, since many wafer lights include a 1:1 paper template that shows the exact cutout.
Gather everything before you begin so you are not climbing up and down a ladder.
- Stud finder and pencil
- Drywall saw or hole saw sized to the template
- Non-contact voltage tester
- Wire strippers and screwdrivers
- Fish tape or a flexible rod for running cable
- Wire connectors and cable that meets local code
- Safety glasses, a dust mask, and a stable ladder
Plan the layout
Start by deciding how many lights you need and where they go. Count fixtures based on the lumens per light and how bright the room should be. Our best recessed lighting page lists lights from 800 lm to 1200 lm each, so a brighter fixture lets you use fewer of them.
Mark the spots on the ceiling with a pencil. Keep rows even, and keep lights a reasonable distance from walls so the light spreads well.
Then use a stud finder to locate joists and see which way they run. Each hole must sit between joists. Shift a mark a little if it lands on one. Check above the ceiling too, if you can reach an attic, for pipes, ducts, or cables in the way.
Install the lights step by step
Safety comes first. Turn off the circuit at the breaker, then confirm the power is dead with a voltage tester at the switch and at the existing fixture. Wear eye protection when cutting, because dust and debris fall straight down.
Use a ladder that is the right height and set it on level ground. Do not stretch to reach, and have someone nearby when you work overhead.
- Trace the template at each marked spot and cut the hole with a drywall saw or hole saw.
- Run cable from the power source to the first hole, then from hole to hole. Leave several inches of slack at each opening.
- Pull the cable through the opening and connect it to the junction box following the maker's instructions. Match black to black, white to white, and connect the ground.
- Tuck the junction box and wires neatly into the ceiling cavity. Keep insulation clear of the box unless the light is IC rated.
- Set the color temperature switch on the side of the junction box before you close it up.
- Squeeze the spring clips, push the light into the hole, and release so the clips hold it against the ceiling.
- Restore power, test each light, and check dimming if you use a dimmer.
Wiring and switch tips
Most homes wire the lights in a chain, with power running from one fixture to the next. Plan the order so cable runs are short and tidy.
If you want dimming, pair the lights with a compatible dimmer. Many lights on our best recessed lighting page list a 5% minimum dimming level, but check the fixture and dimmer instructions together. Using a mismatched dimmer can cause flicker or buzzing.
If you are replacing a switch or adding a new one, the same safety rules apply. Never work on a live circuit.
Compare common ceiling situations
Your ceiling type changes how you approach the job. Use this table as a quick guide.
When in doubt, follow the instructions that come with your fixture and your local code.
| Situation | What to check | Good fit |
|---|---|---|
| Ceiling with insulation above | Use an IC-rated light | Canless wafer, IC rated |
| Bathroom or covered soffit | Look for a damp or wet rating | Damp-rated or wet-rated wafer |
| Shallow ceiling cavity | Check the depth the junction box needs | Canless wafer with junction box |
| Kitchen or workspace | Choose higher lumens or add more lights | 1050 to 1200 lm lights |
Frequently asked questions
Can I install recessed lights without attic access?
Yes, in many cases. You can fish cable through the ceiling with a fish tape and cut holes from below. It takes more patience, and you should check for obstructions first.
Do I need a permit?
It depends on where you live. Many areas require a permit for new electrical circuits or added fixtures, so call your local building department before you start.
Why are my new lights flickering?
The most common cause is a dimmer that does not match the LED lights. Check that the dimmer is rated for LED loads and follows the fixture's instructions.
How far apart should I space the lights?
A common starting point is to space lights evenly across the room and keep them away from walls. Adjust based on ceiling height, the brightness of each light, and how you use the room.
Can I change the color after the light is installed?
Yes, if the model has a selectable color switch. Many lights on our best recessed lighting page offer settings from 2700 K to 5000 K, but fixed-color models cannot be changed.