How to Install Heat Tape Under a Mobile Home
To install heat tape under a mobile home, shut off power, inspect the pipes for leaks, run a self-regulating cable along each exposed pipe, tape it down about every foot, wrap the run in pipe insulation, and plug it into a GFCI outlet. Match the cable length to the pipe run and follow the maker's instructions for overlap and spiral wrapping. Roof cable is a different product, so see the note near the end.
 Radiant Solutions Company HTP-1-37Best overall
 JDZKOMKE 100FTBest long run
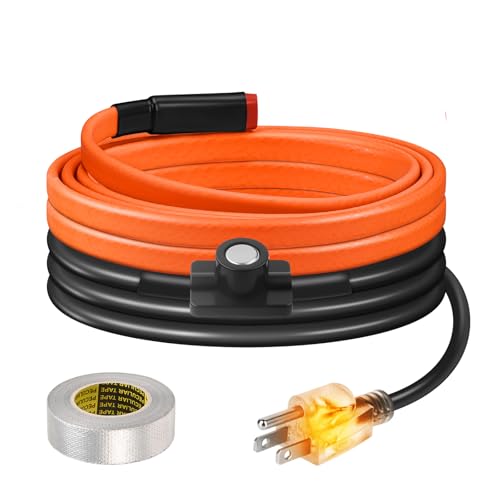 BDDFOTO OR-ParentBest for short pipes
Before You Start: Plan the Job
Mobile home plumbing is more exposed than plumbing in a house with a basement. Pipes often run through the belly of the home or along the underside, and the supply line usually rises from the ground at the water inlet. These spots lose heat fast when skirting is missing or damaged, so start there.
Walk the space with a flashlight and sketch each pipe you want to protect. Note the pipe material (copper, PVC, PEX or another type), the pipe length, the number of fittings and valves, and where the nearest outlet is. Check that the cable you choose lists your pipe material. Many cables on our best heat tape for water pipes page list metal and plastic pipes, but the listing for your cable should say so.
Choose the Right Cable and Length
For water pipes, self-regulating cable is the safer choice. Its output rises as the pipe gets colder and drops as it warms, and many self-regulating cables can safely touch or cross themselves. Always confirm overlap rules with the maker, because some cables cannot overlap at all.
Look for a UL or ETL listing on the whole cable, not just the plug. A built-in thermostat helps too, since it lets the cable run only when needed. Measure the pipe run, then add extra length for valves, spigots and any spiral wrapping. Buying a cable that is too short leaves a cold spot, and splicing cables yourself is not safe unless the maker provides a kit for it.
| Example cable | Length | Output | Good to know |
|---|---|---|---|
| Radiant Solutions HeatTapePro | 37 ft | 6 W/ft | Self-regulating, UL listed, safe to overlap |
| JDZKOMKE Pipe Heat Cable | 100 ft | 5 W/ft | UL listed, IP67, rated to -40°F |
| HEATIT Self-Regulating Heat Cable | 40 ft | 3 W/ft | ETL certified, built-in thermostat, rated to -40°F |
| BDDFOTO Pipe Heat Tape | 3 ft | 8 W/ft | Built-in thermostat, no certification stated |
Safety First
You are working with electricity in a damp, cramped space, so take these points seriously.
- Unplug and de-energize anything you are working near. Never work on a cable that is plugged in.
- Plug the cable into a GFCI-protected outlet. If you do not have one, have an electrician add one.
- Wear safety glasses, gloves and long sleeves. Metal skirting, belly wrap and pipe edges can be sharp, and insulation fibers irritate eyes and skin.
- Do not install heat tape over a leaking pipe. Fix the leak first and let everything dry.
- Do not put heat cable on gas or fuel lines. At least one cable on our page warns against fuel lines because the cable can overheat without water in the pipe.
- Keep plug connections off the ground and out of standing water or snow melt.
- Inspect the cable for cuts, crushed spots and damaged jackets before you begin. Replace it if it looks worn.
Step-by-Step Installation
Here is the basic process. Specific details vary by cable, so keep the instructions that came with yours nearby.
- Prep the pipe. Clean off dirt and moisture. Fix any leaks and repair damaged pipe.
- Lay out the cable. Unroll it fully and keep it from kinking. Start from the outlet end and work toward the far end.
- Place the cable. Run it in a straight line along the bottom or side of the pipe, where it touches the pipe along its full length. Avoid the top, where hot air rises away from the pipe.
- Secure it. Tape the cable to the pipe about every 12 inches using the tape the maker recommends. Standard duct tape tends to fail in cold, damp air.
- Handle valves and fittings. Valves, elbows and spigots lose heat faster. Add a loop or an extra wrap of cable there if the instructions allow it.
- Set the thermostat sensor. If your cable has one, tape the sensor against the pipe and keep it away from the cable itself, so it reads pipe temperature.
- Insulate. Cover the cable and pipe with foam pipe insulation and seal the seams with tape.
- Plug in and check. Plug into the GFCI outlet, press the test button on the outlet, and confirm the cable's indicator light or other check works as described by the maker.
Straight Run or Spiral Wrap
There are two common ways to apply cable. A straight (parallel) run is the simplest. A spiral wrap puts more cable on each foot of pipe, which means more heat where you need it, such as on larger pipes or exposed sections.
Spiral wrapping uses more cable per foot of pipe, so plan your length before you buy. Wrap the cable loosely and evenly, and do not cross it over itself unless the maker says that is safe.
| Method | Best for | Watch out for |
|---|---|---|
| Straight run | Short, protected pipes in a well-skirted space | May not give enough heat on exposed pipes or large valves |
| Spiral wrap | Exposed pipes, valves and fittings | Uses more cable, so measure carefully and avoid crossing it unless allowed |
Insulate and Seal Up the Space
Heat tape works best when the warmth stays near the pipe. Foam sleeves are easy to cut to length and slip over the pipe. Seal every seam and cover fittings and valves too. Do not squeeze insulation so tightly that it presses on the plug end or the thermostat sensor.
Heat tape is not a substitute for a closed-up underside. Repair torn belly wrap, patch holes in skirting and close vents in freezing weather if your home's instructions allow it. If your skirting needs a refresh while you are at it, our guide to the best paint for mobile home exterior covers coatings that suit the outside of the home.
Check the setup at the start of each cold season. Look at the cable ends, plugs and tape, and replace anything that looks damaged.
What About Heat Tape on a Roof?
Some readers ask how to install heat tape on a roof. Roof cable is meant to melt channels through snow and ice in gutters and along eaves. It is not the same as pipe cable, and the pipe tips above do not apply directly.
Use a cable that is rated for roof use. One listing in our data, the Radiant Solutions HeatTapePro, says it is certified for several roof types and recommends roof clips. Another listing warns against using its pipe cable in gutters, so always match the product to the job.
Working on a roof means a fall risk. Use a stable ladder, stay off wet or icy surfaces, and think about hiring a pro if the roof is steep or high. Mobile home roofs can be thin, so follow the home maker's guidance before attaching anything.
Frequently asked questions
Can I leave heat tape plugged in all winter?
Self-regulating cable with a thermostat is designed to run only when it is cold. Even so, check it at the start of the season and after storms.
Do I need to insulate over heat tape?
Yes. Insulation holds the heat in and protects the cable from moisture and cold air. Use pipe insulation sized to fit over both the pipe and cable.
Can I cut heat tape to fit?
Only if the maker says it is cuttable and gives instructions for sealing the end. Many cables come in fixed lengths and should not be cut, so buy the length you need.
Should I put heat tape inside the pipe's insulation or outside?
Put the cable directly on the pipe, under the insulation. Cable on the outside of the insulation heats the air, not the pipe.