How to Install Heat Tape on Water Pipes
To install heat tape, make sure the pipe is dry and leak-free, lay the cable along the pipe (straight or in a spiral), secure it with electrical tape, cover it with pipe insulation, and plug it into a GFCI outlet. Use a cable that matches your pipe run and follow the maker's rules on overlapping. Self-regulating cable is the safer choice for water pipes.
 Radiant Solutions Company HTP-1-37Best overall
 JDZKOMKE 100FTBest long run
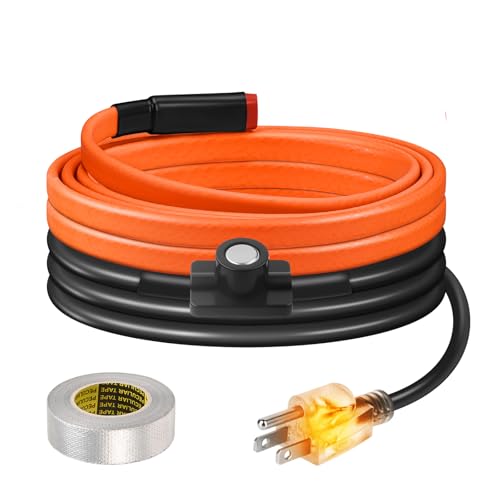 BDDFOTO OR-ParentBest for short pipes
Before you start: pick the right cable
Heat tape, also called heat cable, keeps a water pipe above freezing on the coldest nights. Before you install anything, check that the cable suits your pipe and your setup.
Self-regulating cable is the safer choice for water pipes. Its output rises as the pipe gets colder and drops as it warms, and many self-regulating cables can safely touch or cross themselves. Not every cable allows this, so check the maker's rules before you overlap any part of it. Our best heat tape for water pipes page compares cables side by side if you are still choosing.
- Look for a UL or ETL listing on the whole cable, not just the plug.
- Match the length to your pipe run. Lengths in our comparison run from 3 to 250 ft.
- Choose a built-in thermostat so the cable only runs when needed.
- For exposed pipes, pick an outdoor-rated jacket that resists UV and moisture.
- Confirm the cable is made for your pipe material, such as copper, PVC, PEX or stainless steel.
What you need
Gather your supplies before you head out in the cold. Having everything on hand makes the job quick.
You will need the heat cable, pipe insulation sized to your pipe, PVC electrical tape or the fasteners the maker recommends, a tape measure, and scissors or a utility knife for the insulation. You also need a GFCI-protected outlet within reach of the cable's power cord. Cord lengths in our data are short, for example 3 ft on some cables and 10 ft on others, so plan the outlet location first rather than using a long extension cord.
Step by step: installing the cable
Work on a dry, mild day if you can, and keep the cable unplugged until the very end.
- Check the pipe. Look for drips, cracks or loose fittings. Fix leaks first, and do not install heat tape over a leaking pipe.
- Measure the pipe run, then compare it to the cable length. Never cut a cable unless the maker says it can be cut to length.
- Clean and dry the pipe so the tape sticks and the cable sits flat against it.
- Lay the cable along the pipe. For a straight run, place it on the lower half of the pipe where it stays in contact with the metal or plastic.
- Secure the cable with PVC electrical tape about every foot or two, so it stays pressed against the pipe. Do not use tape that the cable maker advises against.
- Wrap valves, fittings and other hard-to-heat spots with extra attention, since these freeze first.
- Cover the whole run with pipe insulation and seal the seams with tape.
- Plug the cable into a GFCI outlet and confirm it works as the instructions describe.
Straight run or spiral wrap?
Most cables can be run straight along the pipe or wrapped in a spiral. A straight run uses the least cable and works well in mild cold. A spiral wrap puts more heat on the pipe and suits colder climates, longer exposure or large pipes, but it needs a longer cable than the pipe itself.
Some cables are listed as safe to overlap, so a spiral that crosses itself is acceptable. Others are not, and overlapping them can cause damage or fire. When in doubt, keep the cable from touching itself.
| Layout | Best for | Cable needed |
|---|---|---|
| Straight run | Mild cold, short pipes | About the same as the pipe length |
| Spiral wrap | Hard freezes, valves, large pipes | More than the pipe length |
| Doubled back | Tight spots, fittings | Extra cable, check overlap rules first |
Insulation and outdoor pipes
Insulation holds the heat in, so the cable works less and the pipe stays warmer. Use foam or fiberglass pipe insulation rated for use with heat cable, and make sure it stays dry.
For outdoor or exposed pipes, check the jacket rating. In our comparison, some cables list IP65 or IP67 waterproof ratings and a UV-resistant jacket. Seal the ends of the insulation with tape or a weatherproof wrap so rain and snow do not soak in. Keep plug connections off the ground and protected from water.
Safety notes
Heat tape is an electrical product, so treat it with care.
Plug the cable into a GFCI outlet, and never run it through a damaged cord or a worn extension cord. Do not use heat cable meant for water pipes on fuel lines or gutters without water, since there is no water to carry the heat away. Inspect the cable each season for cuts, cracks or scorched spots, and replace any damaged cable.
If you work on a ladder or in a crawl space, take your time. Wear safety glasses when cutting insulation, and use gloves for sharp edges or cold surfaces. If you are unsure about the wiring or outlet, ask a licensed electrician.
Frequently asked questions
Can I use heat tape on plastic pipes?
Yes, many cables work on PVC and PEX as well as metal, but check the label first. Some cables have limits for certain plastics, so follow the maker's guidance.
Should I leave heat tape plugged in all winter?
With a built-in thermostat, it turns on and off by itself, so you can leave it plugged in. Without one, plug it in only when freezing weather is expected.
Can I cut heat tape to length?
Only if the maker says so. Many cables come as fixed lengths, so buy one that fits your pipe run.
Do I need to insulate over the cable?
Yes. Insulation keeps the heat on the pipe and makes the cable more efficient, so it is worth adding.